Amazon S3
Airbridge supports integration with Amazon S3. With the integration, the event data collected by the Airbridge SDK and tracking links are passed to Amazon S3 daily in raw data format, enabling you to utilize the Airbridge data to meet your needs.
Attention
When you disable and then re-enable integration with cloud storage, the integration version is updated to the latest version. As the exported columns vary depending on the integration version, check whether the columns need to be adjusted before re-enabling to prevent any issues.
For more information about the columns, refer to this article.
To implement the integration with Amazon S3, you need to create a connection that is used to transmit data. The following information from Amazon S3 must be submitted to Airbridge to create a connection:
Bucket name
Region
IAM role ARN
Note that the bucket name and region can be found in the AWS Amazon S3 console. The IAM role ARN can be found in the AWS IAM console.
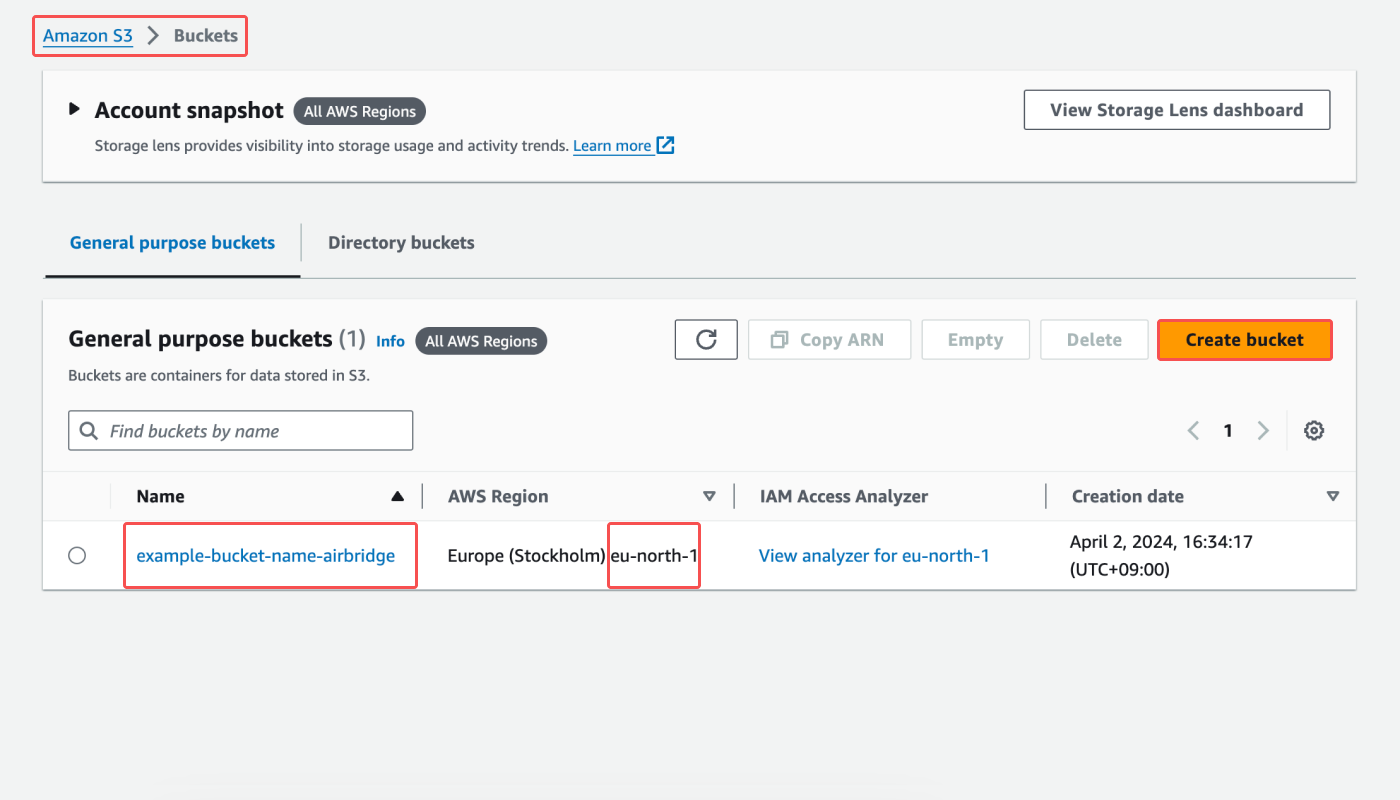
Follow the steps below to get the bucket name and region in the Amazon S3 Console.
1. Sign in to the AWS Management Console and open the Amazon S3 console.
2. Navigate to [Buckets] to find the bucket list. Get the name and AWS Region of the bucket to receive data from Airbridge.
If you don’t have a bucket or want a new bucket, click Create bucket. For detailed instructions on creating a bucket, refer to AWS Documentation.
Follow the steps below to add an Amazon S3 bucket to Airbridge by submitting the bucket name and region.
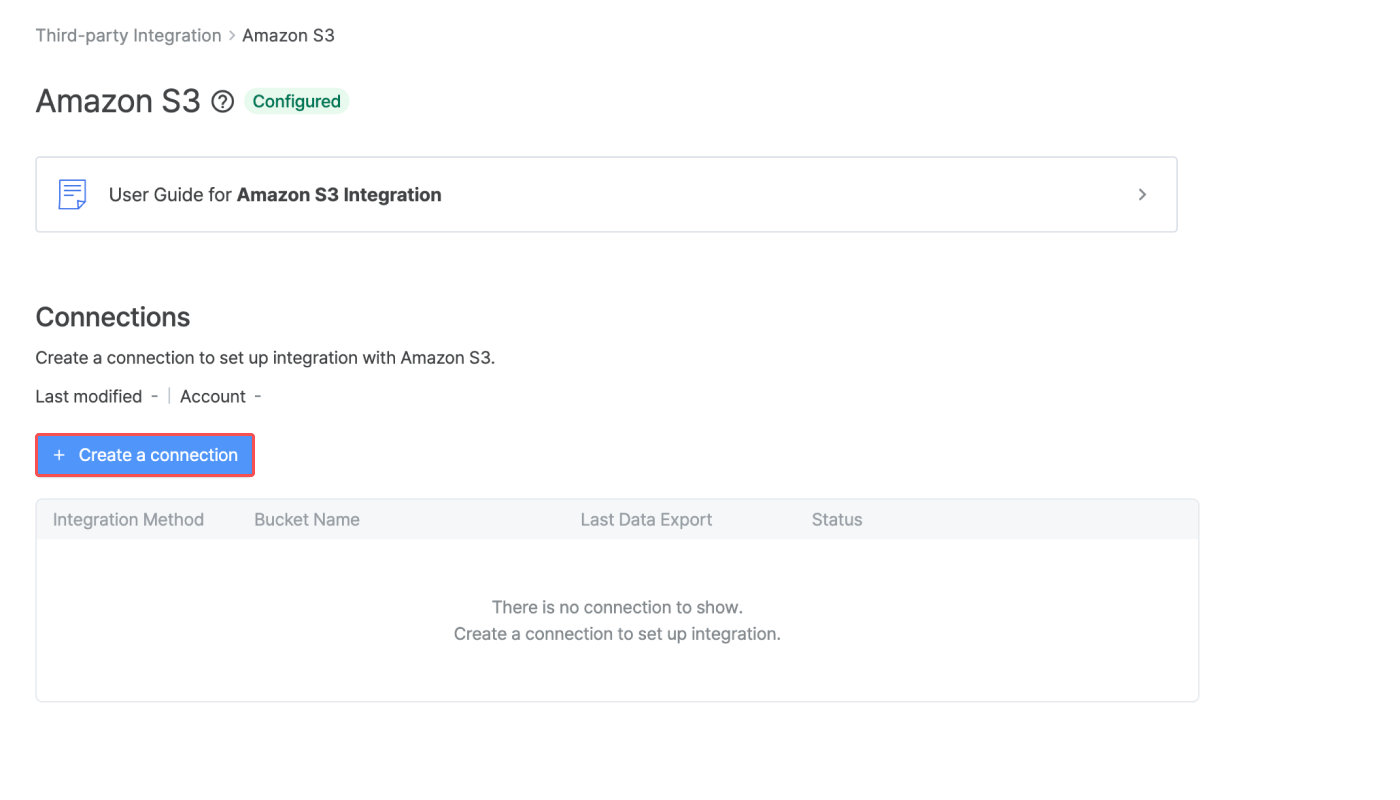
1. Navigate to [Integrations]>[Third-party Integration] in the Airbridge dashboard. Select “Amazon S3.”
2. Click + Create a connection.
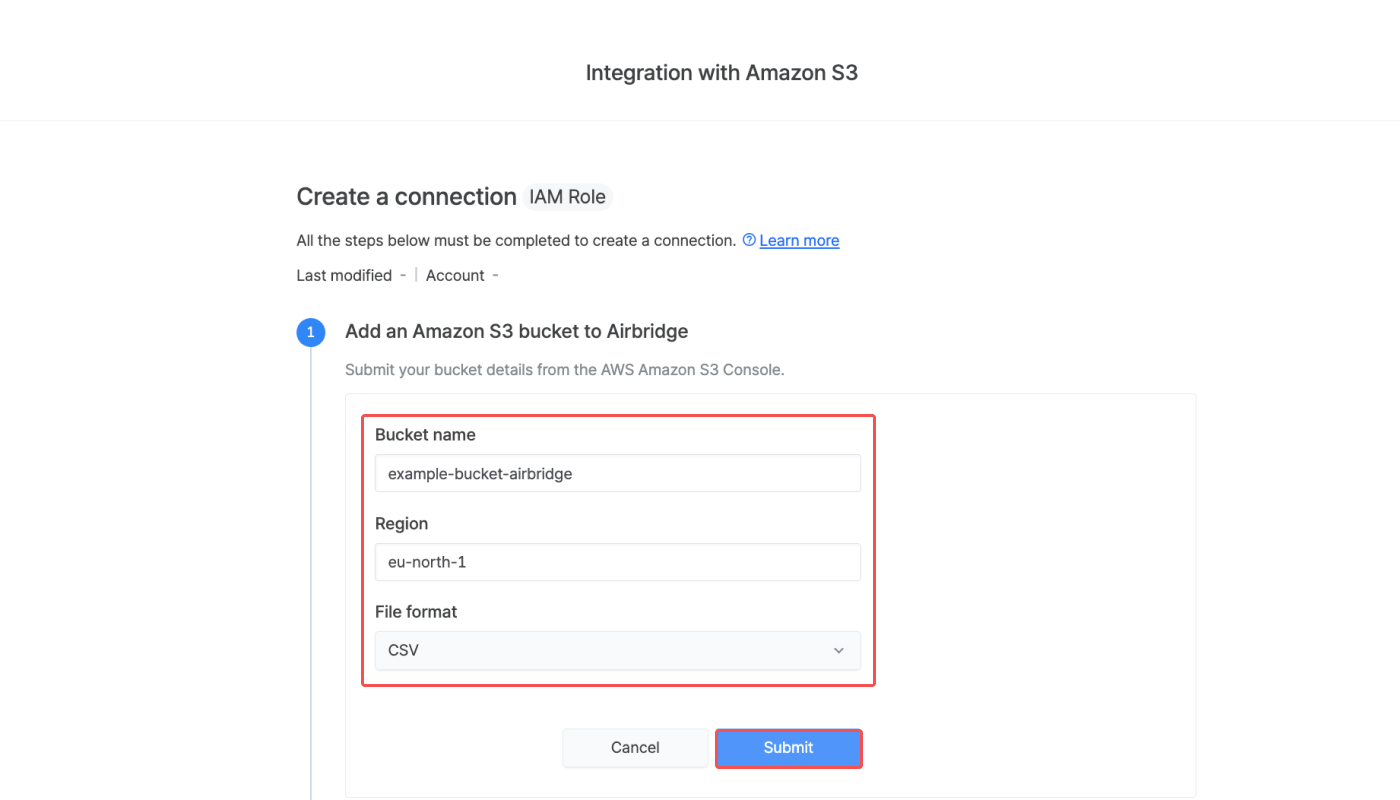
3. Enter the bucket name and region you got from the Amazon S3 console.
4. Under File Format, select between CSV and Parquet. Click Submit to save.
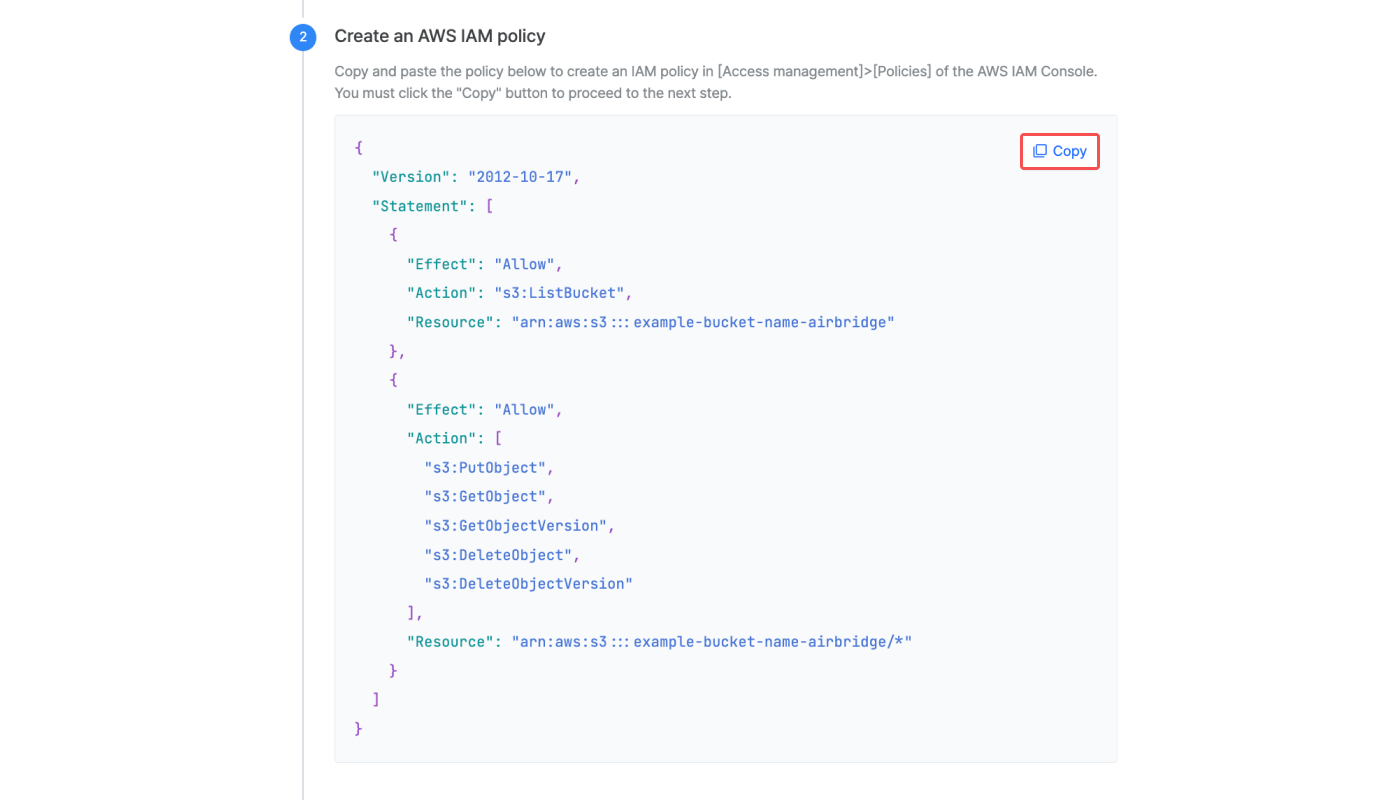
5. Once you have submitted all the information correctly, you will see the policy required to create an IAM policy.
Click Copy to copy the policy. Then, go back to the AWS Management Console.
Follow the steps below to create an IAM policy that manages access to AWS resources.
1. Sign in to the AWS Management Console and open the IAM console.
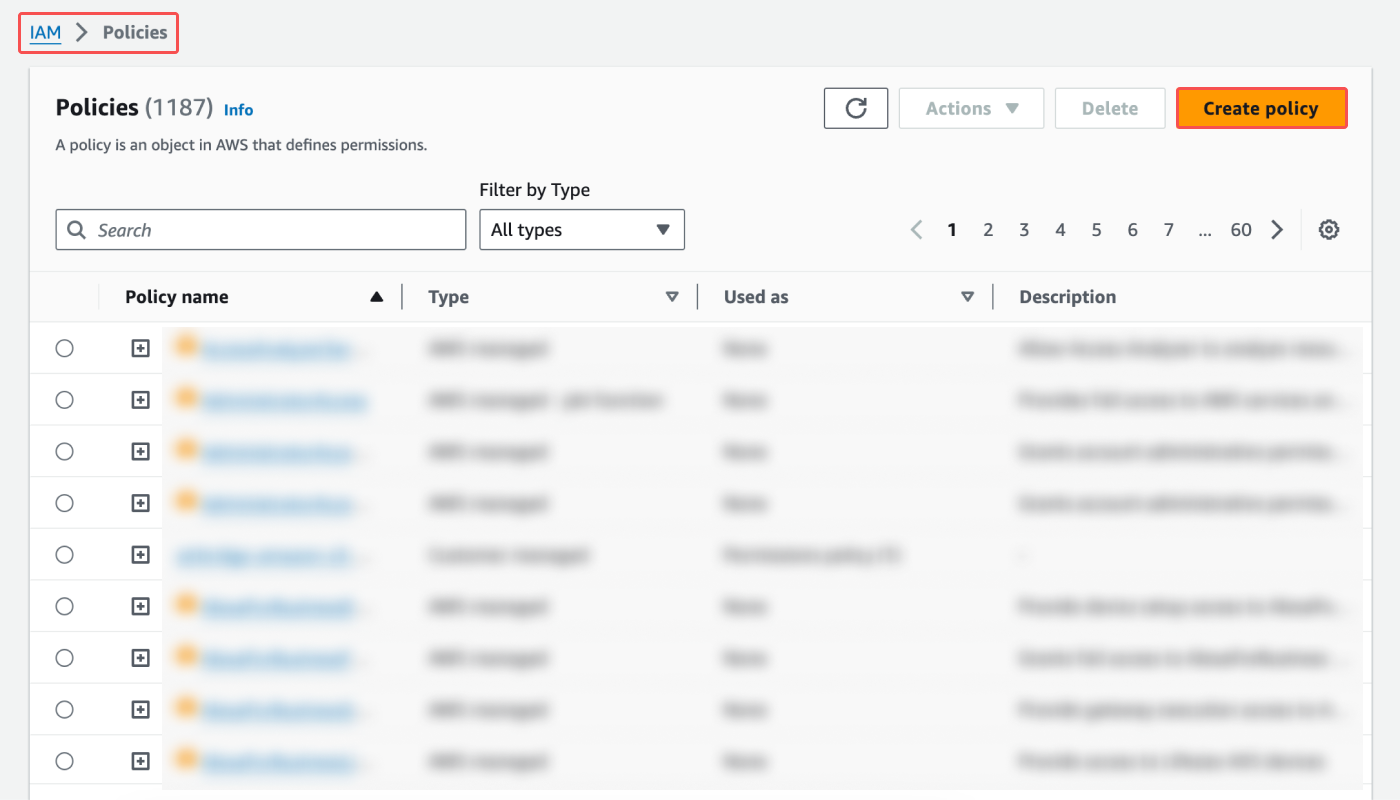
2. Navigate to [Access management]>[Policies] and click Create policy.
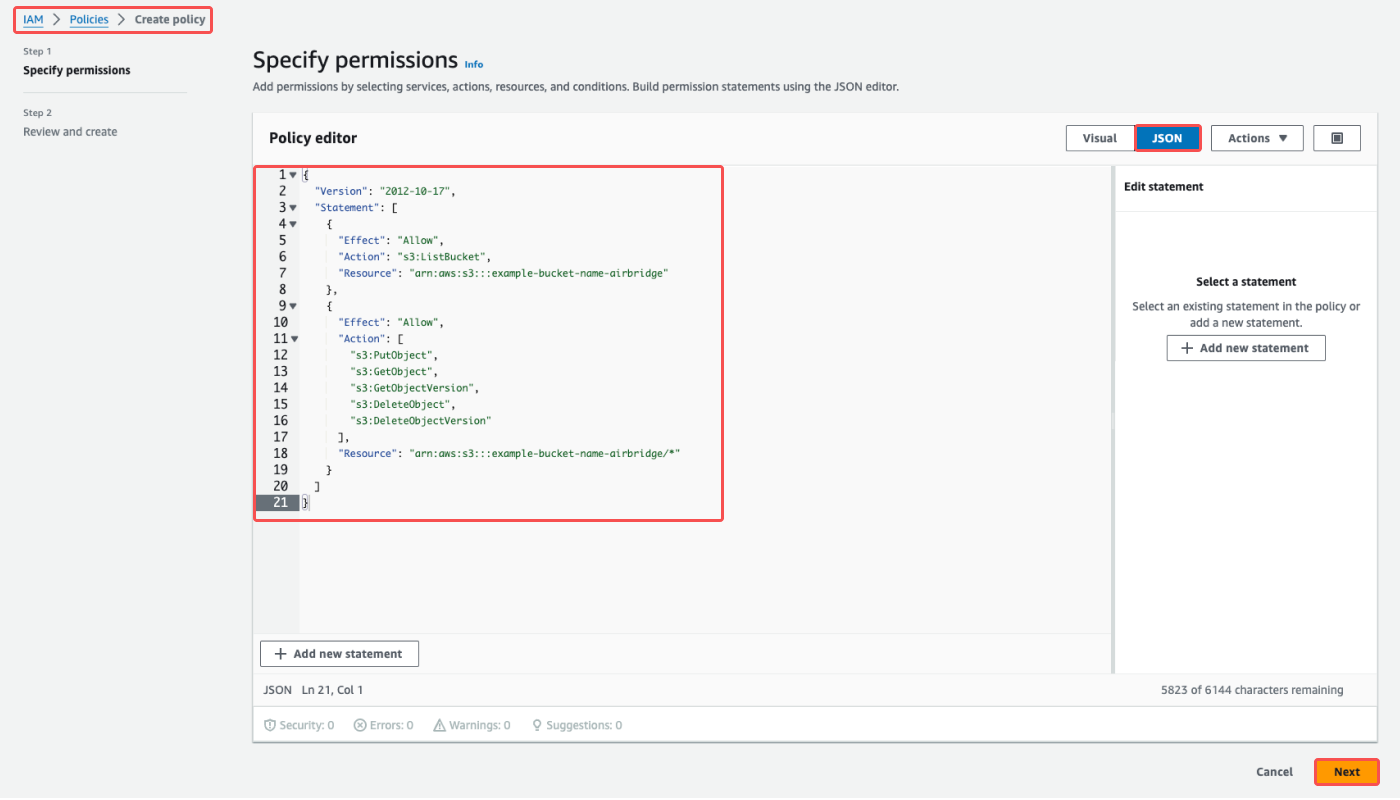
3. Select the [JSON] option. Paste the policy copied from the Airbridge dashboard and click Next.
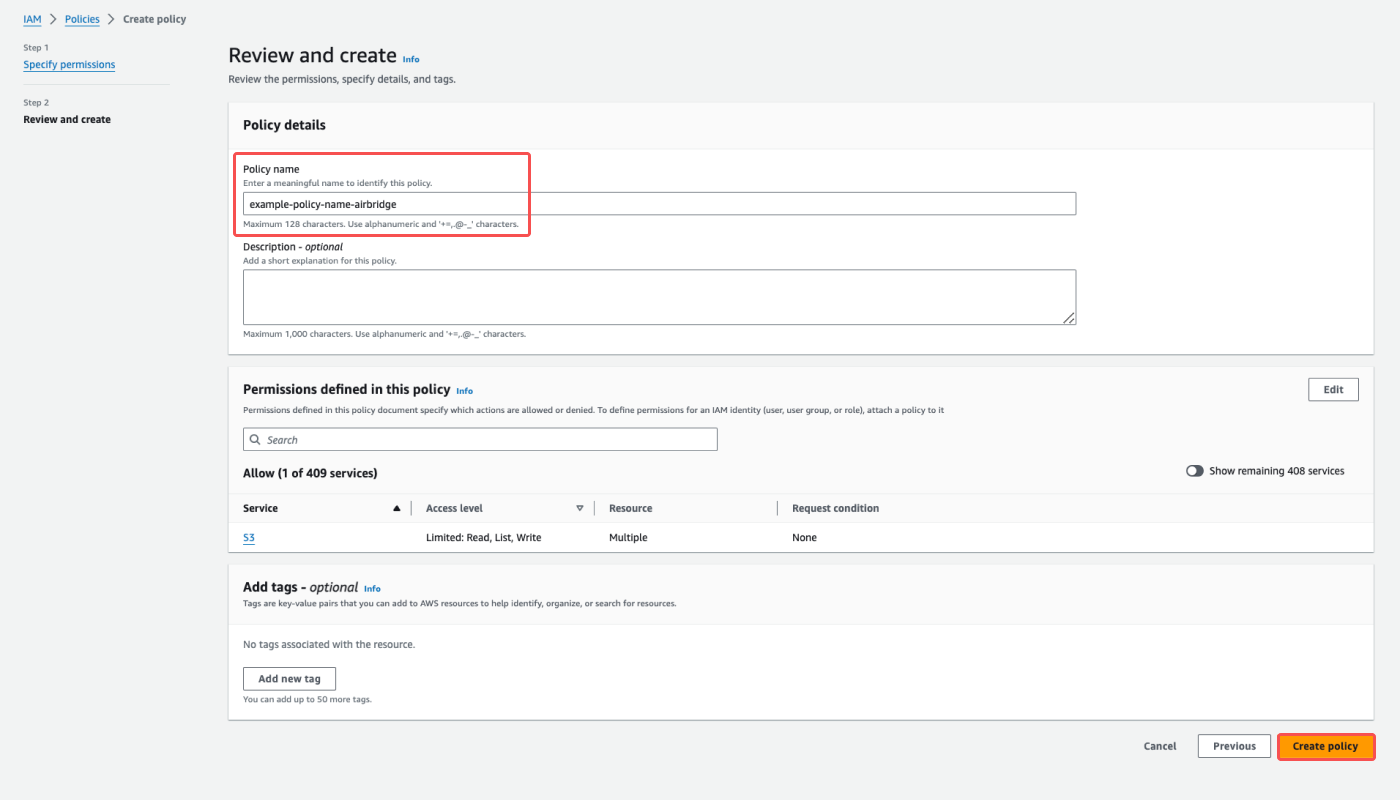
4. Under [Review and create], enter your choice of policy name. Don’t change other settings. Click Create policy to finish creating the policy.
Follow the steps below to create an IAM role with specific permissions.
1. Go back to the Airbridge dashboard and click Next step.
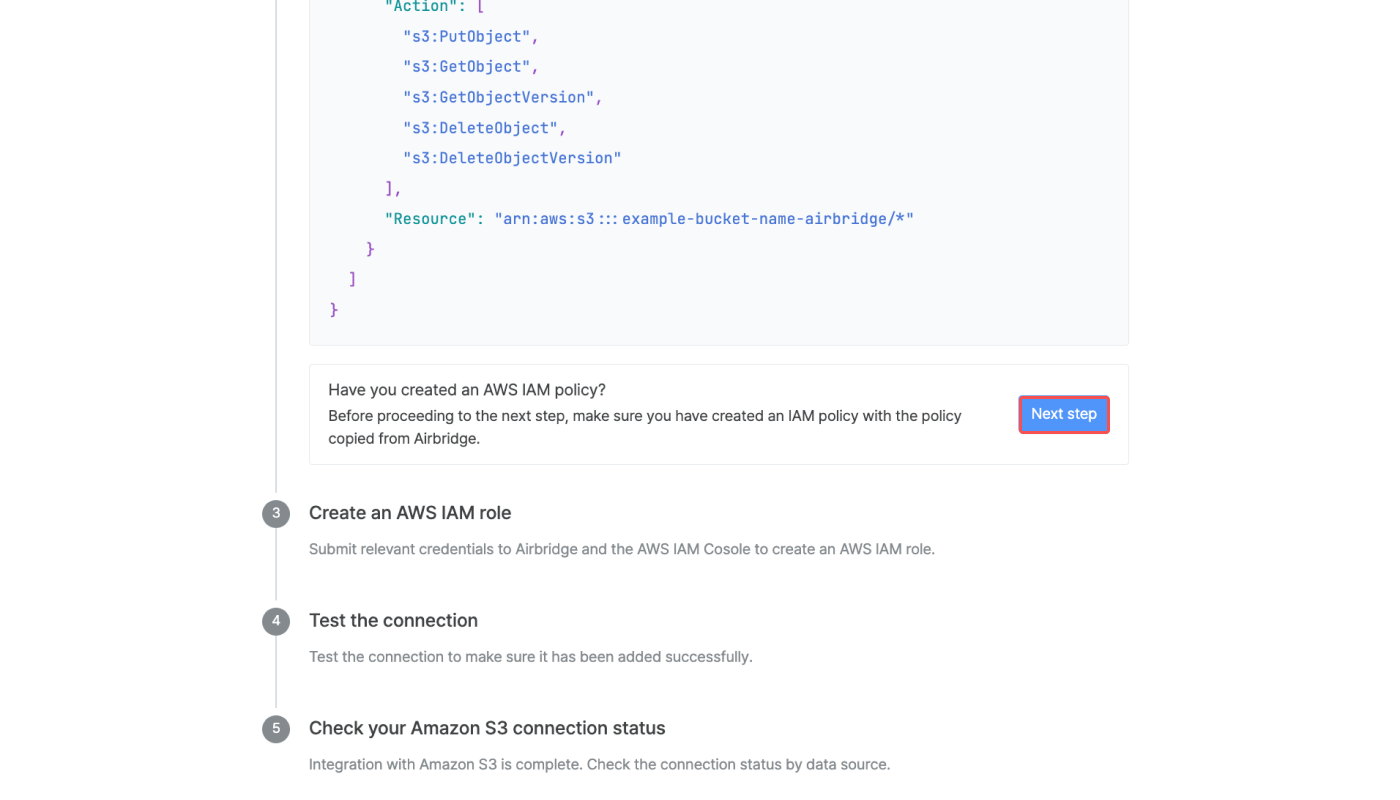
2. Copy the account ID and external ID required to create an IAM role.
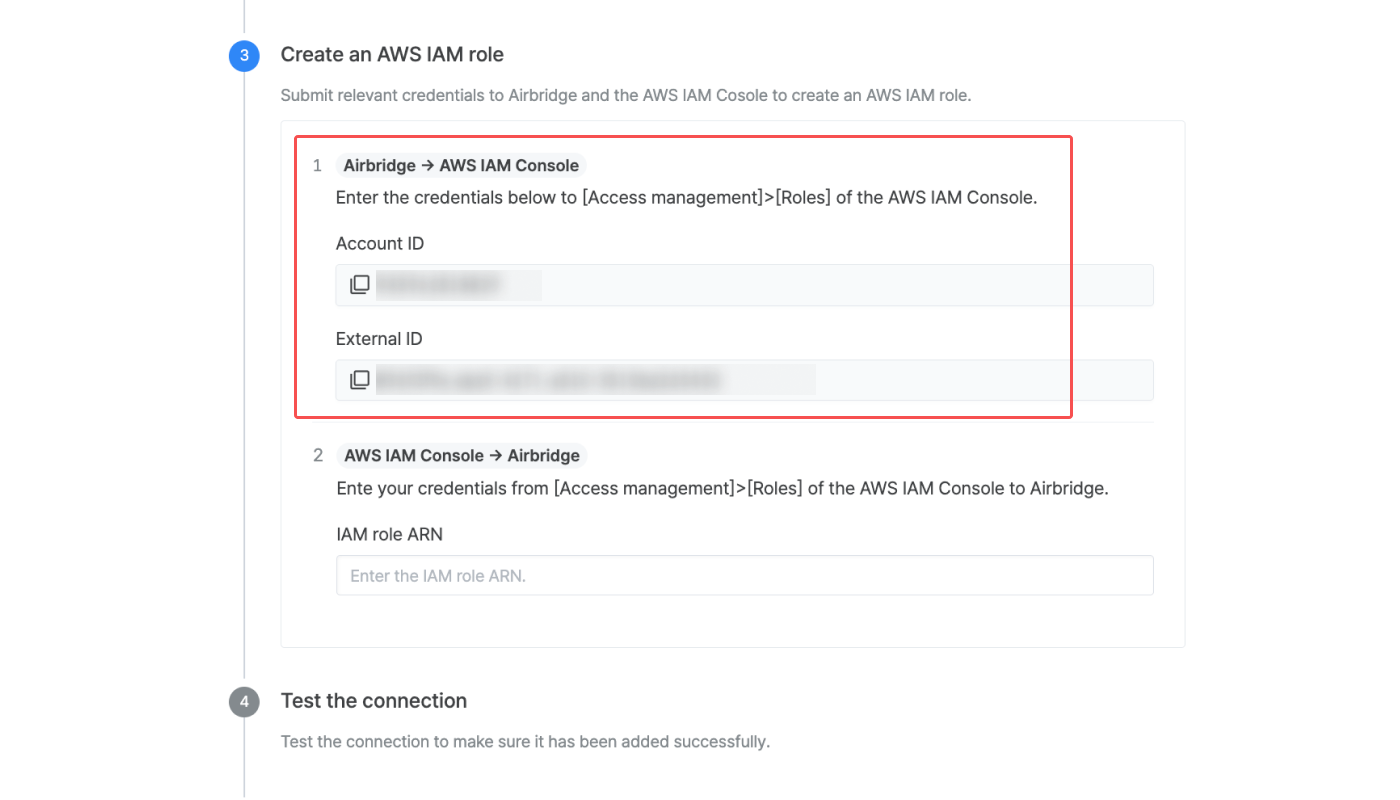
3. Go back to the IAM console. Navigate to [Access management]>[Roles] and click Create role.
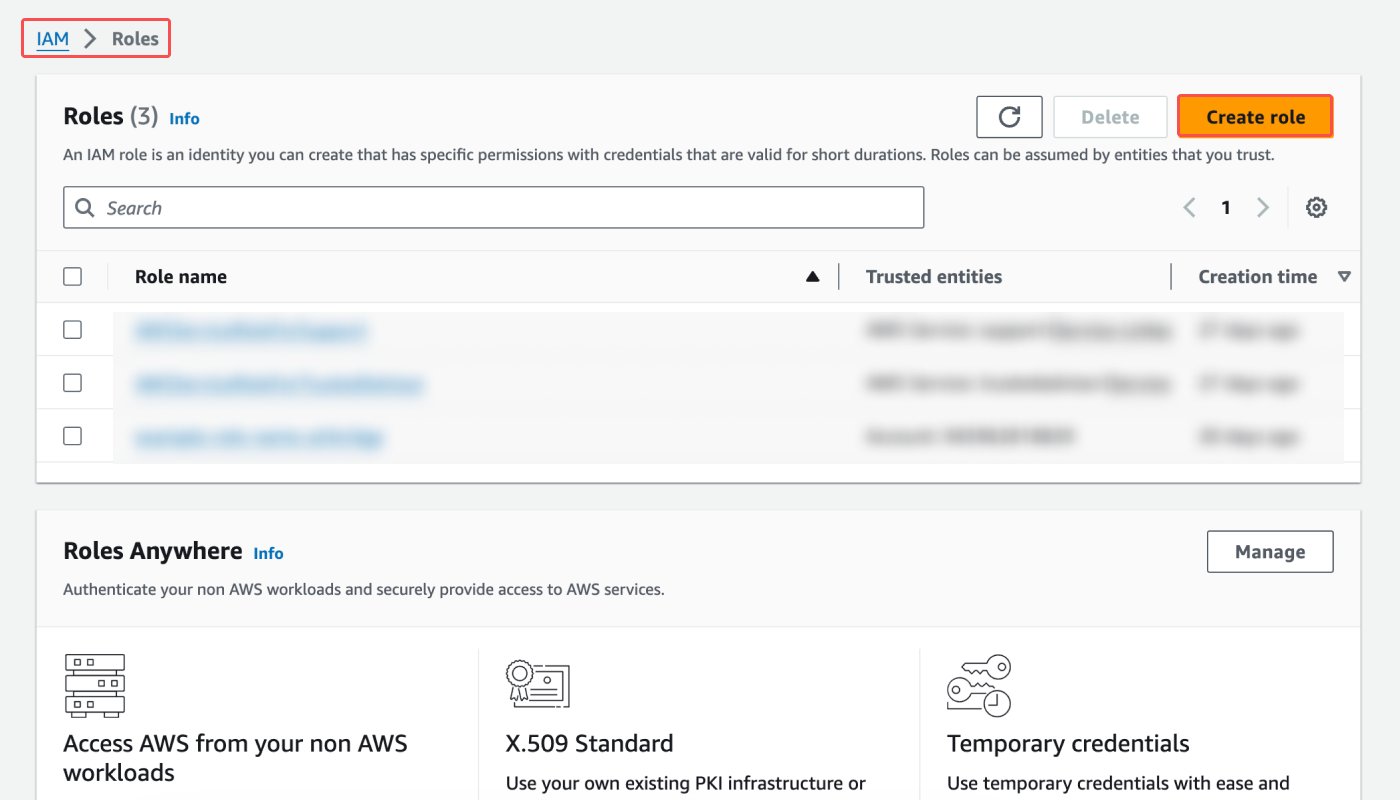
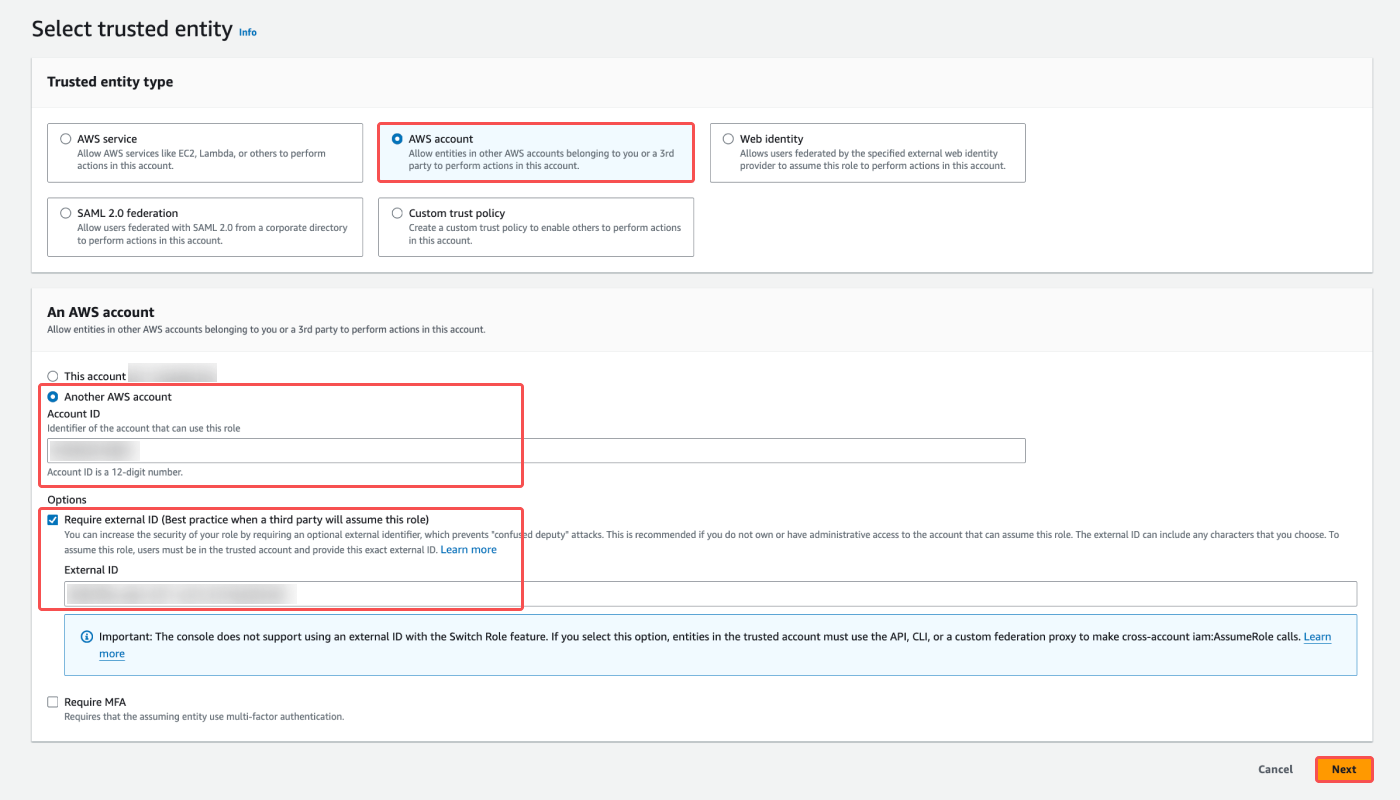
4. Under [Select trusted entity], select “AWS account.”
5. Under [An AWS account], select “Another AWS account.” Paste the account ID copied from the Airbridge dashboard.
Then, select the “Require external ID” option and paste the external ID copied from the Airbridge dashboard. Click Next.
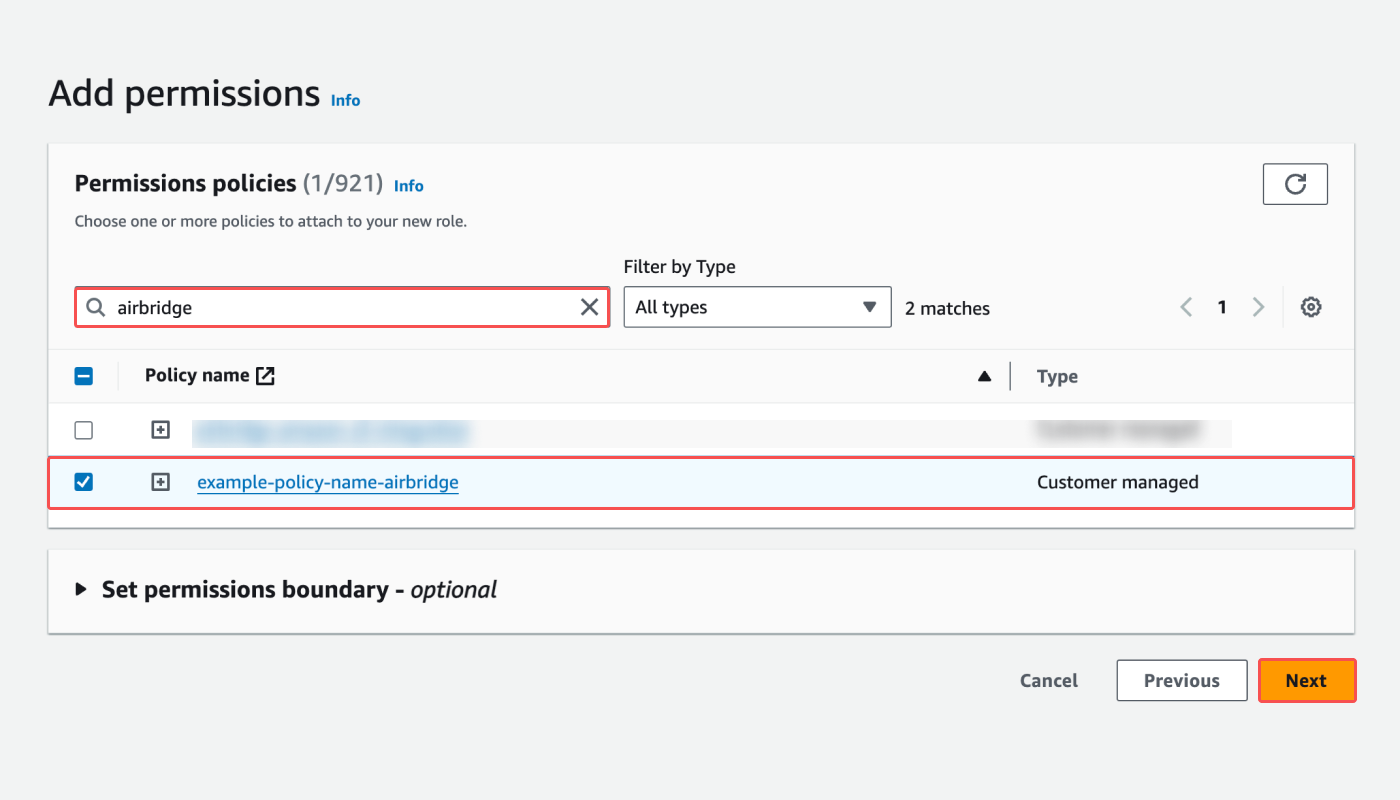
6. Under [Add permissions], search for the policy created for the integration. Check the checkbox and click Next.
7. Under [Name, review, and create], enter your choice of role name. Don’t change other settings. Click Create role to finish creating the role.
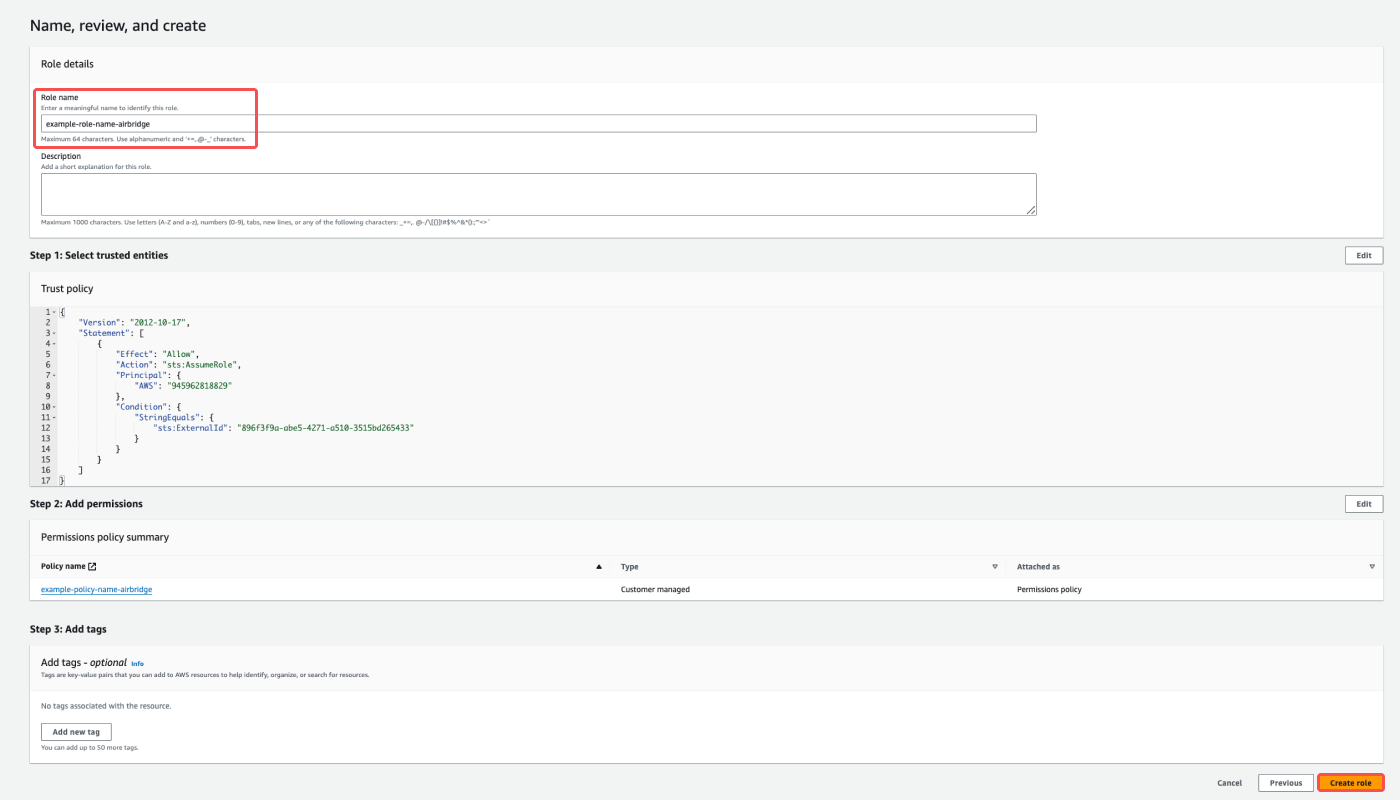
Follow the steps below to submit the IAM role ARN to Airbridge.
1. Navigate to [Access management]>[Roles] in the IAM console. Click the name of the IAM role created for the integration.
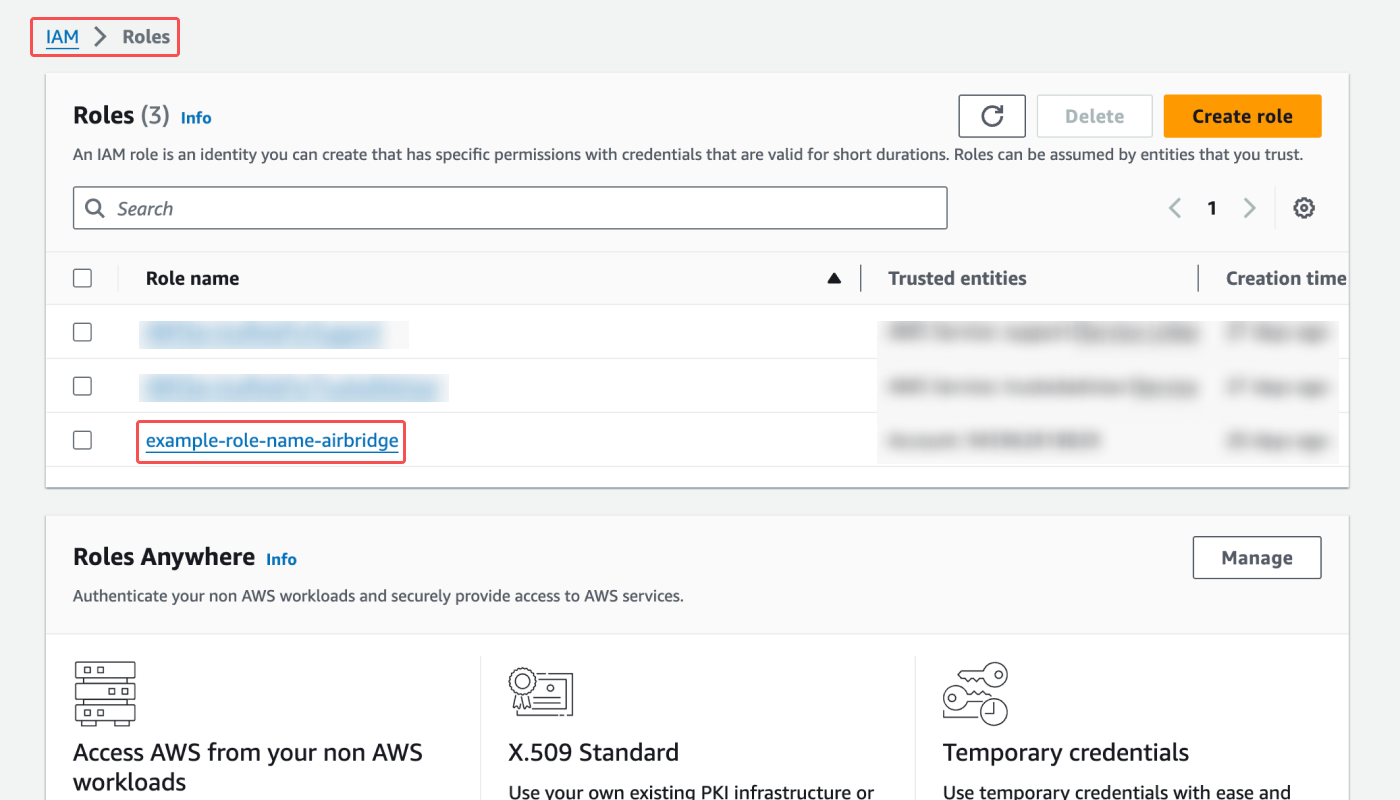
2. Copy the ARN.
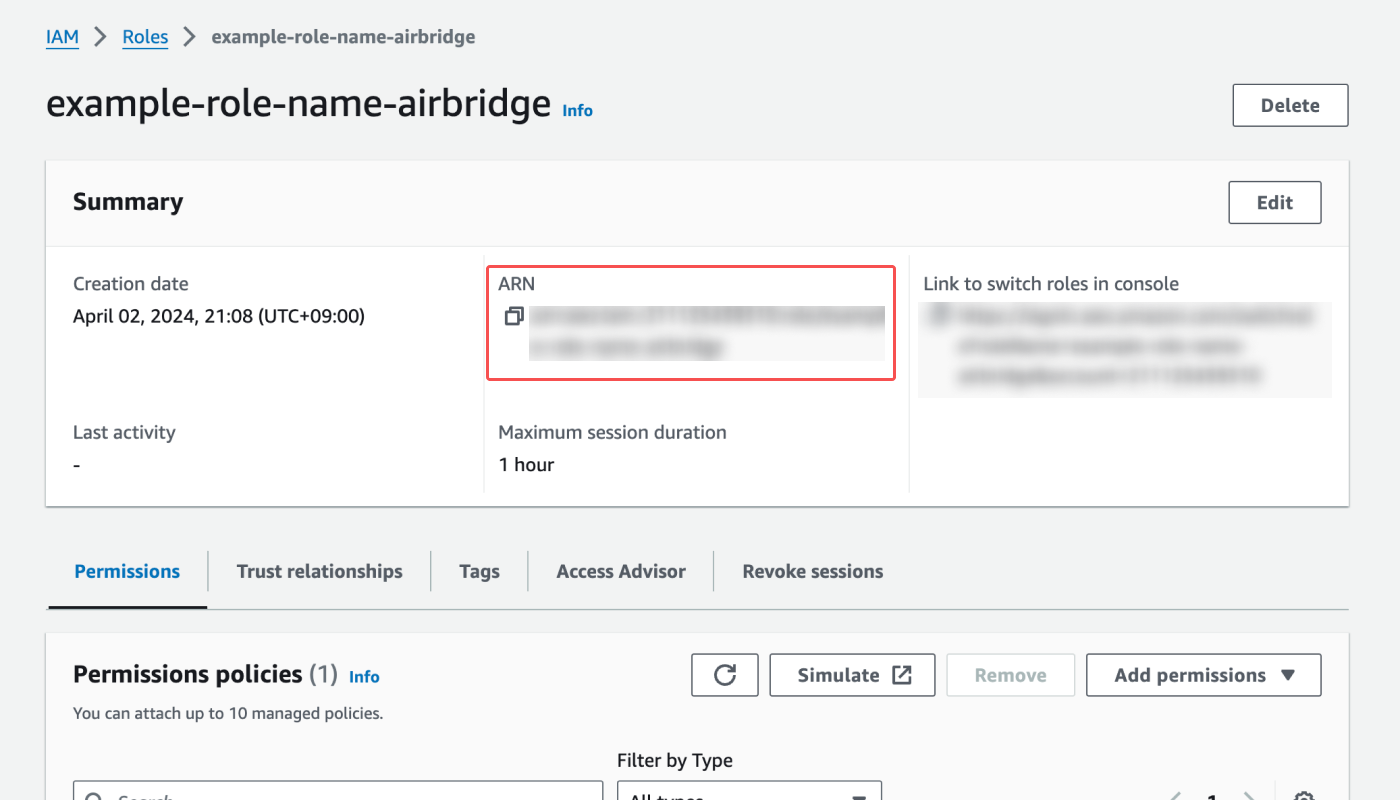
3. Go back to the Airbridge dashboard. Paste the ARN copied from the IAM console and click Submit.
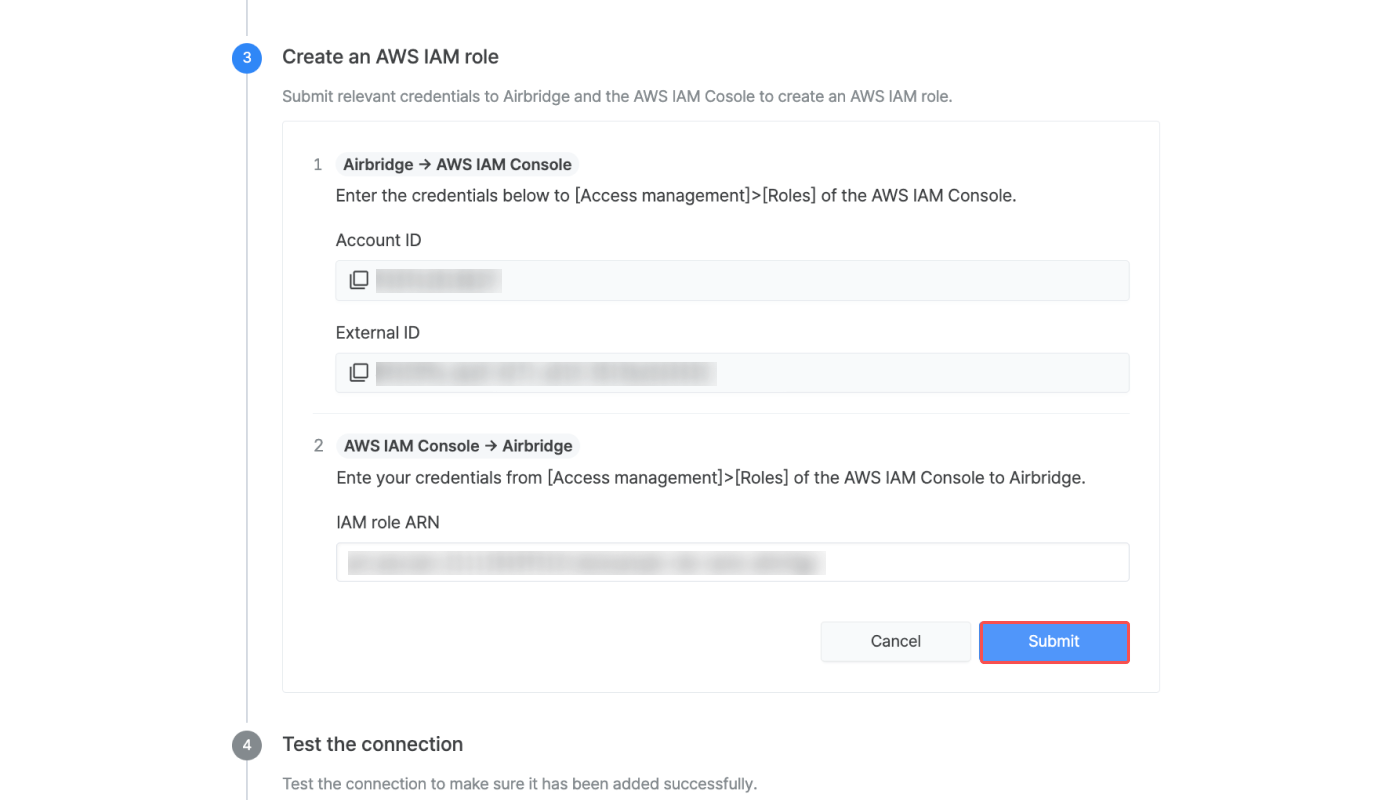
Follow the steps below to save the connection.
1. Click Save connection in the Airbridge dashboard.
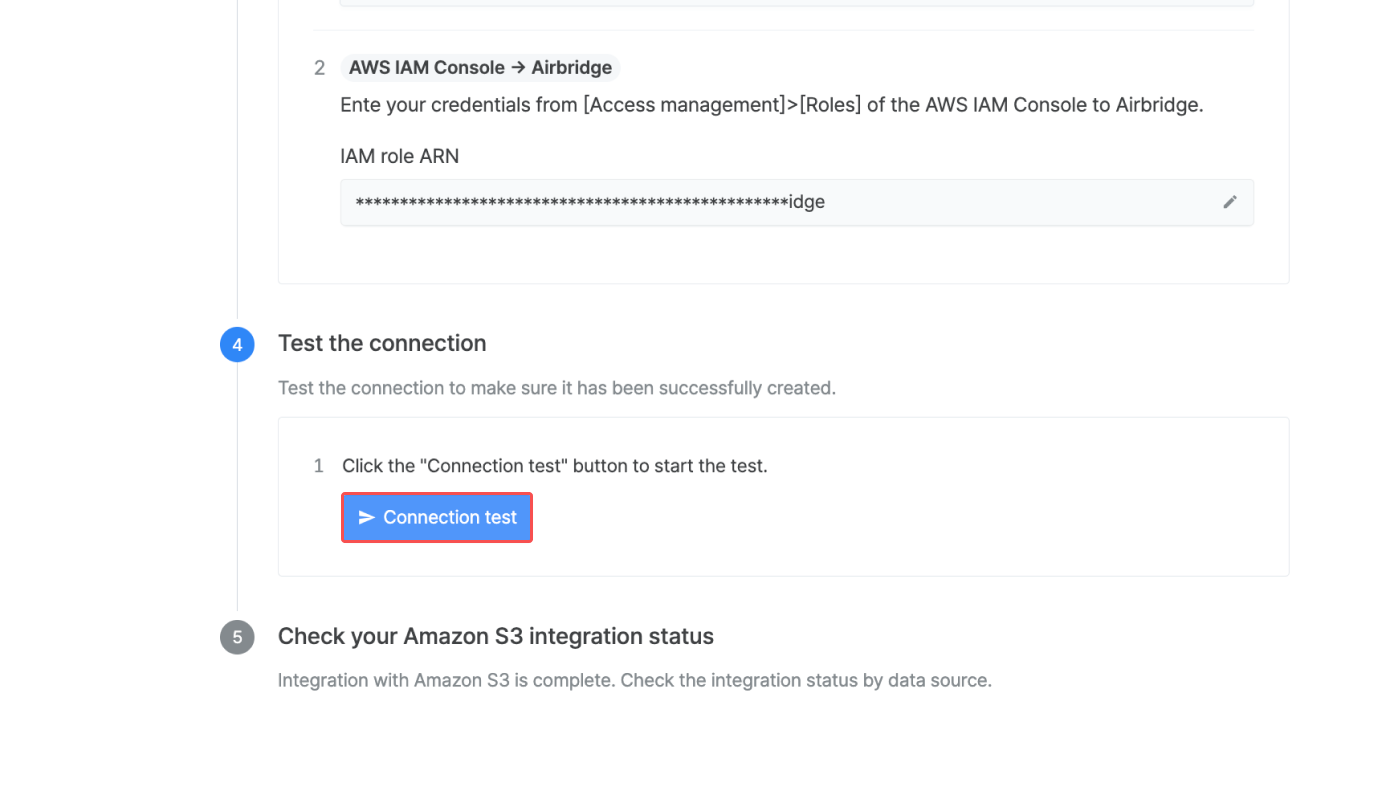
2. The connection will be successfully saved unless there is any problem with the Amazon S3 information submitted.
If Airbridge fails to save the connection, check whether the Amazon S3 information you submitted to Airbridge is correct, make changes if necessary, and save the connection again. If you leave the page without saving the connection, you have to start from the beginning of the integration process again.
Find out how to edit credentials or delete connections for integration.
If your Amazon S3 credentials have changed, you must update them in Airbridge as well by following the steps below.
1. Navigate to [Integrations]>[Third-party Integration] in the Airbridge dashboard. Select “Amazon S3.”
2. Click the connection whose Amazon S3 credentials have changed.
3. Click the credential to edit and enter the changed value.
4. Click Done to save.
If you edit the bucket name, region, or file format, you must start from the beginning of the integration process. If you edit the IAM role ARN, you must click " Save connection" in Step 4, even if you have clicked it before editing.
Note
After 13 November 2024, each organization will be assigned an external ID. Existing connections created in the past with a different external ID will still be working without any interruption. Note that when updating the Amazon S3 information of the connection, the external ID will also be automatically updated with the newly assigned external ID.
Follow the steps below to delete a connection and disable integration with Amazon S3.
1. Navigate to [Integrations]>[Third-party Integration] in the Airbridge dashboard. Select “Amazon S3.”
2. Click the connection to delete.
3. Click Delete on the top right corner.
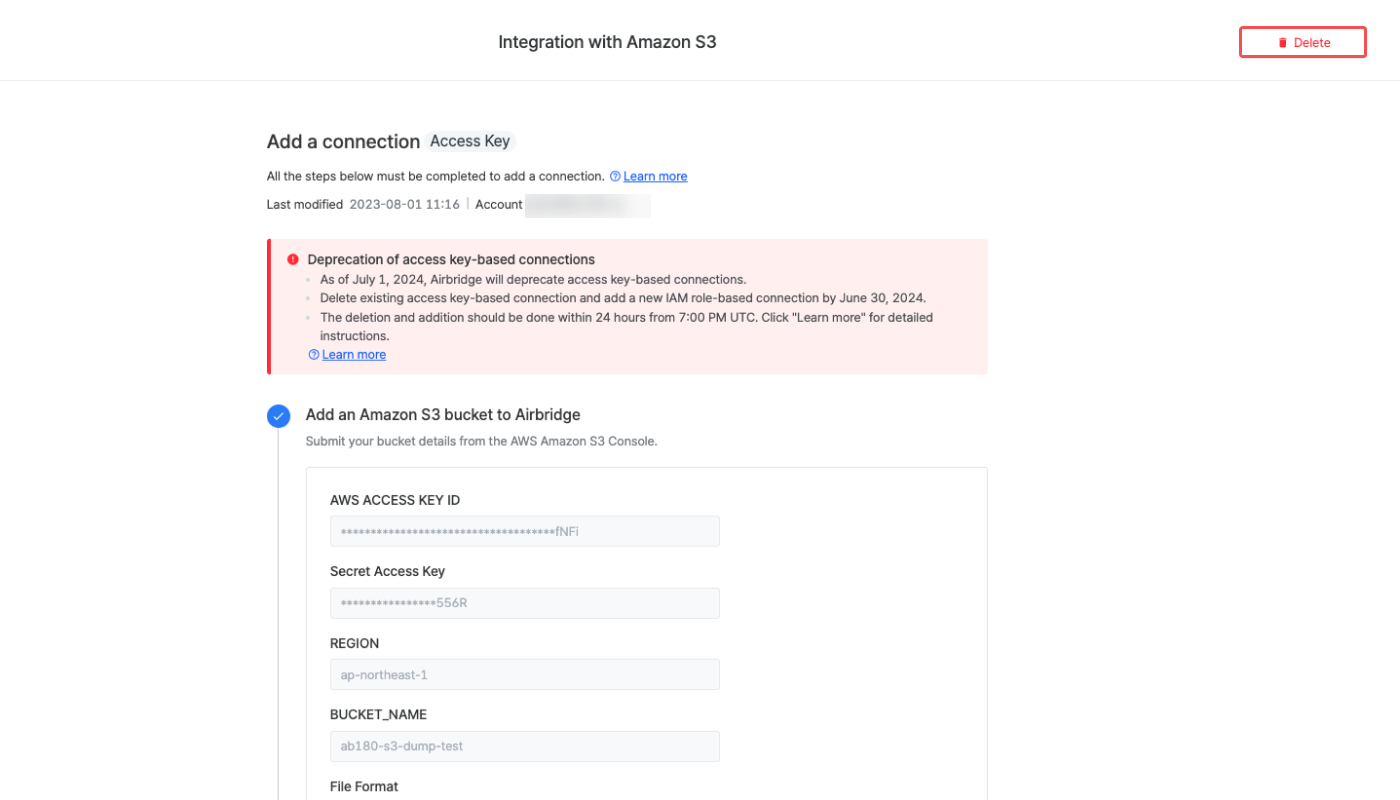
If you want to enable integration with Amazon S3 again after deleting a connection, start over the integration process.
Data already pushed from Airbridge to Amazon isn’t affected even though you delete a connection.
If the integration status shows “Error” on the [Integrations]>[Third-party Integration] page, you must submit the credentials again.
The error message is also shown in the [Integrations]>[Integration Overview] page. Click on the notification to move to the cloud storage integration page and resolve the error.
Once the integration setup is complete, you can view the integration status by data source on the cloud storage integration page.
Refer to the below for details about integration status and data export schedule.
Status | Description |
|---|---|
Waiting | The credentials have been submitted, but no data has been pushed yet. |
Success | The daily data has been successfully pushed to the cloud storage. |
Error | The data hasn’t been pushed due to an error with the credentials or others. |
No Data | The integration is enabled, but there is no data to push to the cloud storage. |
The status will show “Waiting” right after the credentials are submitted and will change to “Success” when data is pushed for the first time.
Data is pushed to cloud storage daily at 7:00 PM (UTC), regardless of your app time zone setup.
Because Airbridge collects events that occurred up to 24 hours ago, the event occurrence dat, the event collection date, and the data export date may differ from one another. All events occurred on the same day are saved with the same path within the Amazon S3 bucket integrated with Airbridge.
Note
Once your Amazon S3 integration setup is complete, data will be pushed to cloud storage starting at the next 7:00 PM (UTC). The data will be saved as .csv.gz files with the following paths within the bucket integrated with Airbridge:
App events:
${YOUR-BUCKET-NAME}/${YOUR-APP-NAME}/app/${VERSION}/date=${year}-${month}-${day}/Web events:
${YOUR-BUCKET-NAME}/${YOUR-APP-NAME}/web/${VERSION}/date=${year}-${month}-${day}/Tracking link events:
${YOUR-BUCKET-NAME}/${YOUR-APP-NAME}/tracking-link/${VERSION}/date=${year}-${month}-${day}/
Each file, created per event, uses the values from the Field Name column of the Airbridge Data Spec spreadsheet as the column names.
Airbridge supports free integration with a single cloud storage. Additional charges apply for integrating with two or more cloud storages.
The cloud storage integration status is shown under the name of each cloud storage on the [Integrations]>[Third-party Integration] page.
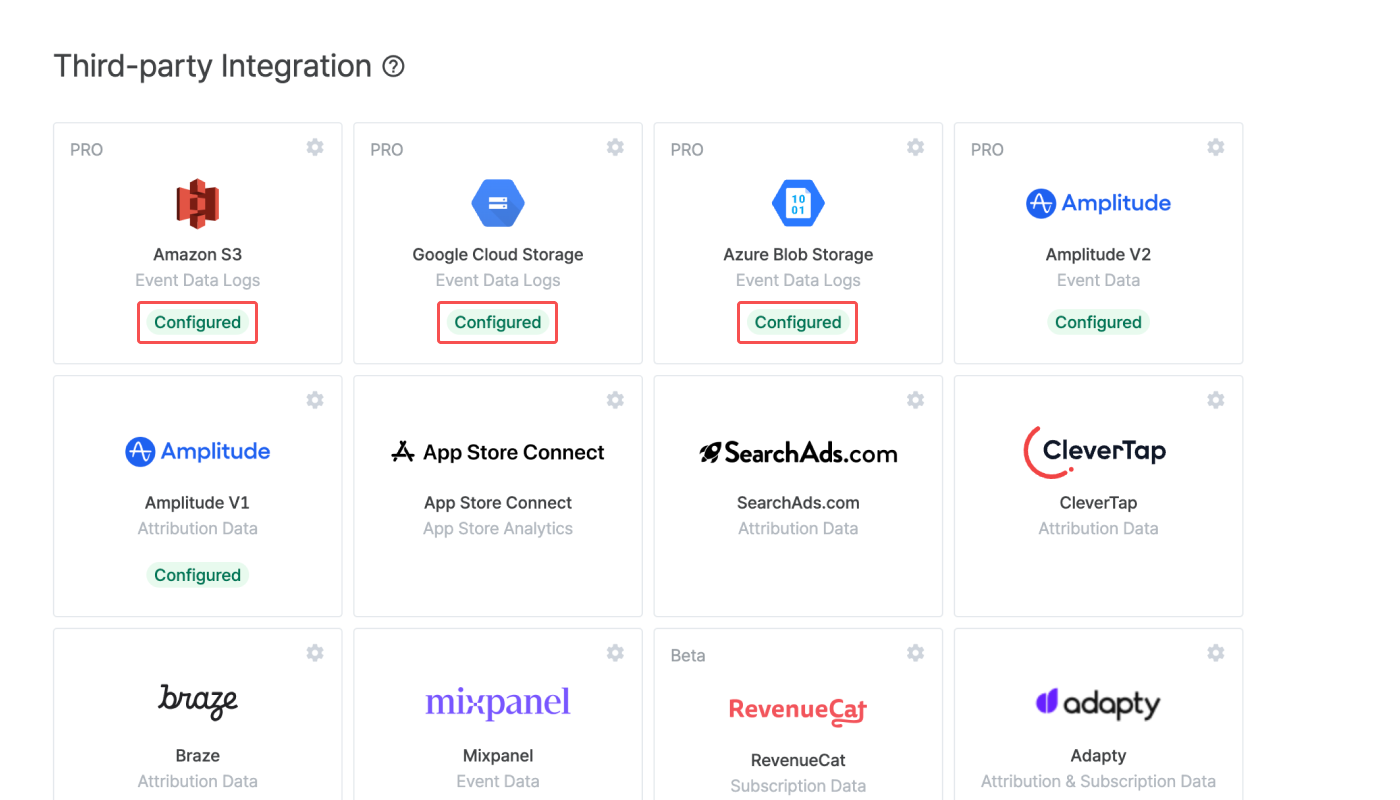
Refer to the table below for details about cloud storage integration status. You can also view the integration status specific to each data source.
Status | Description |
|---|---|
(No status shown) | The credentials have not been submitted, or the integration status is unknown. |
Configured | The credentials have been submitted, and the data is being successfully pushed to the cloud storage. |
Error | The data hasn’t been pushed due to an error. |
Closed | The cloud storage is not in use. To connect, reach out to your Airbridge CSM. |
A newly created connection always uses the latest integration version. As the exported columns vary depending on the integration version, check whether the columns need to be adjusted before creating a connection to prevent any issues.
Note
Was this helpful?