- Marketers Guide
- Reporting
- Using Your Raw Data
Raw Data Export
Airbridge allows you to export raw data as a CSV file. Raw data export is supported for app and web event data.
For app event raw data export, navigate to [Raw Data]>[App Raw Data Export], and for web event raw data export, navigate to [Raw Data]>[Web Raw Data Export] in the Airbridge dashboard.
Navigate to [App Raw Data] or [Web Raw Data] and click Export raw data. The process includes the following steps.
Select the events you want to export. At least 1 event must be selected to move to the next step.
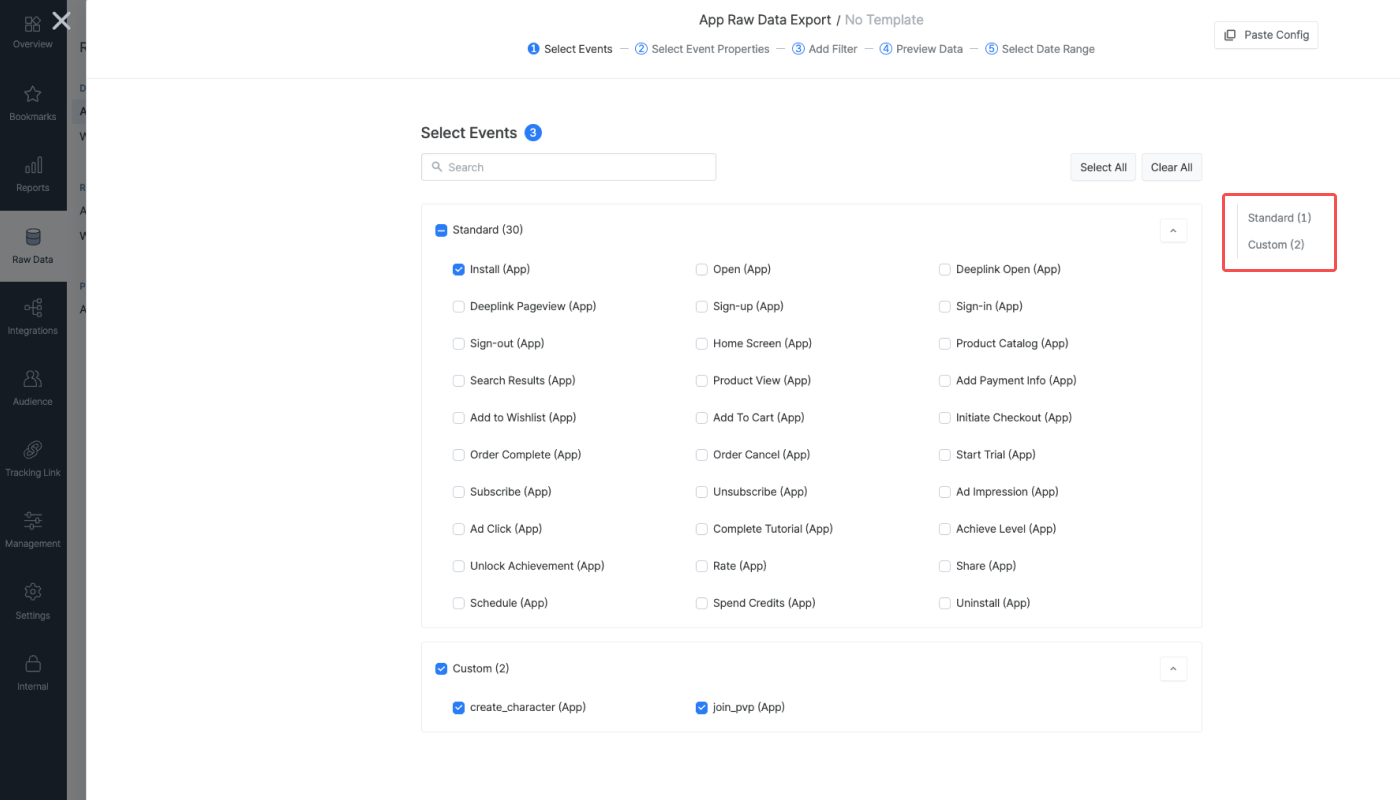
Airbridge events are divided into Standard Events and Custom Events. You can select events individually or select an event category that includes different events.
On the right, you can see the number of events you have selected. Click the event category to move to a specific event section.
Select the event properties you want to export. Event properties are sub-attributes of events. The Event Category is selected by default and cannot be deselected. Selecting event properties is optional and can be skipped.
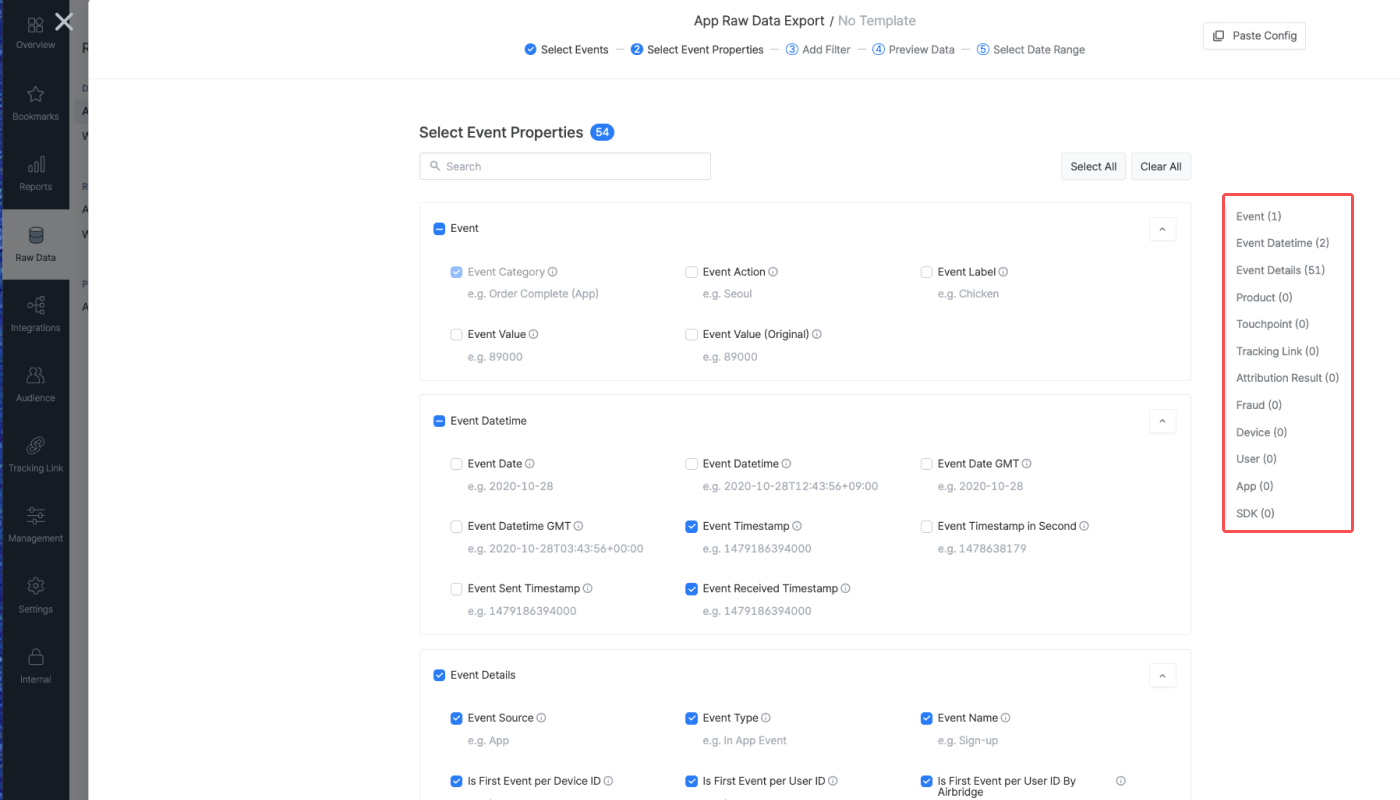
On the right, you can see the number of event properties you have selected. Click the property category to move to a specific property section.
Refer to the Airbridge Data Spec sheet for more details about the event properties Airbridge supports. The property names can be found under the Field Name.
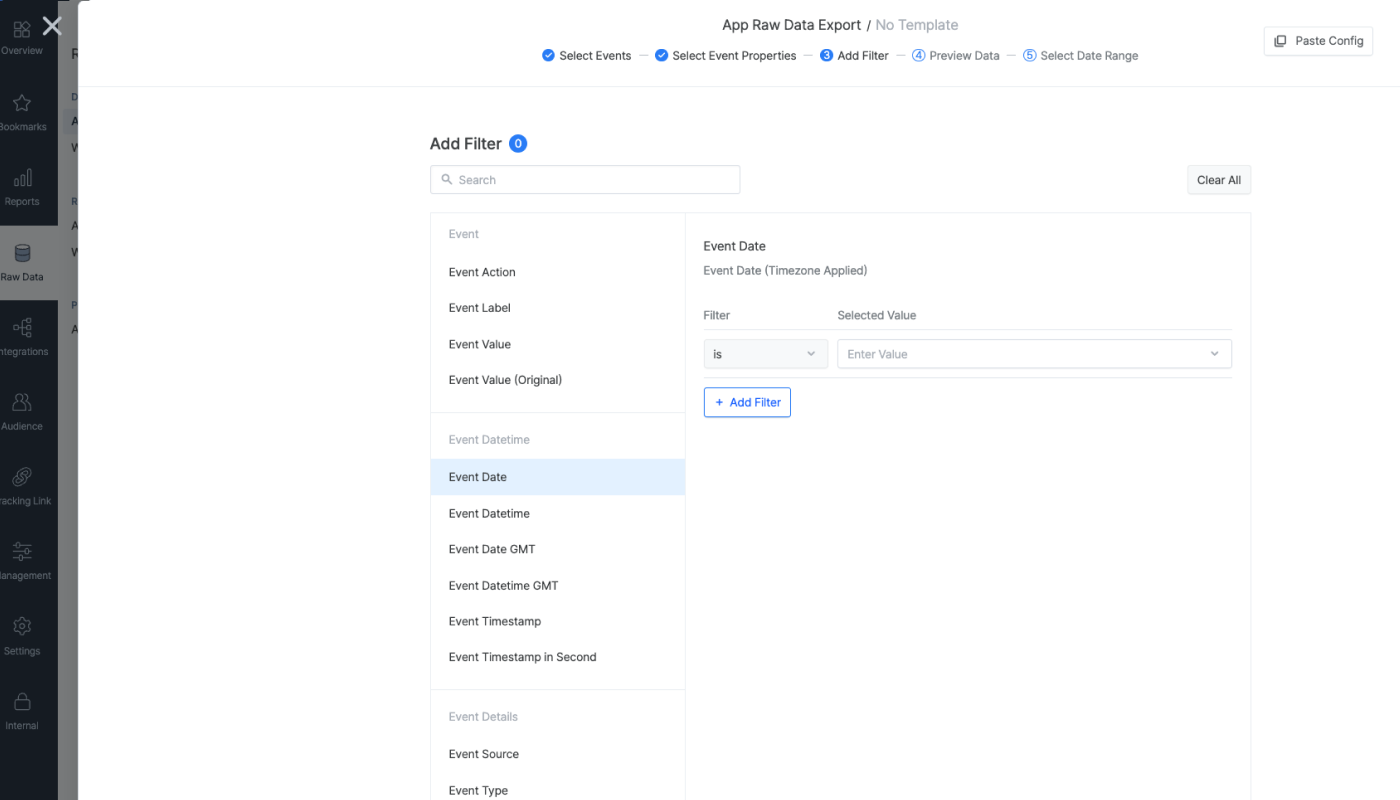
You can add filters for each event property. This is an optional step and can be skipped.
By adding filters, you can export data with a more specified event property.
The [Preview Data] step allows you to preview the raw data collected over the last 3 days based on the settings you configured in the previous steps. The date range for the data export can be configured in the next step. If you don't see the expected result, tray again after max. 10 minutes.
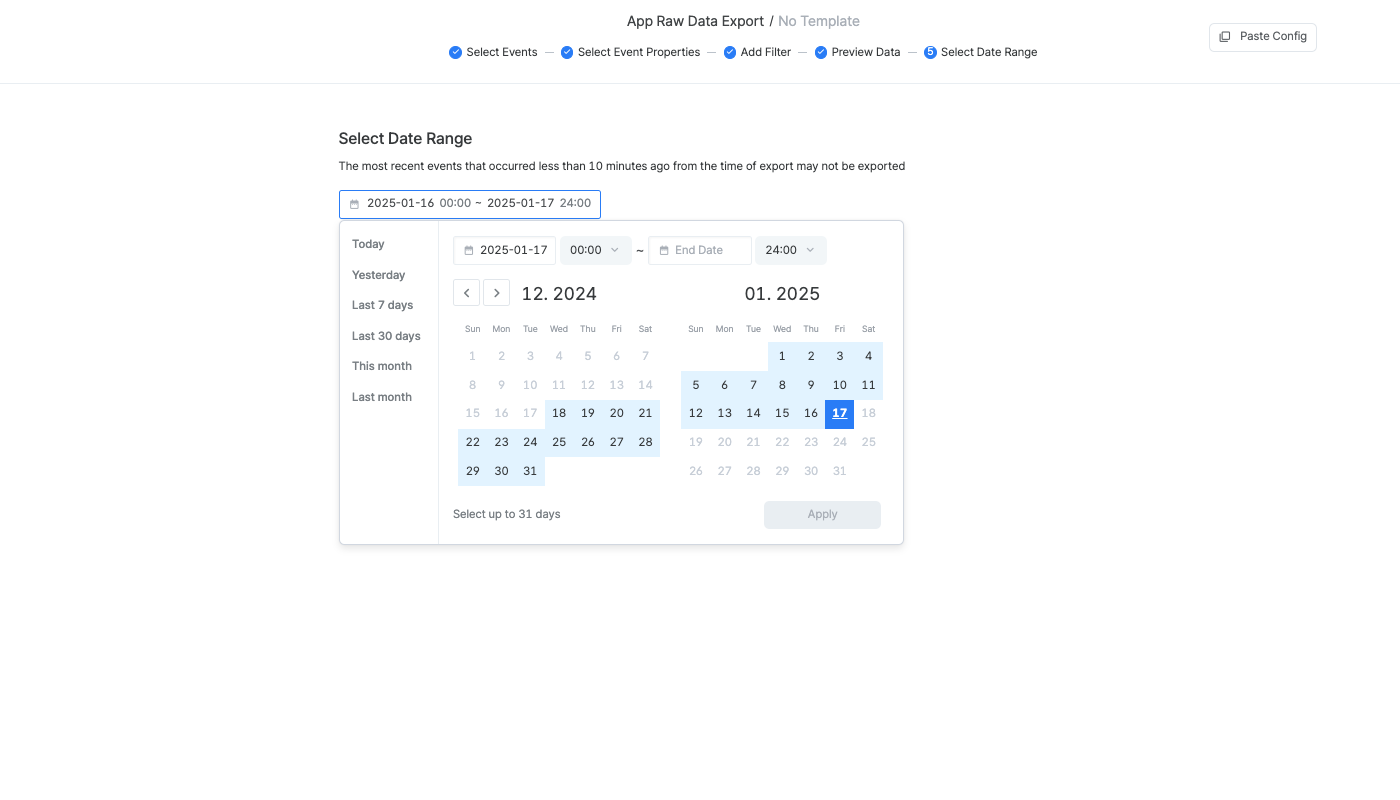
Set the date range for data export. The date range can be set up to 31 consecutive days for a single export. Data available for export ranges from D-179 to D-0 (today).
For example, if you export data on August 30th, the data available for export ranges from March 4 to August 30. You may export data of up to 31 days within that window.
Once you have set the date range, click Request export to start the export. When the export is complete, a confirmation email will be sent to the email used as the Airbridge User ID.
When the data export is complete, the CSV file can be downloaded from the list of export requests by clicking the file size in the Status·Download column.
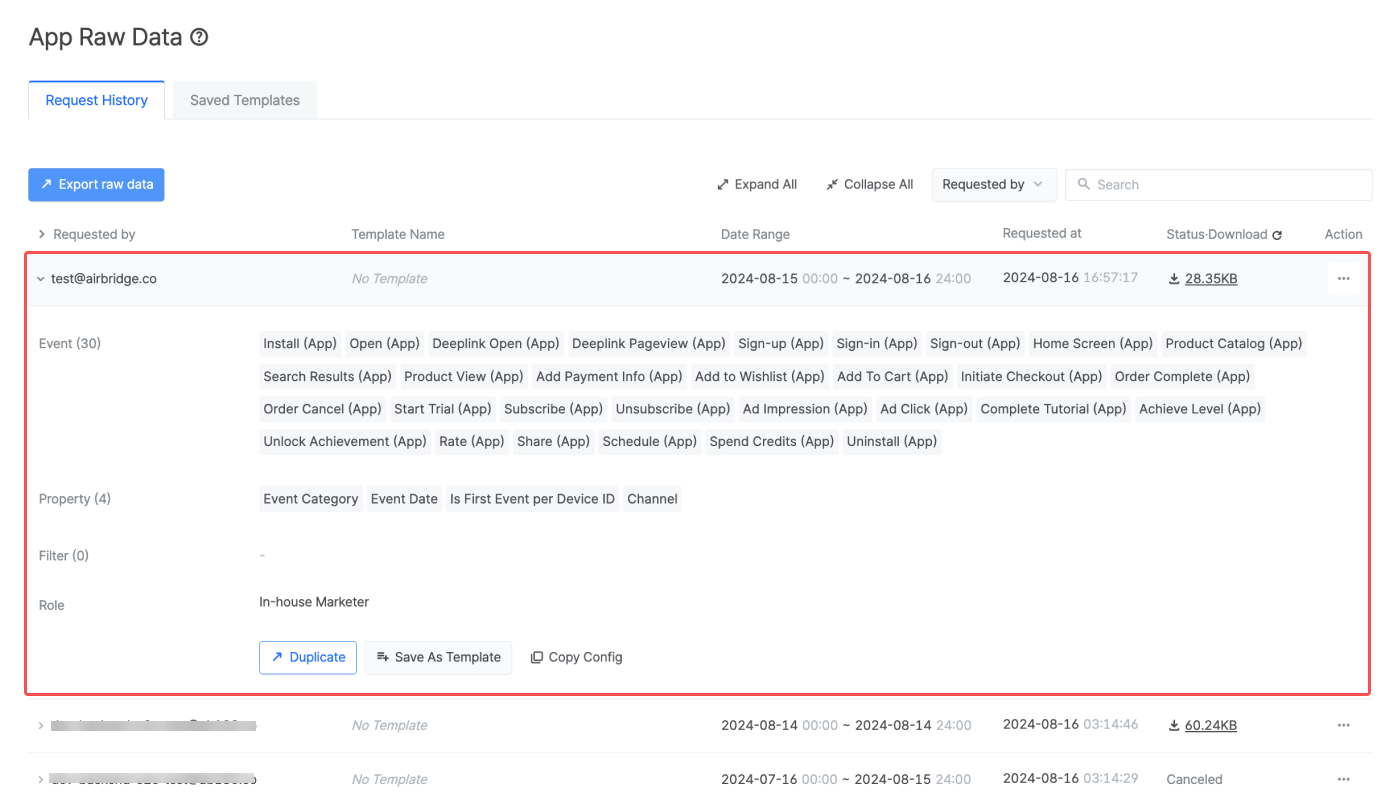
In the [Request History] tab, you can see the Airbridge account that requested the export, the template name that was used, the date range of the raw data, the request time, and the status.
Click a request in the [Request History] tab to expand and find the details of the request.
When the export is complete, the CSV file size will appear in the Status·Download column. Click on that clickable area to download the CSV file.
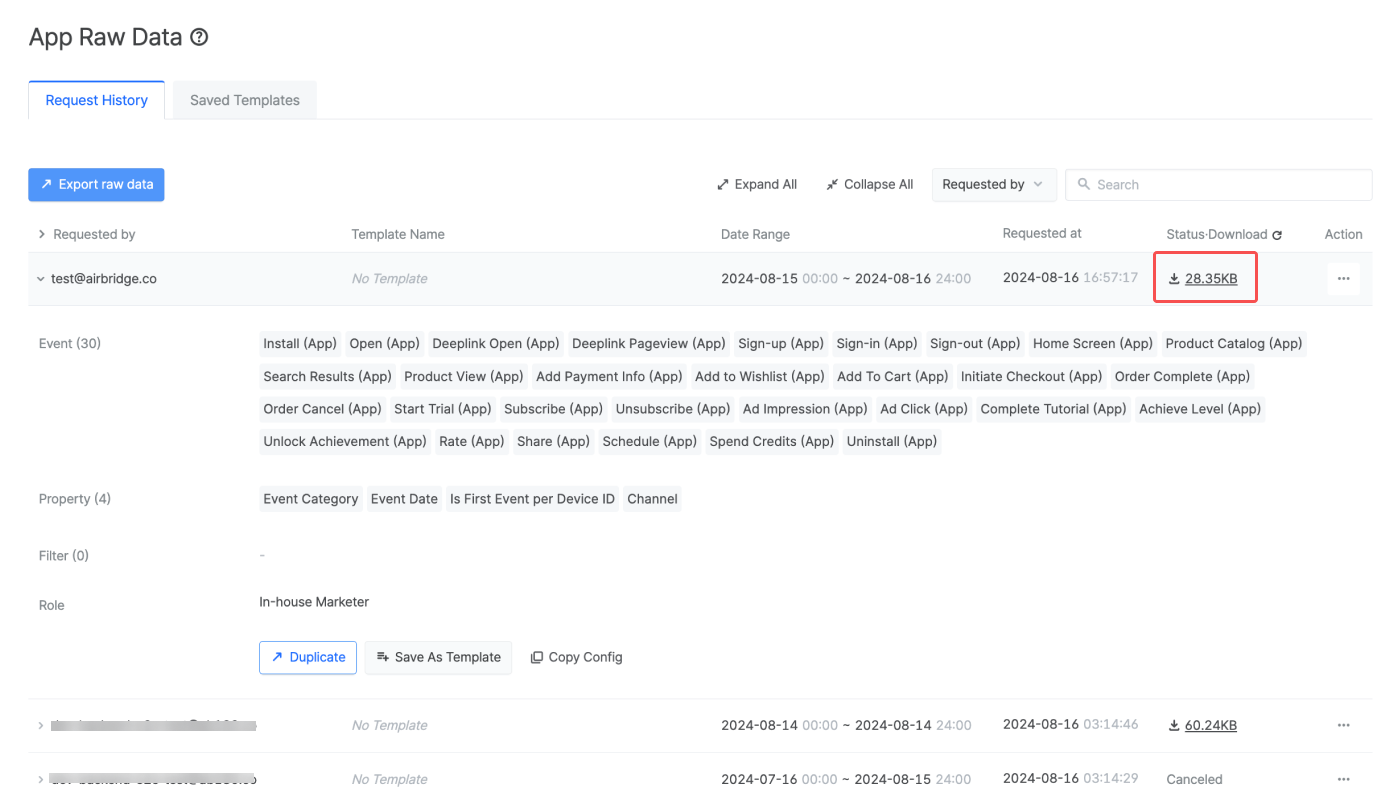
The file cannot be downloaded when the file size is not visible. A status message will show if the export cannot be completed or downloaded.
Refer to the information below for the status messages and their meanings.
The request configs saved as templates can be found in the [Saved templates] tab. Templates allow you to export data easily without configuring the settings for every export.
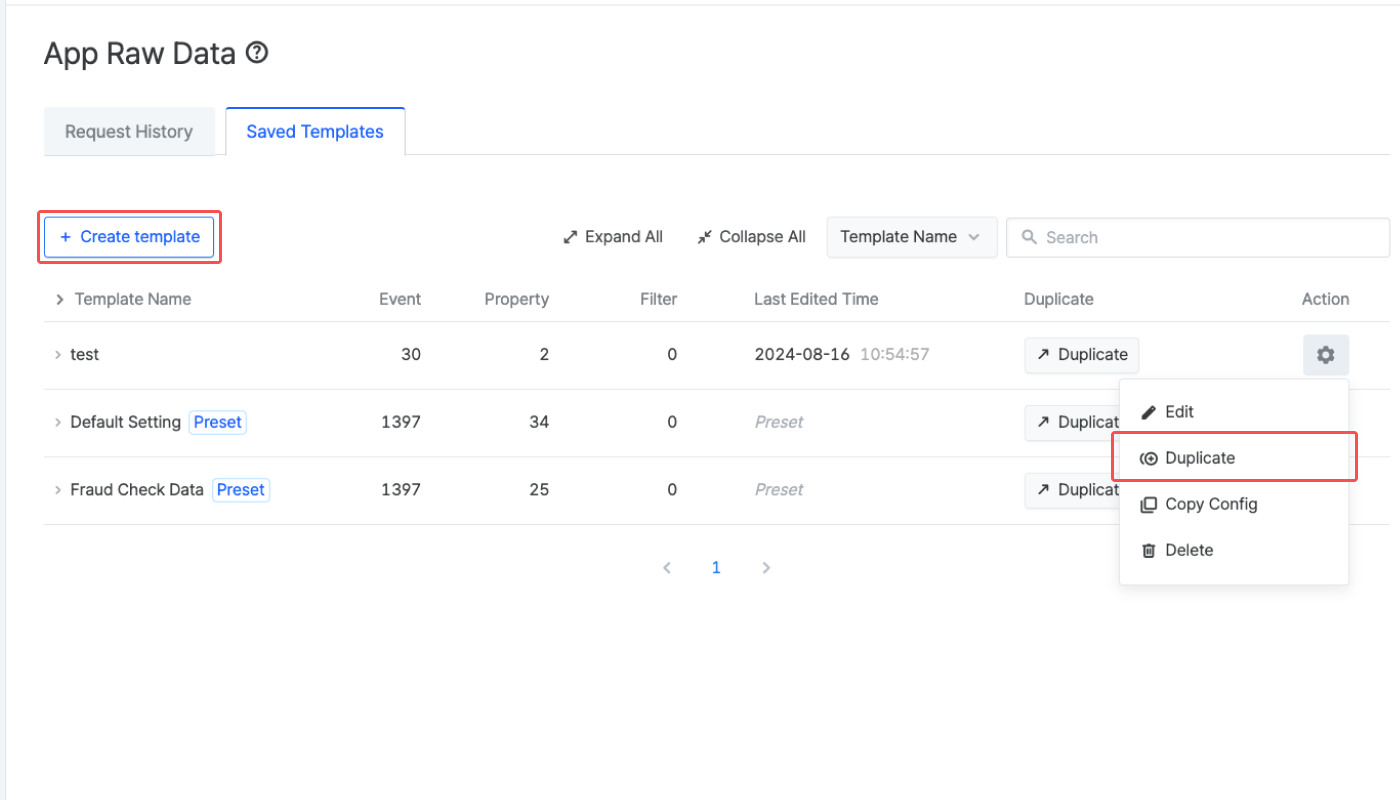
In the [Saved Templates] tab, click Create template.
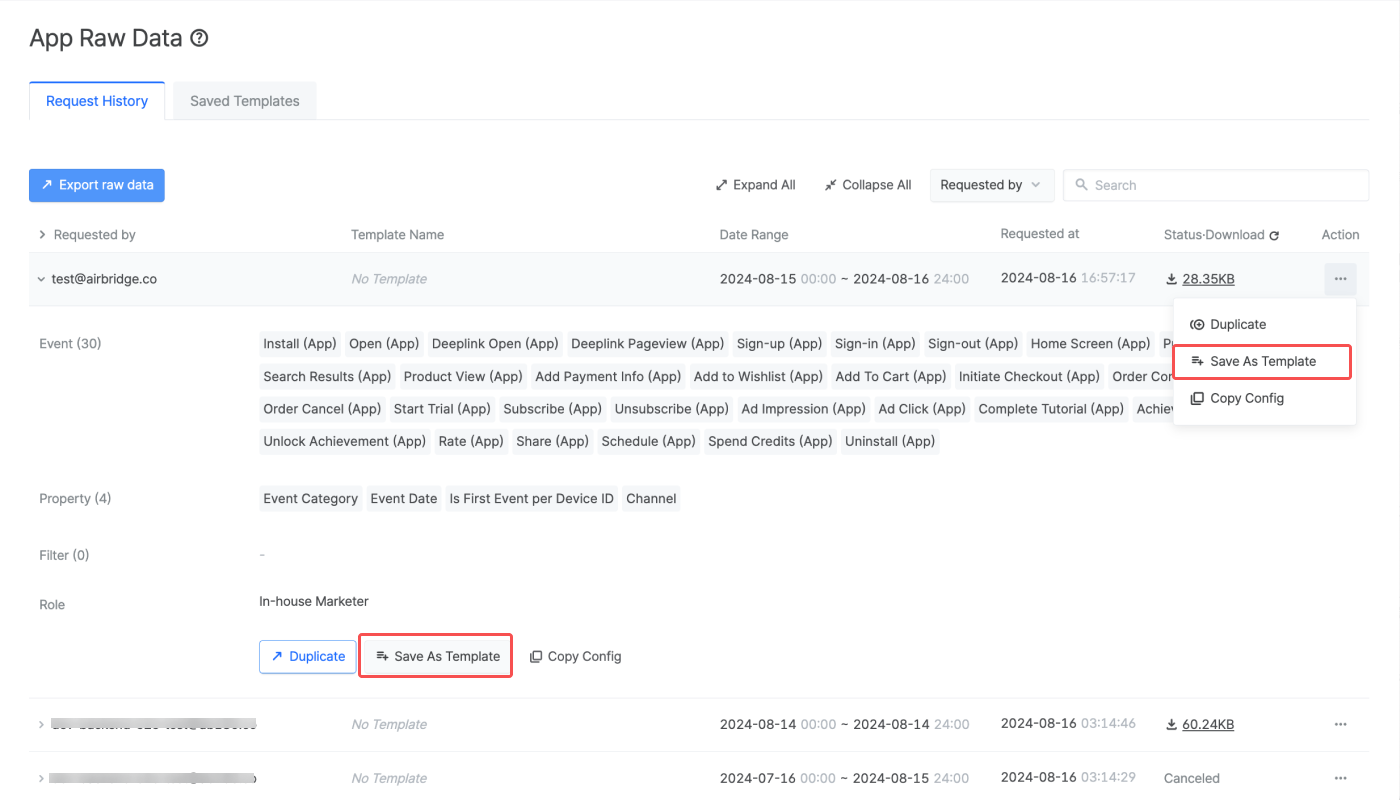
You can also click a request in the [Request History] tab to expand and find the Save As Template button at the bottom or click the [gear] icon and select Save As Template.
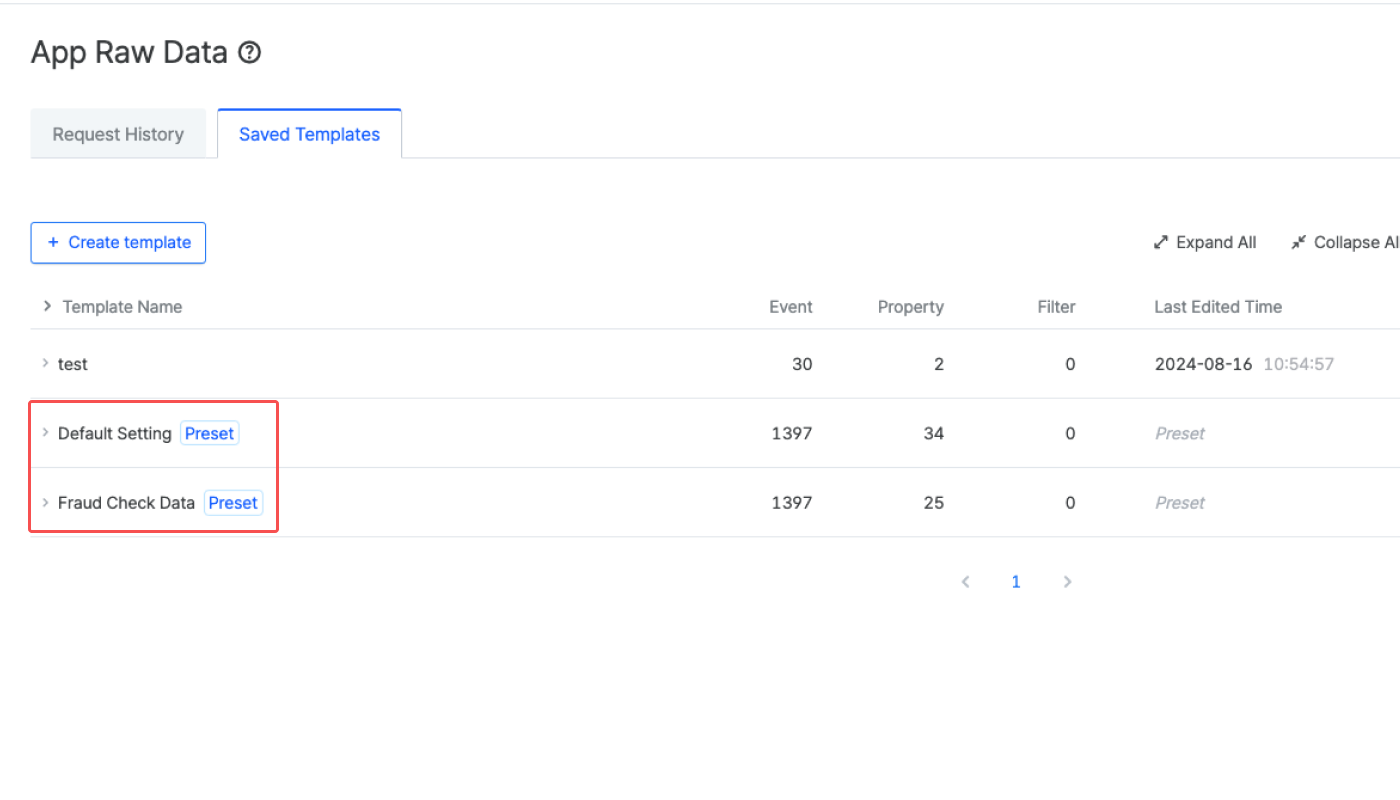
By default, two preset templates are provided: Default Setting and Fraud Check Data. The Default Setting template includes events and event properties for general data monitoring, whereas the Fraud Check Data template includes events and event properties for general ad fraud validation.
The preset templates can be duplicated, edited, and saved as a new name.
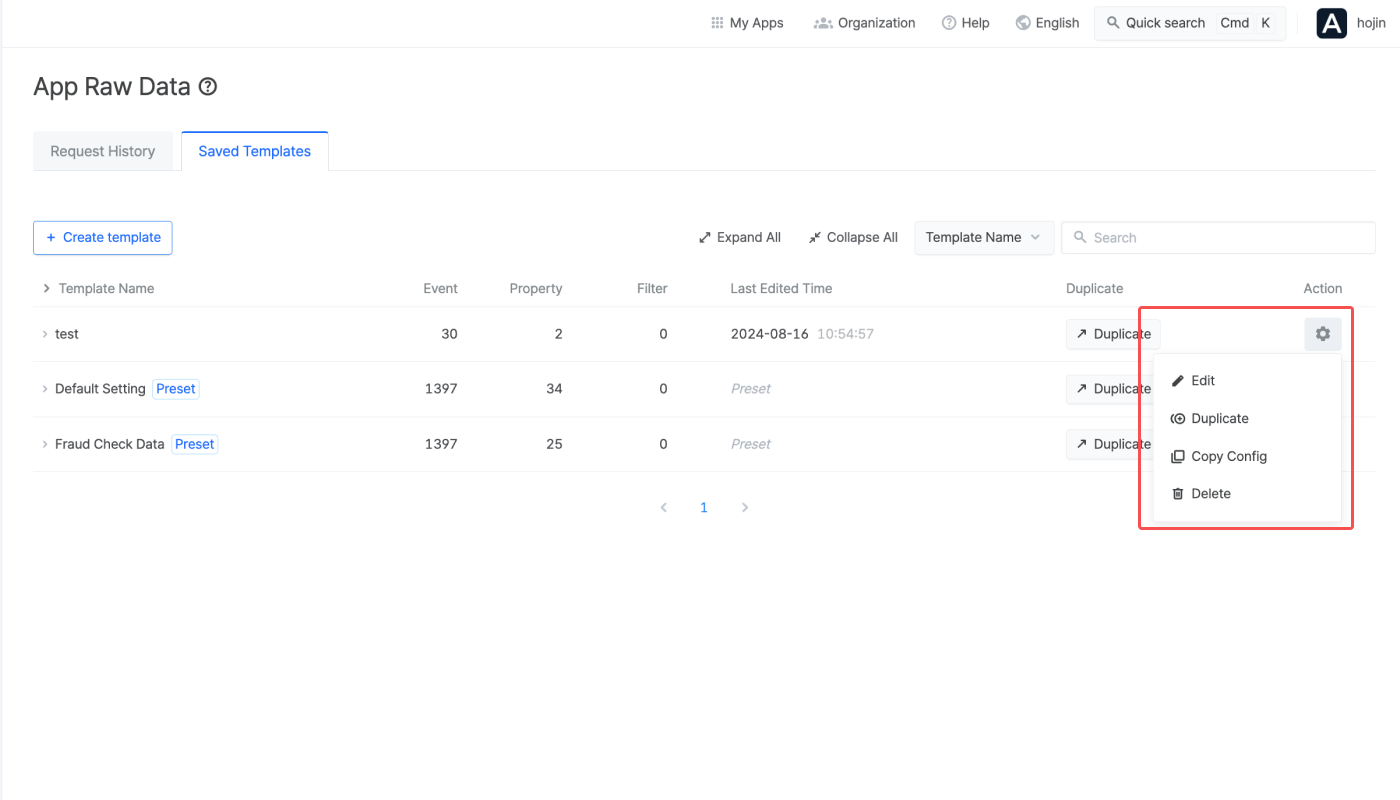
In the [Saved Templates] tab, click the [gear] icon.
Select Edit to edit the event, event property, and filter settings in the template. Select Duplicate to save the template as a new name. Select Copy Config to copy the configs for the template and paste them into a spreadsheet.
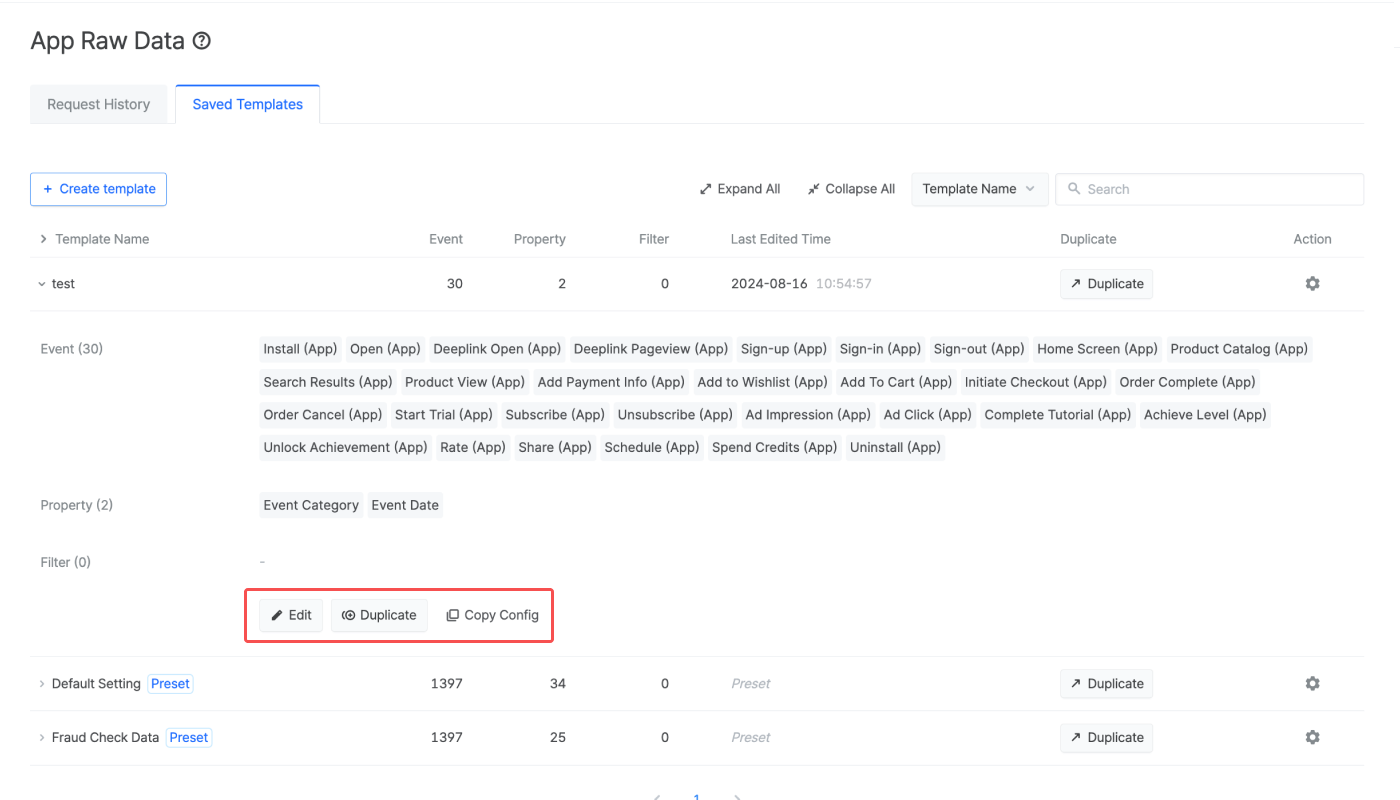
You can also click the template name to expand and find the Edit, Duplicate, and Copy Config buttons at the bottom.
In the [Saved Templates] tab, click the [gear] icon.
Select Delete to delete the template. Note that once a template is deleted, it cannot be restored.
Agency users cannot export event property-level data unless they have been granted permission by the Owner or In-house Marketers to do so.
When selecting the [Raw Data]>[Agency Settings] menu, you will be redirected to the [Agency] page, where you can see which agencies can access raw data and which specific event properties they have access to.

Data collected by Airbridge within the last 10 minutes might not be included in the export file. It's best to export data after enough time has past.
To comply with Meta's privacy policy, data attributed to Meta ads is displayed as "Restricted."
The preview may differ from the actual export results. The preview only shows the last 3 days of data including today.
The table below outlines the features and limitations of raw data export.