[Deprecated] DeepLink Plan - Migrating from Firebase Dynamic Links
Airbridge supports a seamless migration from your existing Firebase Dynamic Links to Airbridge tracking links.
By using the Migrator and Generator Templates provided by Airbridge, you can easily convert your Firebase Dynamic Links to Airbridge tracking links. The migration includes the following steps:
Parameter mapping using the Migrator Template
Creating Airbridge tracking links using the Generator Template
Read on to learn more about the templates.
The Migrator Template is a Google spreadsheet file used to separate the parameters of the Dynamic Links and map them to the corresponding Airbridge tracking link parameters.
The following table describes the individual sheet tabs in the Migrator Template.
Sheet Tab | Description |
|---|---|
Enter Dynamic Link | Enter your Firebase Dynamic Links metadata. |
Parameter Mapping Result | Find the Firebase Dynamic Links metadata mapped to Airbridge tracking link parameters. |
Required Info | Configure the Migrator Template Version. In the scheme field, enter the URL scheme, which can be found in the Airbridge dashboard. |
Parameter Mapping Table (Firebase) | You can see the parameter mapping table between Firebase Dynamic Links and Airbridge tracking links. |
The Generator Template is a Google spreadsheet file for creating Airbridge tracking links using the Tracking Link API and Google Apps Script. It enables you to easily create large numbers of tracking links.
Complete the pre-setup process outlined in the following table.
Complete the pre-setup process outlined in the following table.
Steps |
Description |
Handled by |
|---|---|---|
1. App Registration | Register the app with Airbridge. | Marketer |
2. Airbridge SDK Installation | Install the Airbridge SDK to your app. | Developer |
3. Deep Link Setup | Complete the necessary setup to enable deep linking. | Developer |
4. Deferred Deep Link Setup and Deep Link Testing | Complete the necessary setup to enable deferred deep linking and test whether the deep links work as intended. This step is optional but highly recommended for completion in the preparation stage. | Developer, Marketer |
5. SDK Testing | Test whether the Airbridge SDK has been successfully installed. | Marketer |
6. App Release | Release the app with the Airbridge SDK. | Developer |
Follow the steps below to convert your Firebase Dynamic Links to Airbridge tracking links.
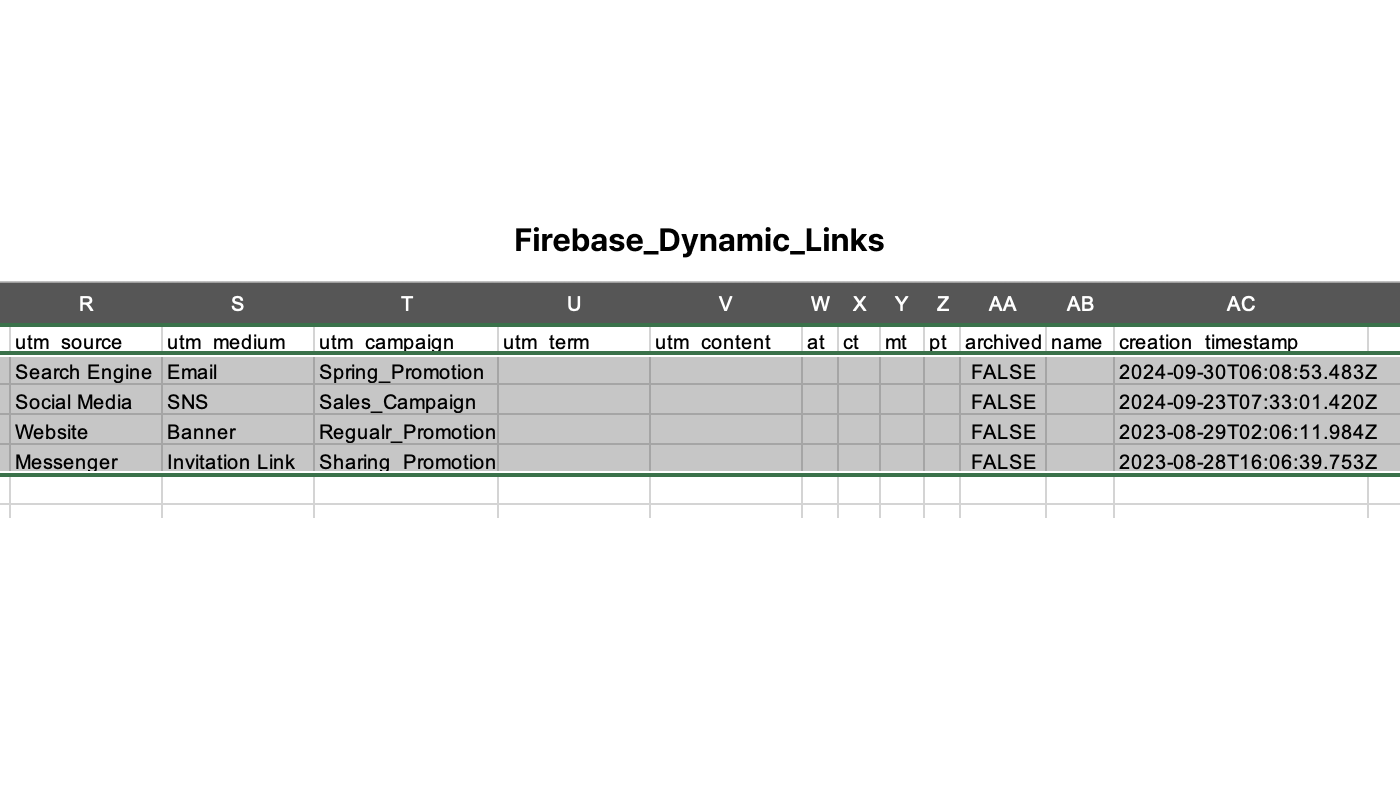
1. Download your Firebase Dynamic Links as a CSV file. Refer to this article from Firebase.
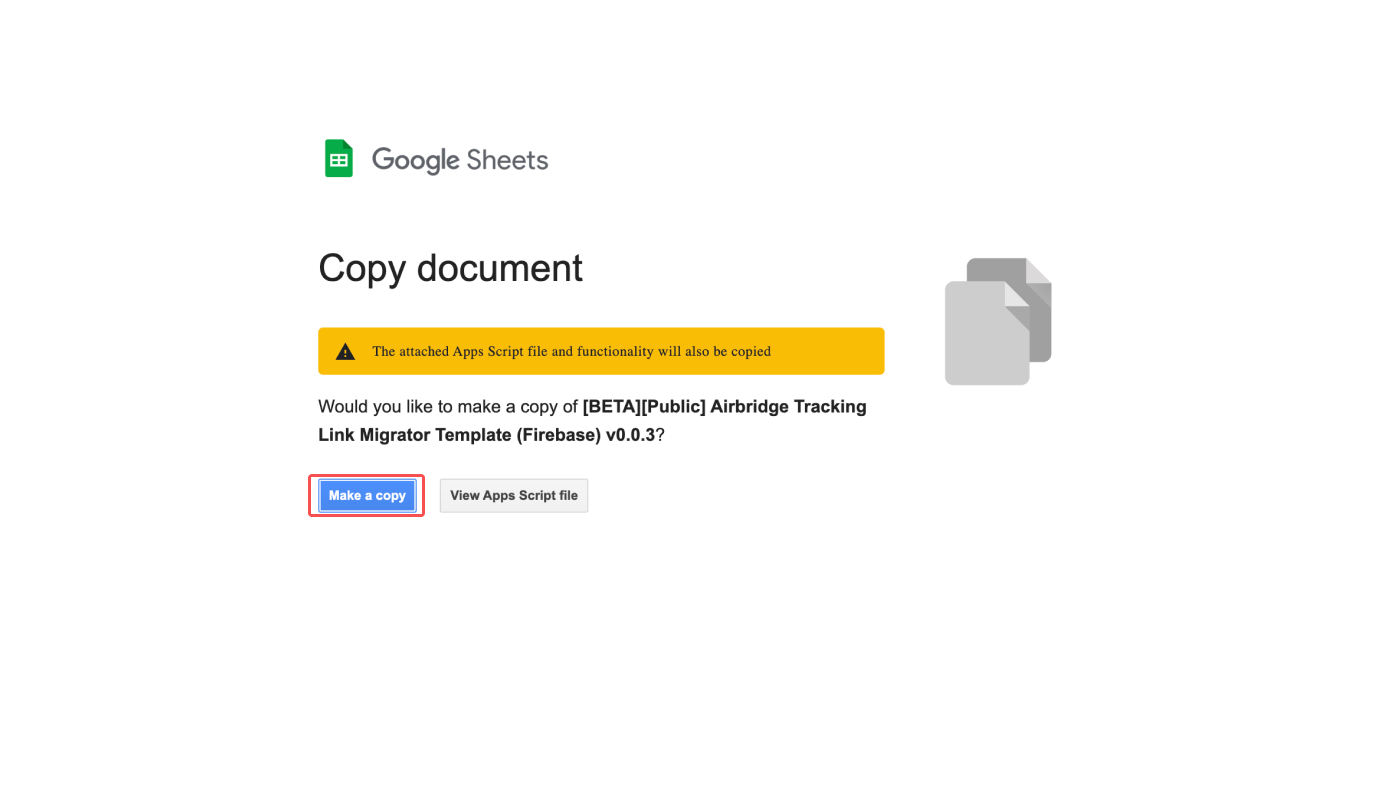
2. Create a copy of the Airbridge Tracking Link Migrator Template (Firebase). The new copy will be saved in your Google Drive. You'll need to be logged in to your Google account.
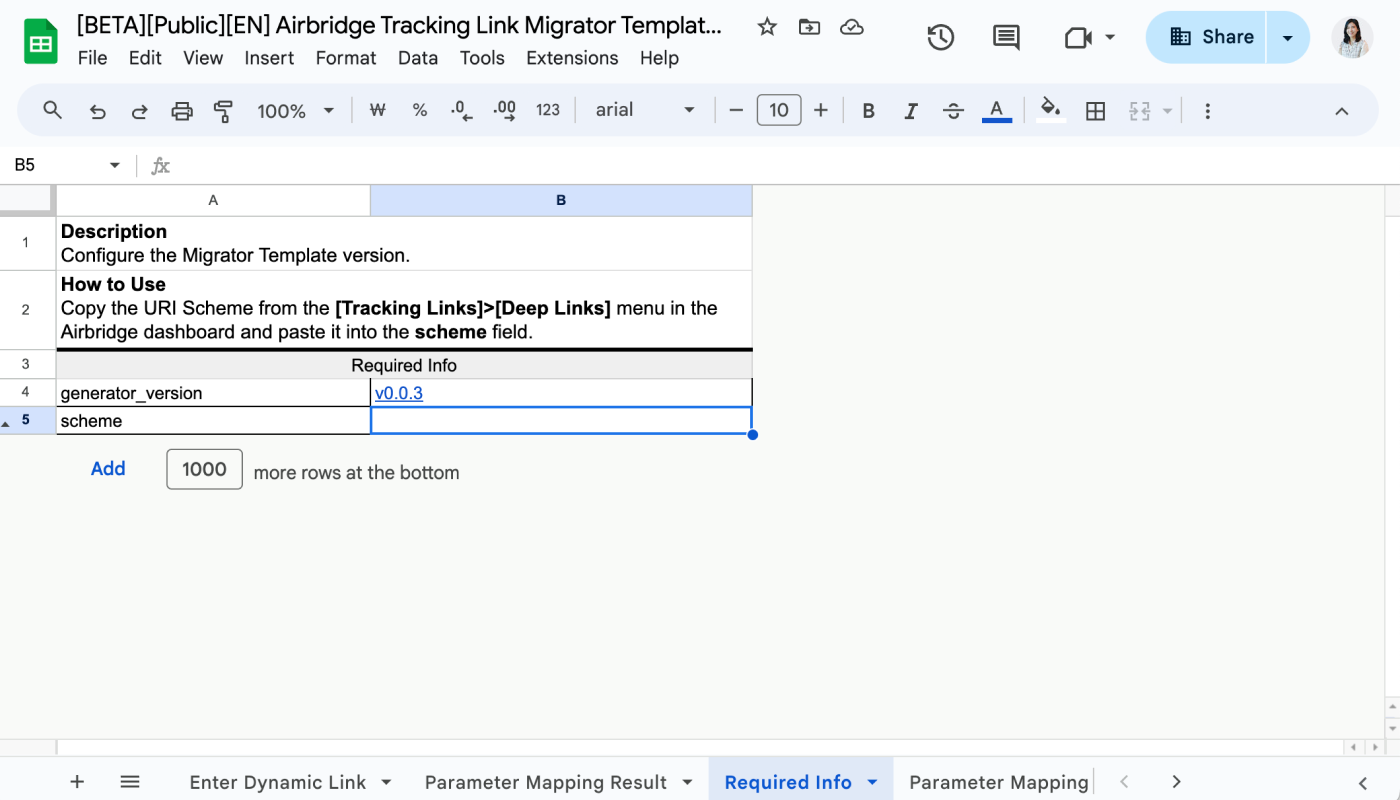
3. In the [Required Info] sheet tab, enter the URI Scheme as the scheme value in B5. The URI Scheme can be found on the [Tracking Link]>[Deep Links] page in the Airbridge dashboard.
4. Copy the values from the CSV file of the Firebase Dynamic Links you downloaded in Step 1 and paste them into columns A to AC into the [Enter Dynamic Links] sheet tab of the Migrator Template.
Attention
Copy the metadata of the Firebase Dynamic Links you want to convert to Airbridge tracking links from the first to the last column in full.
Paste the copied values into the [Enter Dynamic Links] sheet tab.
5. Click the [Parameter Mapping Result] sheet tab. You can see the Firebase Dynamic Links metadata mapped to Airbridge tracking link parameters. Check whether the mapping is done as intended. If you feel the need to edit, you can do so directly on the sheet.
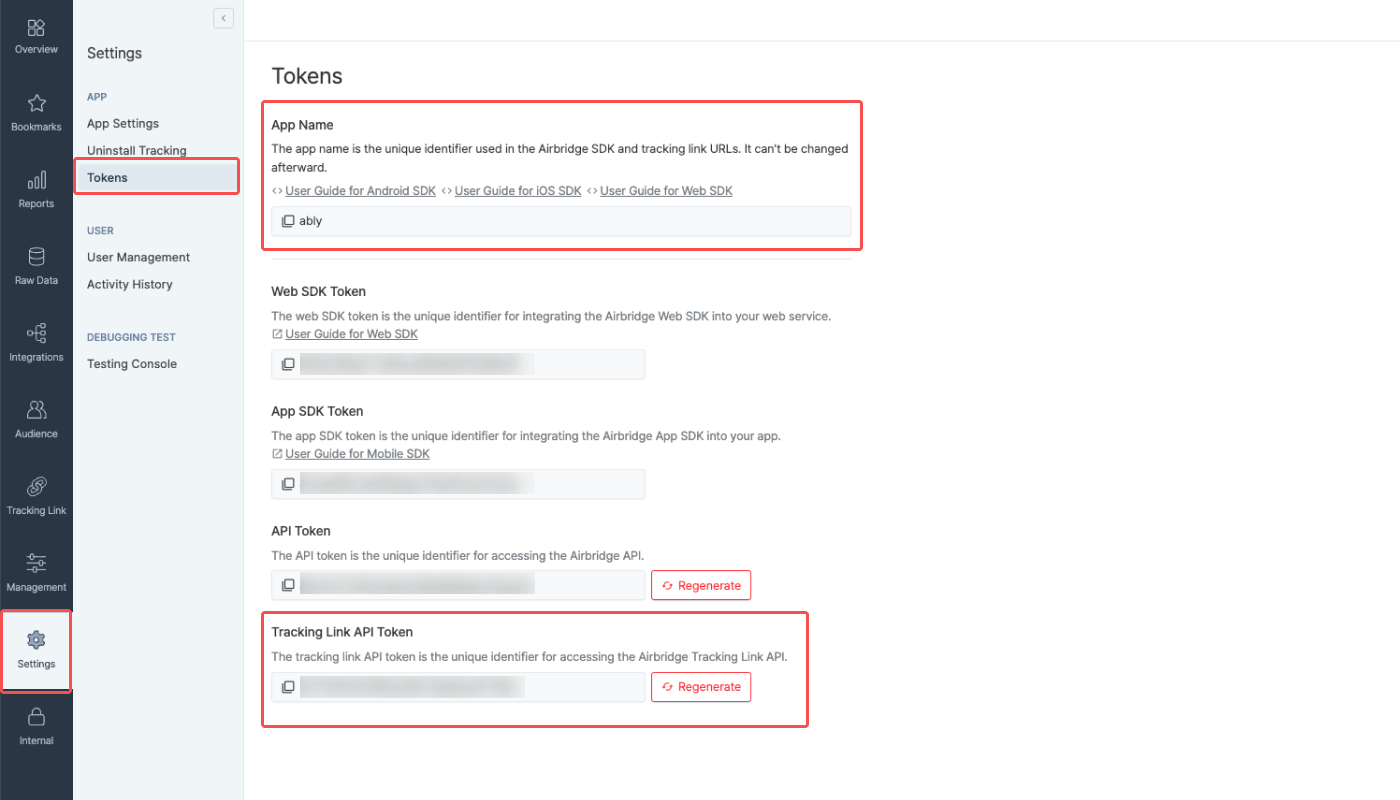
6. Now, create a copy of the Airbridge Tracking Link Generator Template (DeepLink Plan). In the [Required Info] sheet tab, enter the App Name and the Tracking Link API Token, which can be found on the [Settings]>[Tokens] page in the Airbridge dashboard.
The App Name and Tracking Link API Token can be found on the [Settings]>[Tokens] page. You can copy the values by clicking on them.
Then, install the Airbridge Tracking Link Generator following the steps outlined below.
1. Go to Google Workspace Marketplace and install the Airbridge Tracking Link Generator. We recommend logging in to your Google account first before clicking Install.
2. When the pop-up window opens asking for your permission, click Continue.
3. Choose a Google account to continue.
4. Scroll down and click Allow.
5. When the pop-up window opens confirming the install, click Done.
7. Go back to the Migrator Template. Click the [Parameter Mapping Result] sheet tab and copy the values from columns N to AD. Then, paste them into the [Create Tracking Links] sheet tab from column A in the Generator Template. Make sure the fields align.
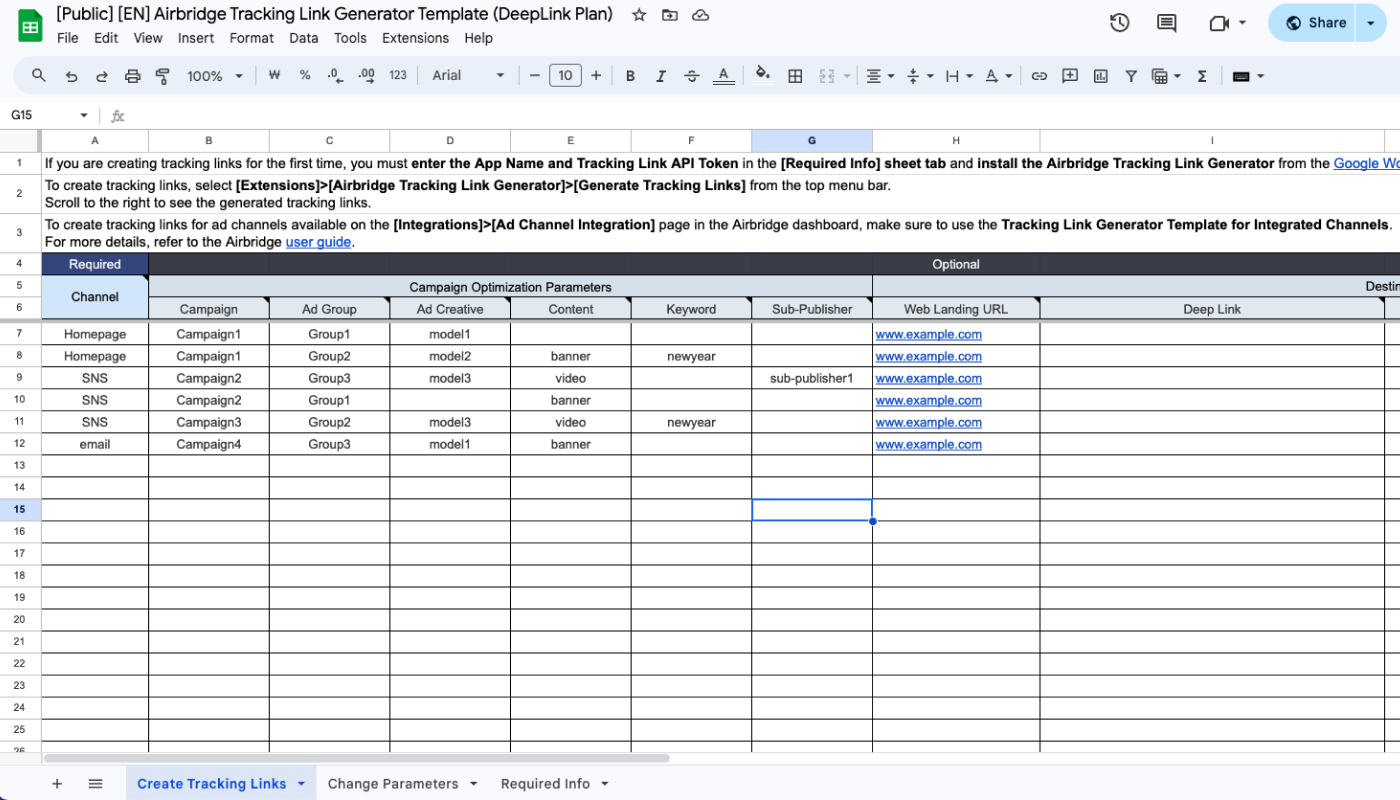
Attention
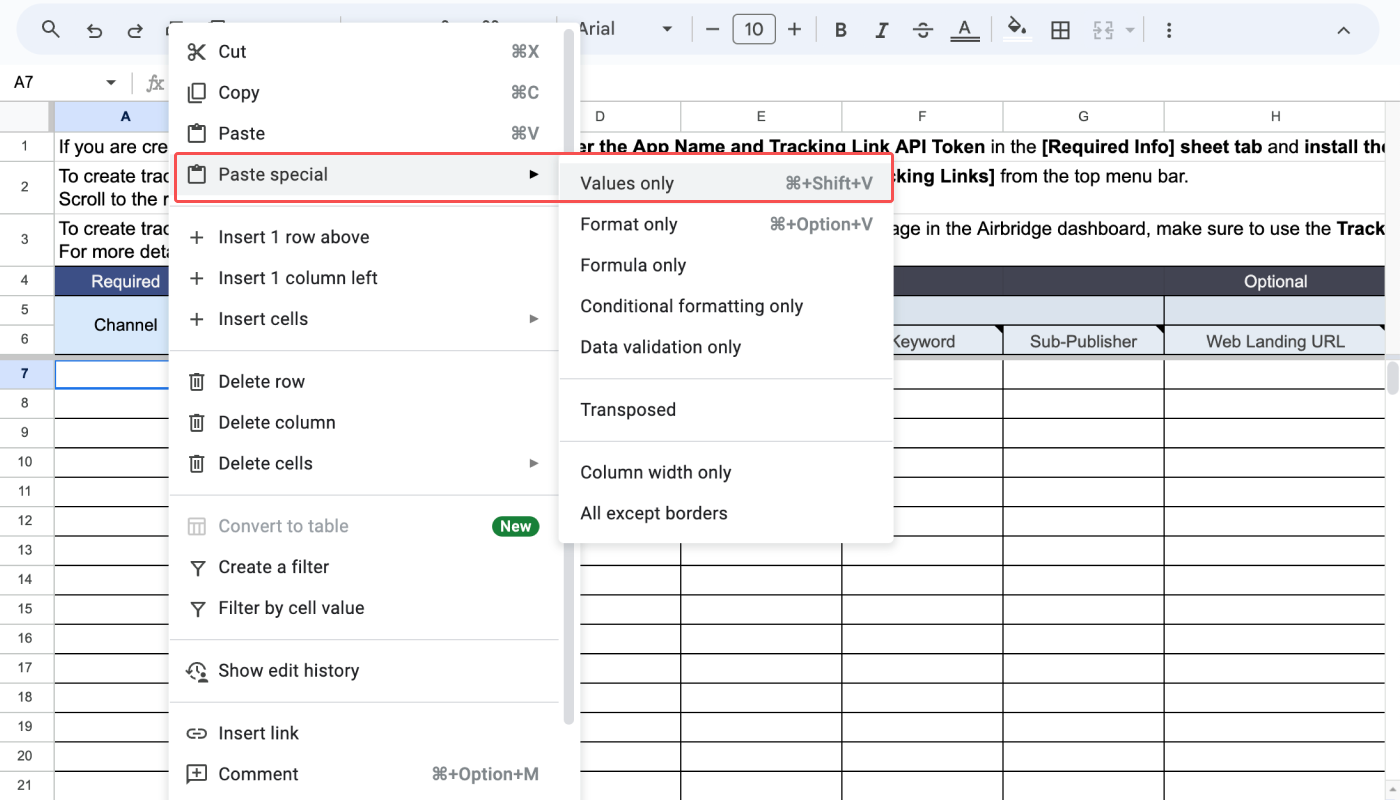
When you paste the mapping result into the Generator Template, make sure you copy only the values. Follow the instructions below.
Right-click on your mouse and select [Paste Special]>[Values only].
USe
command+shift+V(Mac) orcontrol+shift+V(Windows).
8. Select [Extensions]>[Airbridge Tracking Link Generator]>[Generate Tracking Links] from the top menu bar to create tracking links.
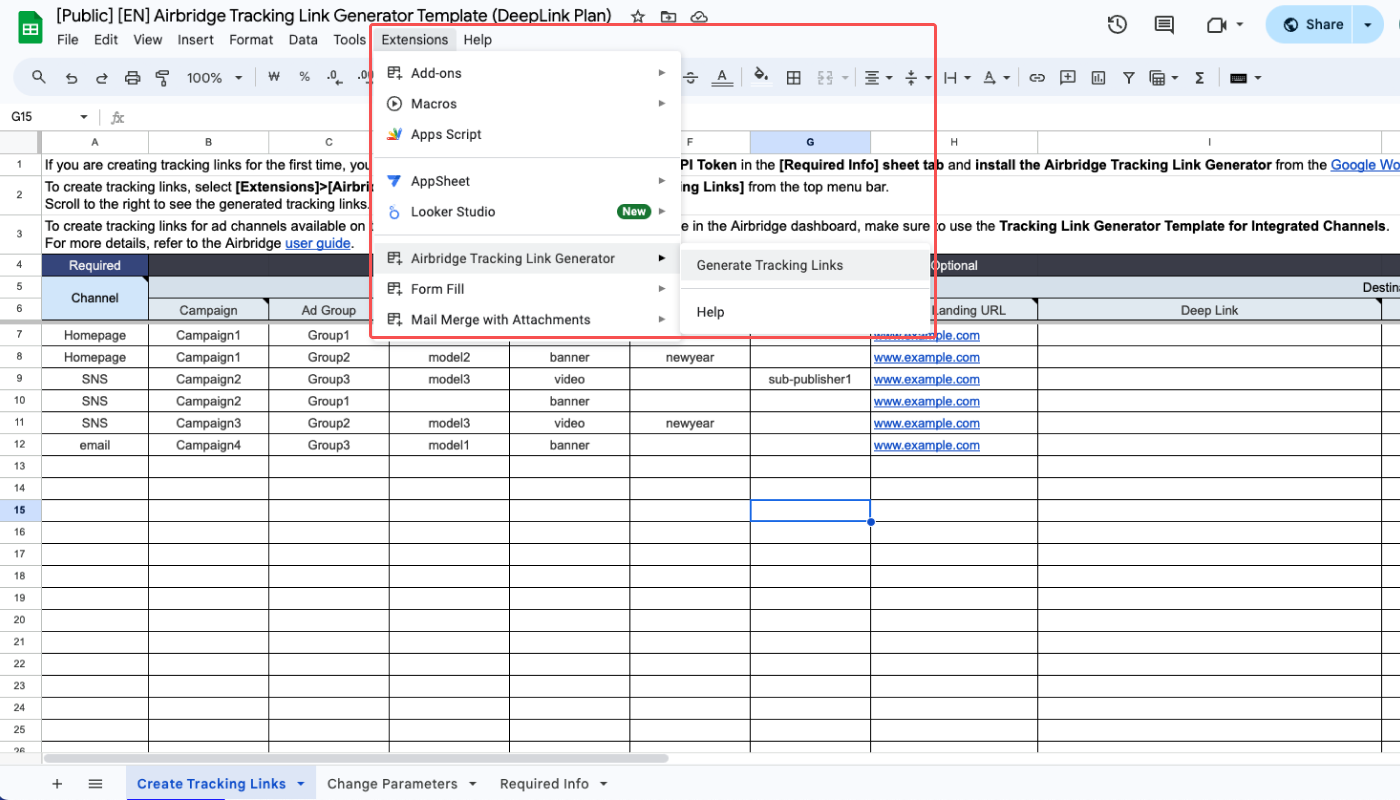
If the Generate Tracking Links button is not visible in your Generator Template or the tracking links are not generated properly, we recommend refreshing the Template or reinstalling the Airbridge Tracking Link Generator.
Once you've completed the steps above, we recommend waiting for 1 to 2 days for Airbridge to collect enough campaign data.
View your data in the Airbridge reports. Refer to the following articles.
User Guide Category |
Description |
Article |
|---|---|---|
DeepLink Plan - Airbridge Reports | View the data collected through the tracking link in the Actuals Report and Trend Report. | |
DeepLink Plan - Glossary | Check the GroupBys and metrics available in the Airbridge Reports. |
Was this helpful?
