Data Connector
Data preparation is the crucial first step in creating a robust marketing mix model. The data connector allows for an easy self-serve data upload as well as integration with third-party solutions, including Airbridge, to prepare data for marketing mix modeling.
Using the MMM Studio’s data connector, you can easily upload a CSV or XSLX file to the data hub and store data for the following data types that must be readied for marketing mix modeling: analysis target, marketing activity, and context variables.
The following data sets must be prepared to perform marketing mix modeling.
Data Set | Description |
|---|---|
Analysis Target | The business outcome or the conversion that represents the success of your marketing activities. It can be anything from installs and subscriptions to revenue, etc. |
Marketing Activity | The data of your marketing activities. Either impression, click, or cost data can be used. |
Context Variables | The external variables that affect the analysis target other than your marketing activities. It can be anything from app ranking in app stores to the number of views on social media, etc. |
The files you upload MUST adhere to the required file formats, which differ by the data type you choose for the upload. Refer to the following when preparing files for self-serve data upload.
You can refer to this sample file and the following table to understand how the file for the analysis target data should be formatted.
REQUIRED Column Header Name | Field Input Format | Description | Field Value Example |
|---|---|---|---|
metric | string | The metric name to be stored in the data hub as the analysis target | Install |
value | float | The numerical metric value | 150 |
date | YYYY-MM-DD | The date the metric value occurred | 2023-08-29 |
The required column header names MUST be included in the file, which are metric, value, and date. Make sure the column header names are input in lowercase letters without spaces.
The file must be less than 100 MB in size. The file name must be less than 80 characters.
All fields in the required columns MUST include values. Input 0 or none, depending on the input format of the column.
All metric column fields must contain the same value, meaning that each file can only contain data of a single metric.
Up to 9 columns can be included in the file, meaning that 6 more columns can be input in addition to the 3 required columns.
Make sure the word “column” is not included in any of the column header names. Duplicate column header names shall not be included.
It is recommended to enter column header names in lowercase and keep them within 60 characters.
You can refer to this sample file and the following table to understand how the file for the marketing activity data should be formatted.
REQUIRED Column Header Name | Field Input Format | Description | Field Value Example |
|---|---|---|---|
metric | string | The metric name to be stored in the data hub as the marketing activity | Cost |
value | float | The numerical metric value | 150 |
date | YYYY-MM-DD | The date the metric value occurred | 2023-08-29 |
channel | string | The ad channel name | Amazon |
The required column header names MUST be included in the file, which are metric, value, date, and channel. Make sure the column header names are input in lowercase letters without spaces.
The file must be less than 100 MB in size. The file name must be less than 80 characters.
All fields in the required columns MUST include values. Input 0 or none, depending on the input format of the column.
All metric column fields must contain the same value, meaning that each file can only contain data of a single metric.
Up to 10 columns can be included in the file, meaning that 6 more columns can be input in addition to the 4 required columns.
Make sure the word “column” is not included in any of the column header names. Duplicate column header names shall not be included.
It is recommended to enter column header names in lowercase and keep them within 60 characters.
You can refer to this sample file and the following table to understand how the file for the context variable data should be formatted.
REQUIRED Column Header Name | Field Input Format | Description | Field Value Example |
|---|---|---|---|
metric | string | The metric name to be stored in the data hub as the context variable | views |
value | float | The numerical metric value | 150 |
date | YYYY-MM-DD | The date the metric value occurred | 2023-08-29 |
The required column header names MUST be included in the file, which are metric, value, and date. Make sure the column header names are input in lowercase letters without spaces.
The file must be less than 100 MB in size. The file name must be less than 80 characters.
All fields in the required columns MUST include values. Input 0 or none, depending on the input format of the column.
All metric column fields must contain the same value, meaning that each file can only contain data of a single metric.
Up to 10 columns can be included in the file, meaning that 7 more columns can be input in addition to the 3 required columns.
Make sure the word “column” is not included in any of the column header names. Duplicate column header names shall not be included.
It is recommended to enter column header names in lowercase and keep them within 60 characters.
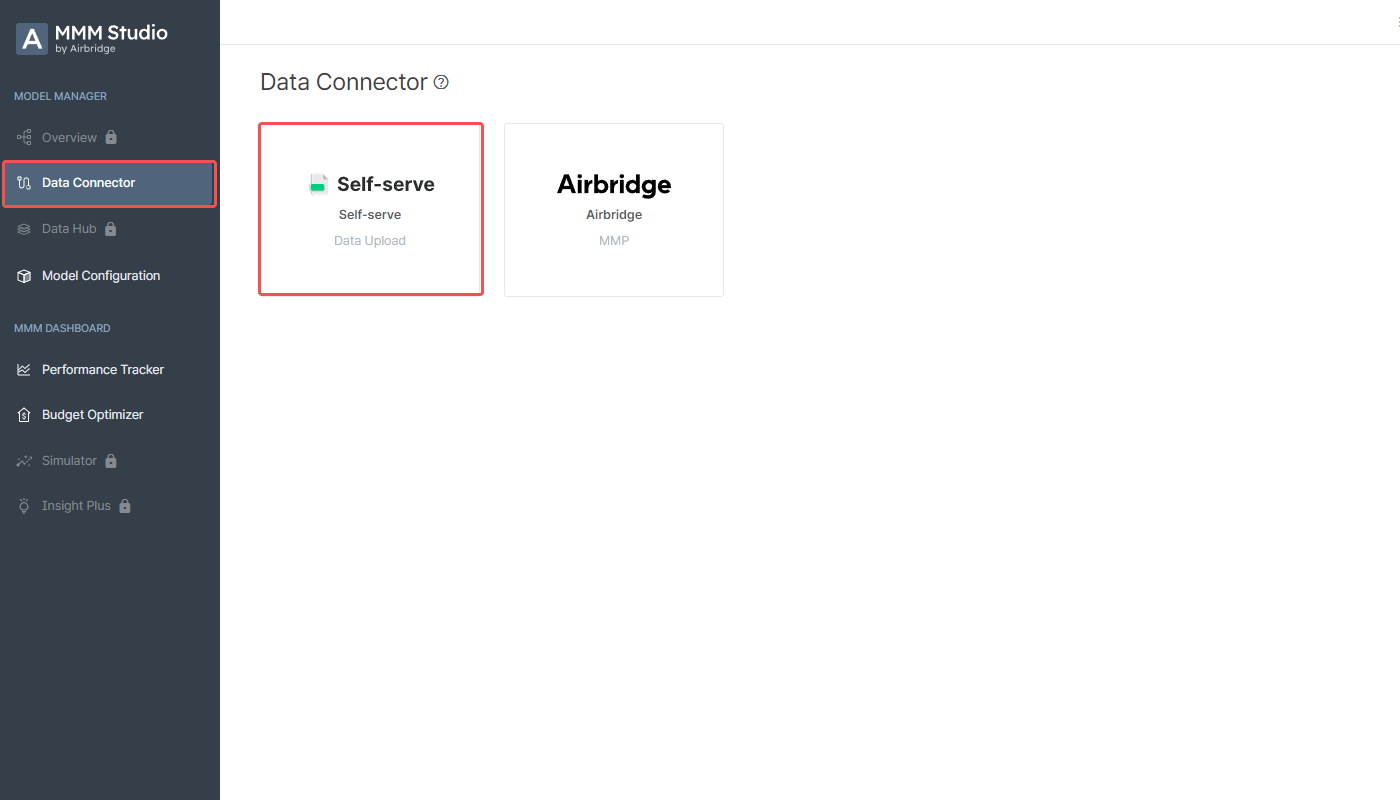
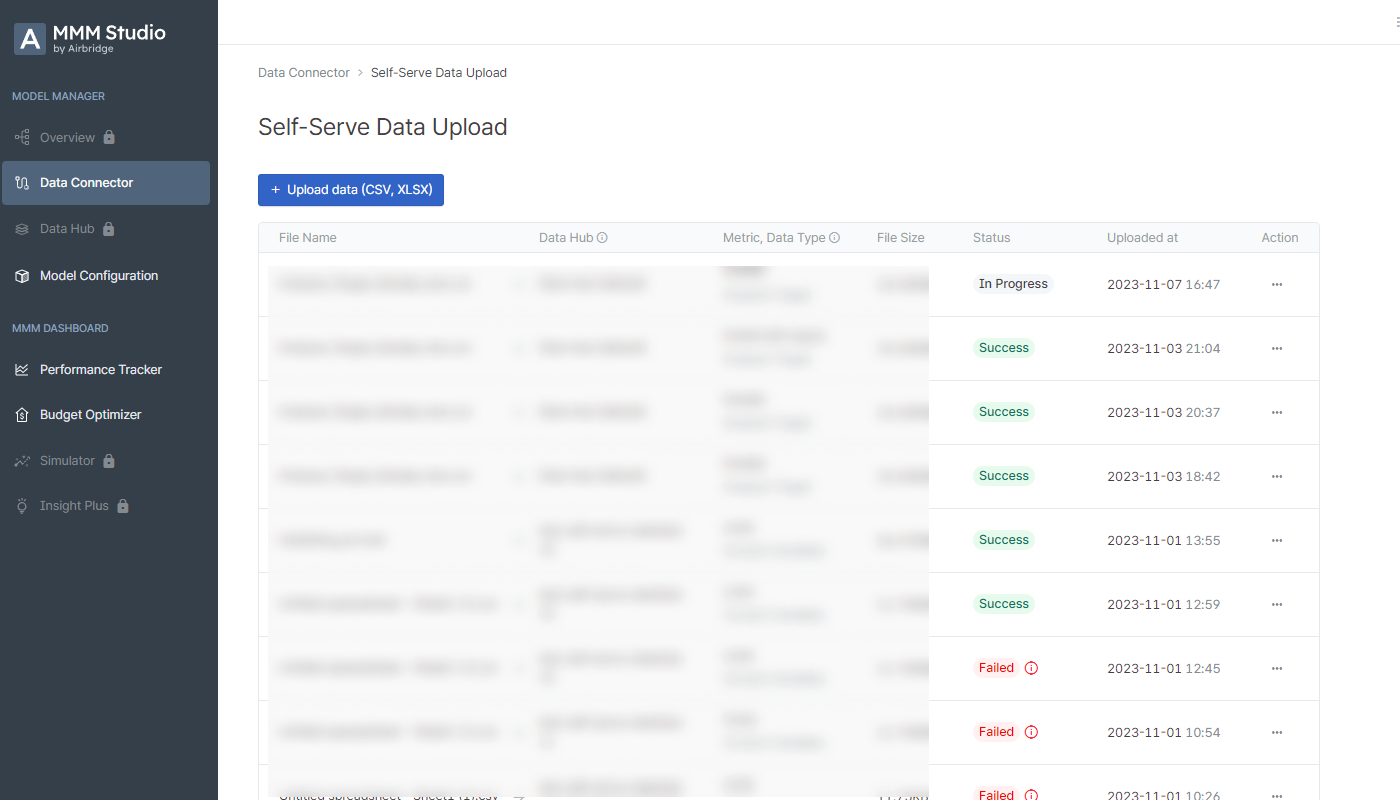
1. Select [Data Connector] from the left menu bar and select “Self-serve.”
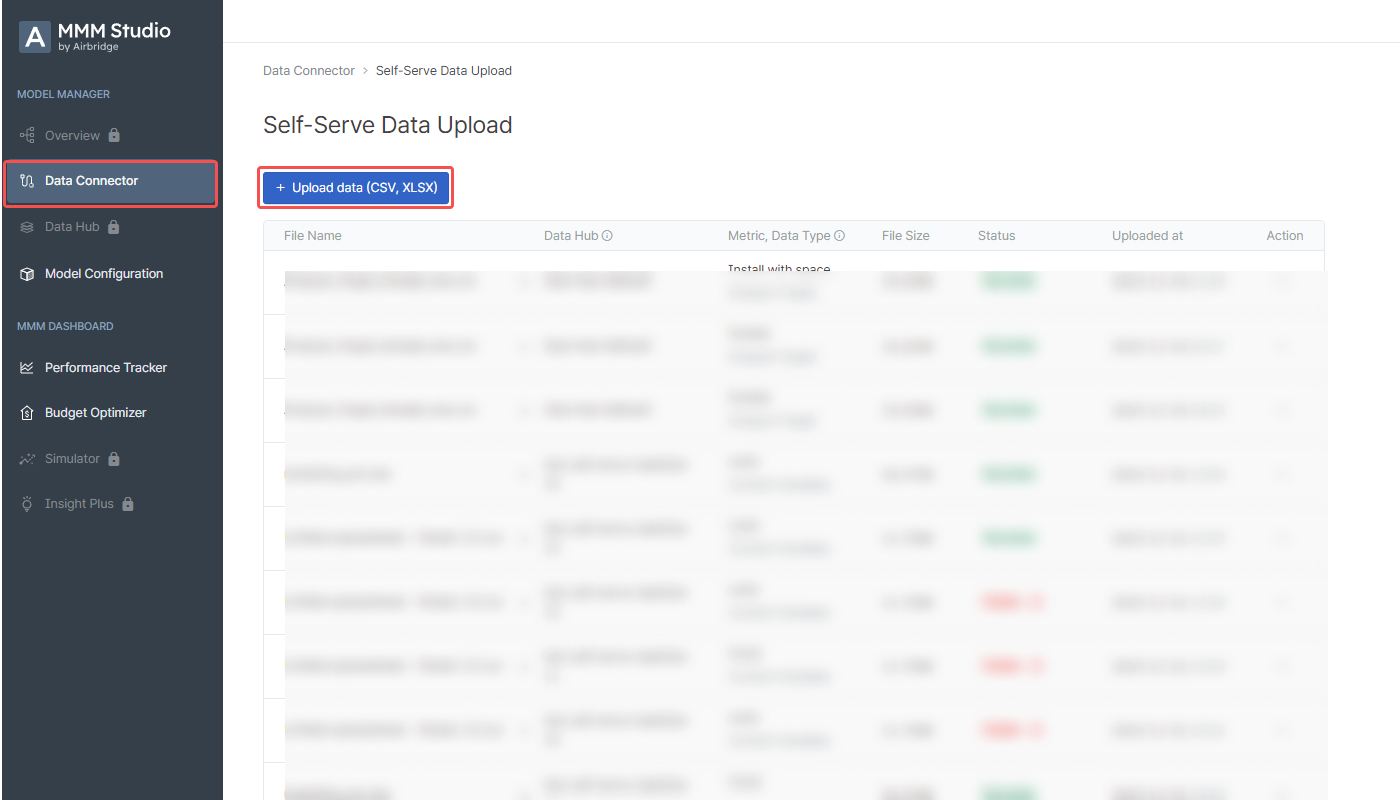
2. Click the “Upload data (CSV, XLSX)” button.
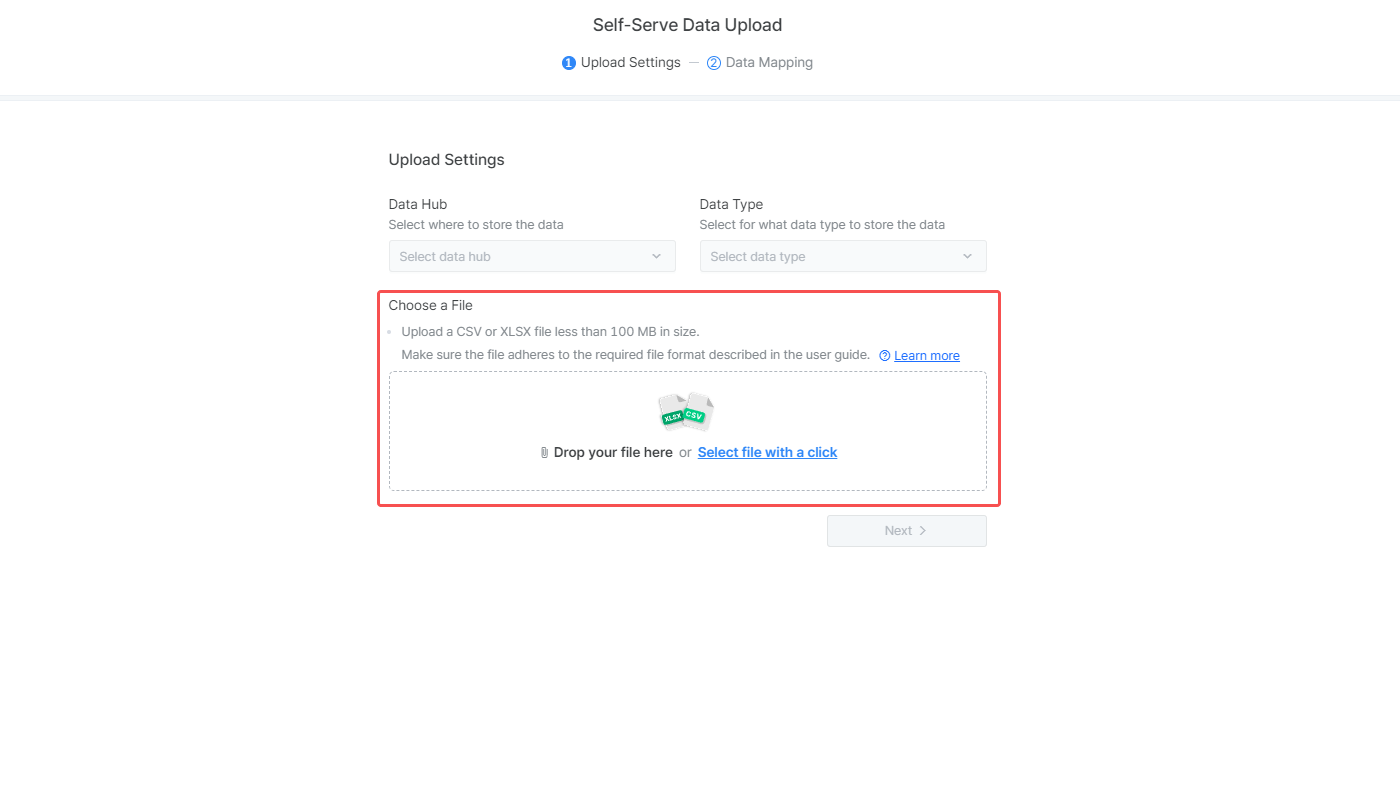
3. Select the data hub where you want to store the data you upload. Then, select the data set type.

4. Drag and drop your file to the upload box or click “Select file with a click” to select your file. Ensure your data is prepared in a file that adheres to the required format. Click “Change file” to replace the file. Then, click the “Next” button.
5. Configure the data mapping table.
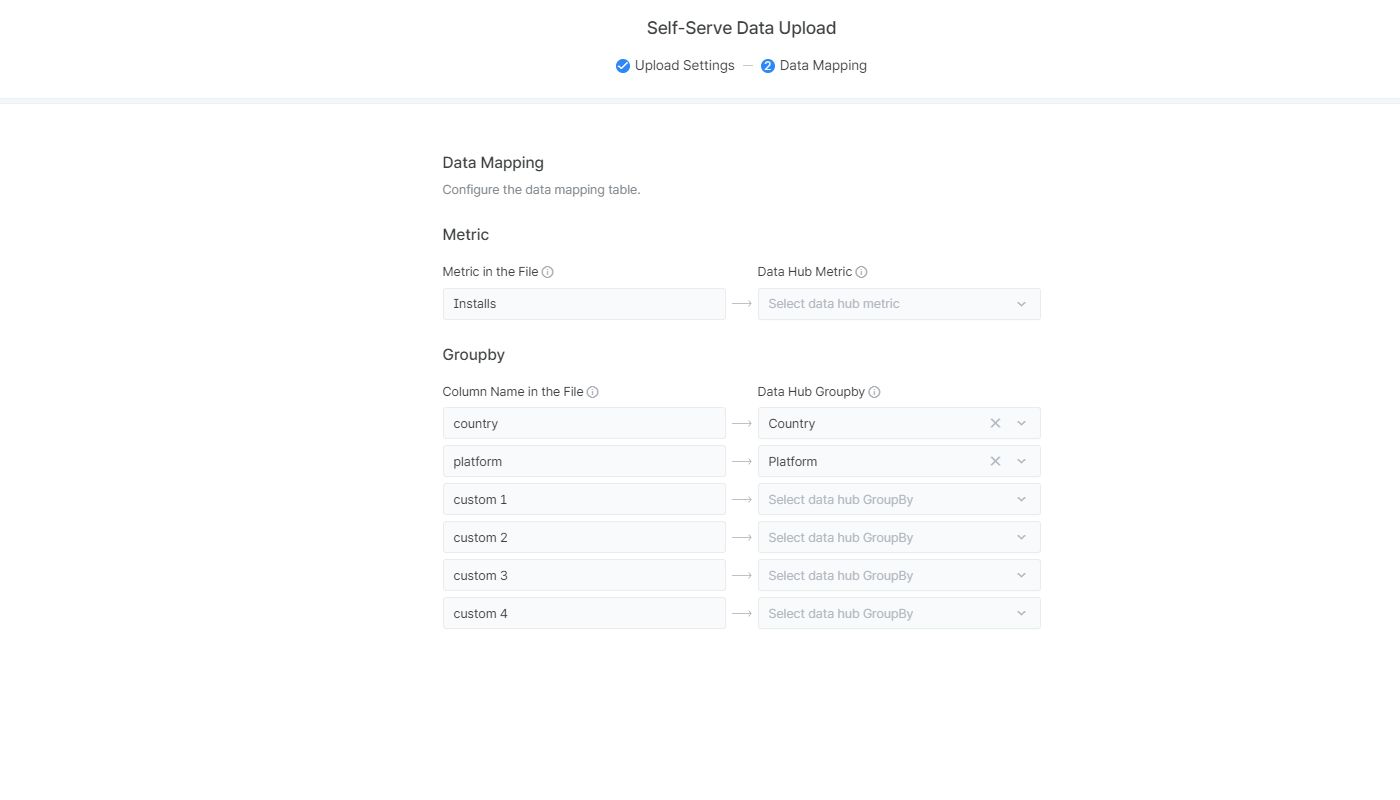
6. Click the “Upload” button to complete the self-serve data upload. Confirm the data type and the metric.

7. The data upload status can be viewed on the [Data Connector]>[Self-Serve] page. The time for the data to be saved in the data hub varies depending on the file size. It takes about 10 minutes for a file of 10MB to be stored in the data hub.
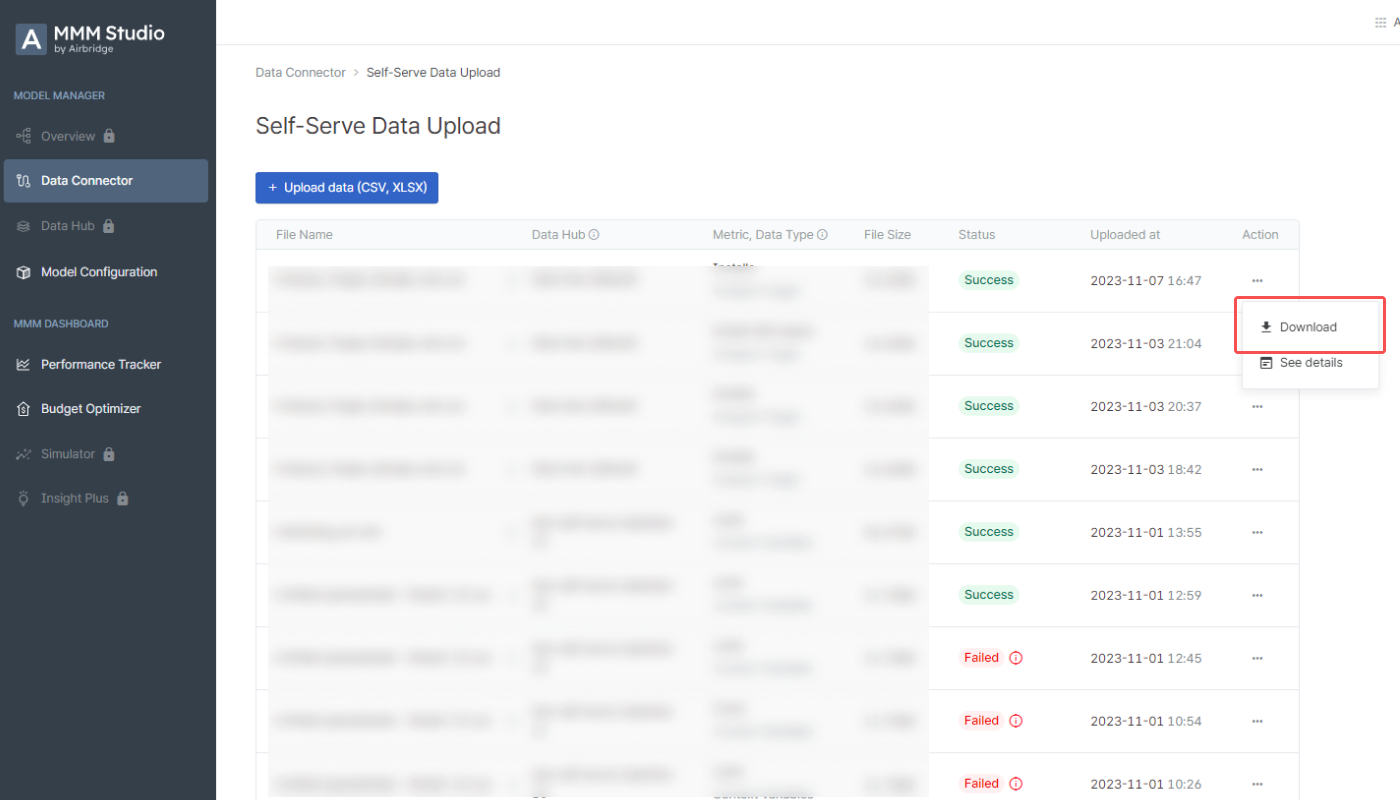
Click the […] action icon and select “Download” to download the uploaded file.
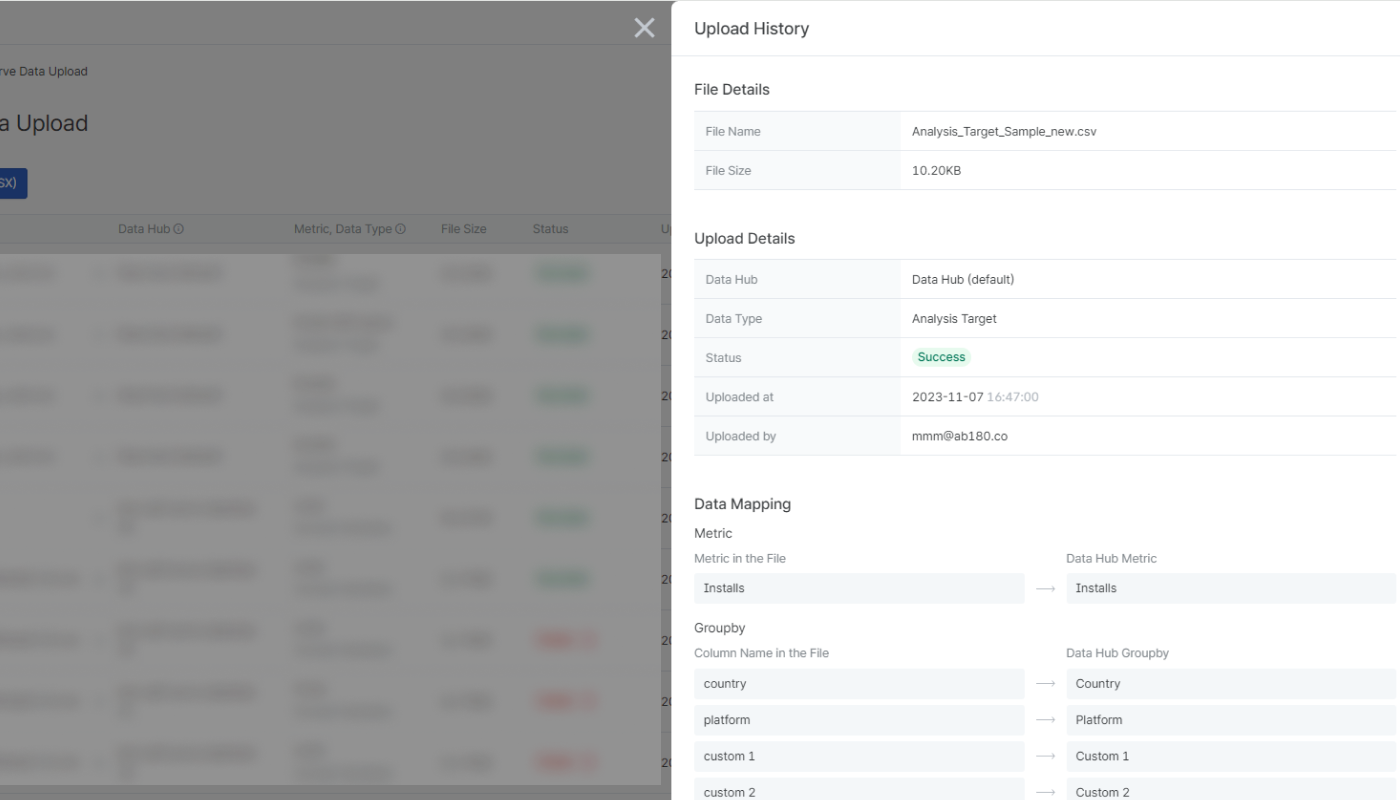
Click the […] action icon and select “See details” to see the file information, upload details, and data mapping table.

The failed upload histories can be deleted. Click the […] action icon and select “Delete history” to delete.

The following status messages will show in the [Status] column. Refer to thissection to solve errors. If you have problems with uploading your file, contact us at dl_mmm@ab180.co.
Status | Description |
Success | The file has been successfully uploaded and stored in the designated data hub. |
In progress | The file is being uploaded and stored in the designated data hub. The time it takes to complete depends on the file size. It takes about 10 minutes for a 10MB file. |
Waiting | The file is in the queue for upload. When the uploading begins, the status will change to “In progress.” |
Failed | The file could not be uploaded. Click the exclamation icon to find the cause of the error. |
Most of the problems occur because the file does not adhere to the required format. Check your file again and make sure your network connection is working.
When the data upload fails, click the exclamation icon next to the "Failed" badge to find the cause of the error.

Cause of error | Resolution |
Required column(s) missing | Add the missing columns and upload the file again. |
Excess number of columns | Adjust the columns and upload the file again. |
Duplicate column header names | Remove the duplicate column header names and upload the file again. |
Column header name missing | All columns that contain a value must have a column header name. Input the column header name and upload the file again. |
Column header name includes “channel” | The word “channel” shall not be included in the column header name for the analysis target data. Remove or change the column header name and upload the file again. |
Value(s) missing in the required column(s) | All fields in the required columns must contain a value. Input all values and upload the file again. |
Metric column values not identical | All metric column values must be identical. Adjust your data and upload the file again. |
Invalid data input format | Adjust your data and upload the file again. |
Note
The data connector is available to paid plan users only. If you are considering a paid plan, contact the MMM Studio team at dl_mmm@ab180.co.
If you want to explore the MMM Studio before contacting the team, you can use the demo data to create a sample marketing mix model. Select [Model Configuration] from the sidebar, click the “Create a new model” button, and select “Data Hub (Demo)” as the data hub.
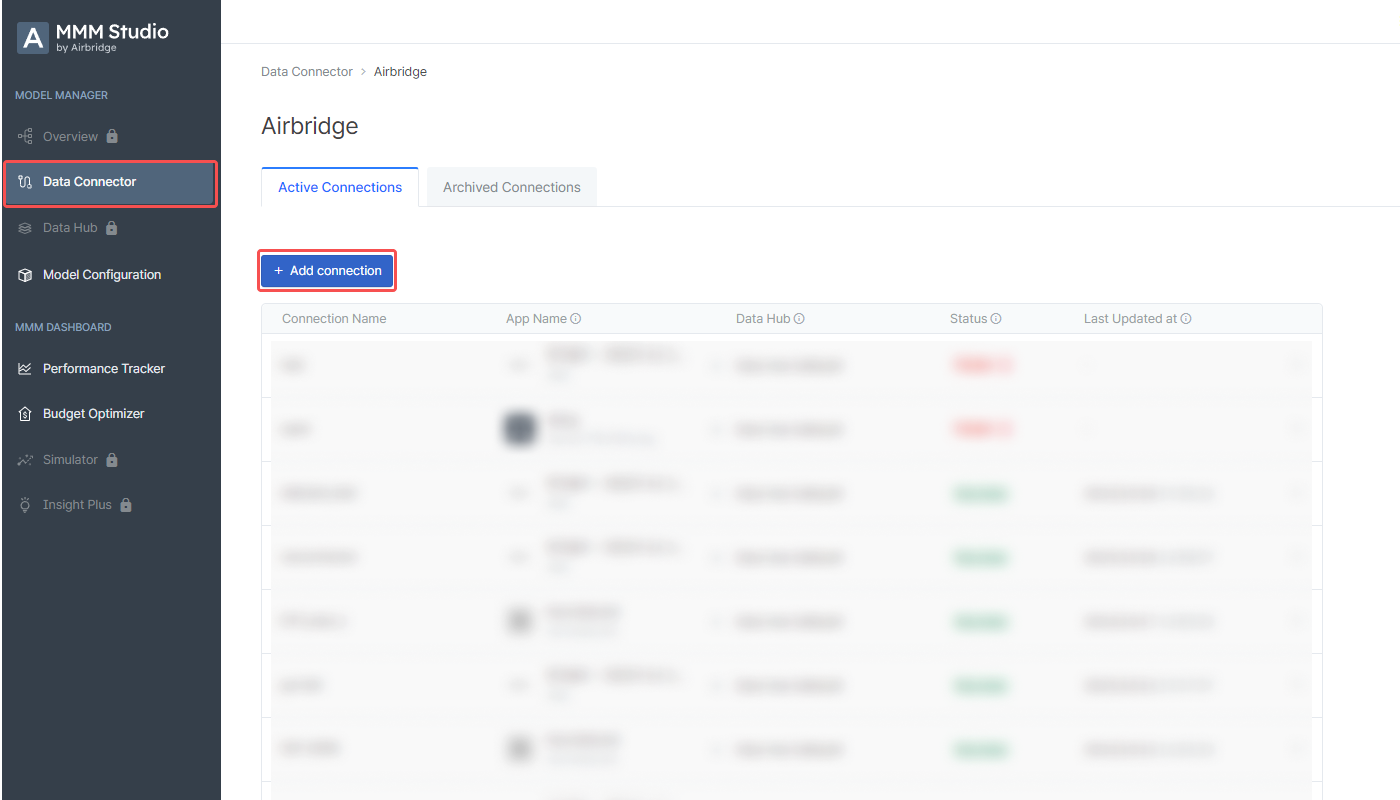
1. Select [Data Connector] from the sidebar in the MMM Studio and select “Airbridge.”

2. Click the “+Add connection” button.
What is a connection?
A connection is an element required for importing Airbridge data to the MMM Studio. When adding a connection, you can configure the connection details and the data you want to import. Multiple connections can be added.
Enter the connection name. The connection name must be unique and consist of fewer than 32 characters.
Select the data hub where you want to save the data you import.

Caution
Only Owner and In-house Marketer users have access to the API token of the app registered to Airbridge in the Airbridge dashboard.
1. Sign in to your Airbridge account and navigate to [Settings]>[Tokens] in the Airbridge dashboard to find the app name and the API token. For more details, refer to this article.
You can easily open the [My Apps] page list in your Airbridge account by clicking "Airbridge" to find the app name and API token.
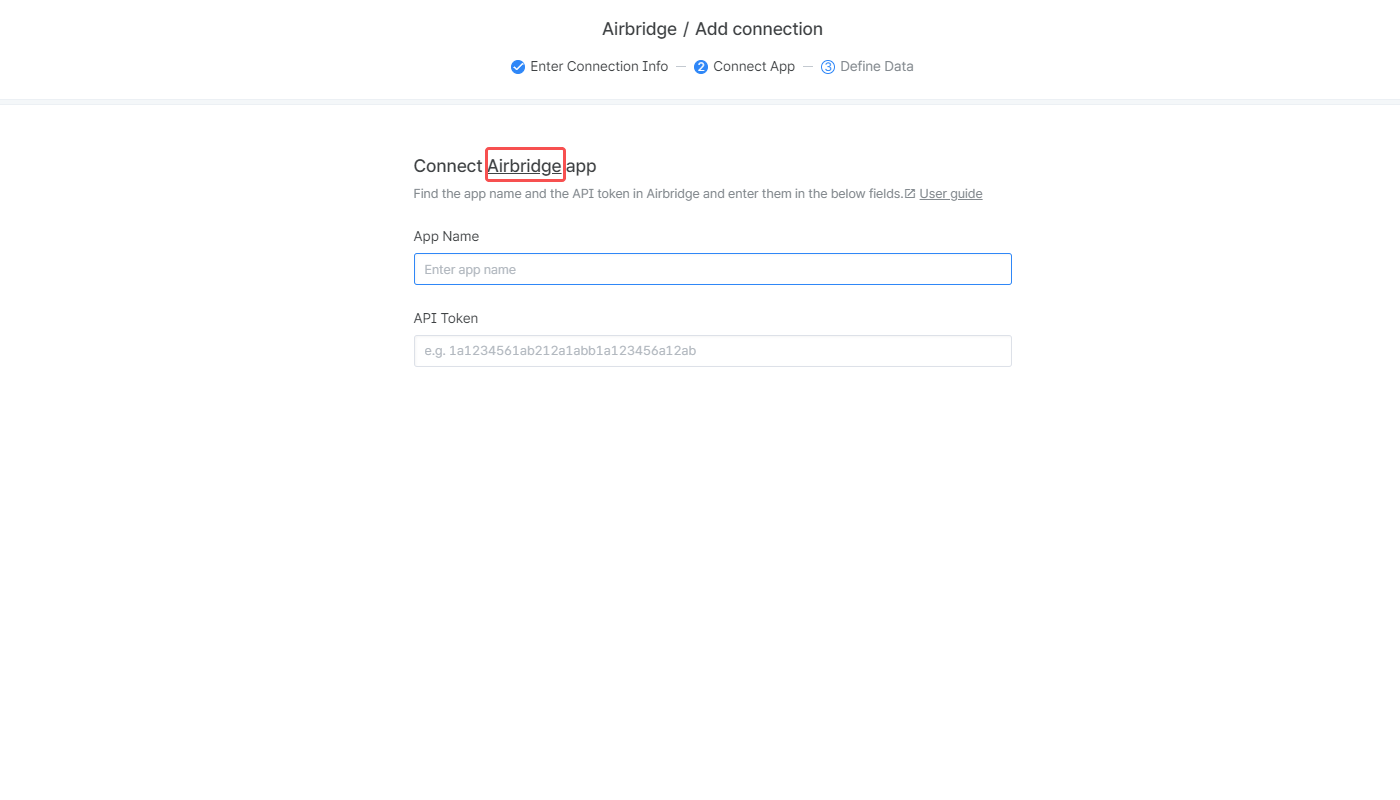
2. Enter the app name and the API token into the respective fields in the MMM Studio.
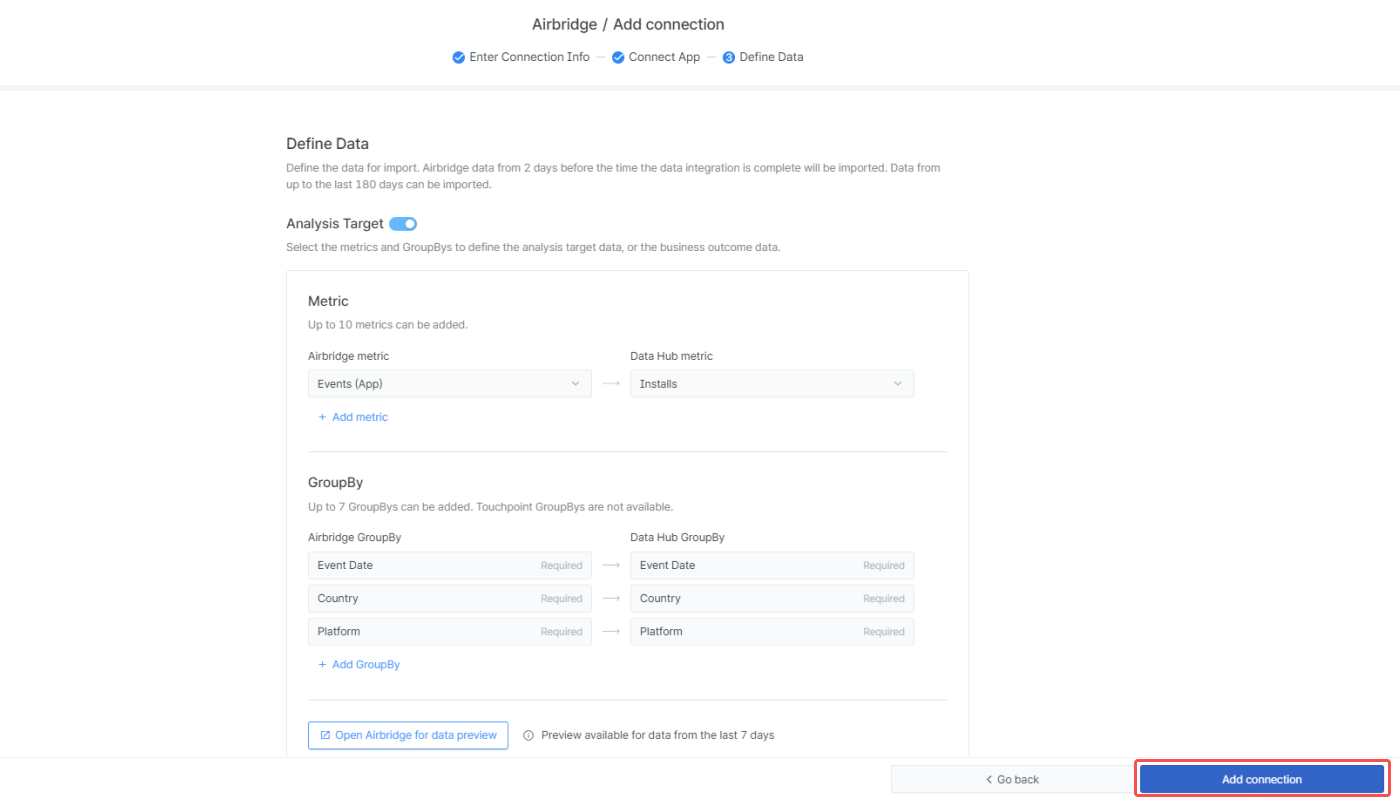
Switch on the toggles to define the data you want to import from Airbridge for marketing mix modeling. Airbridge data from 2 days before the time the data integration is complete will be imported. Data from up to the last 180 days can be imported. For marketing mix modeling, the following two data sets are required:
Analysis target: Conversion or metrics that measure the business outcome
Marketing activity: Metrics that measure the marketing activities

2. Select the metrics and GroupBys of the data you want to import and decide under what names to save them in the data hub.
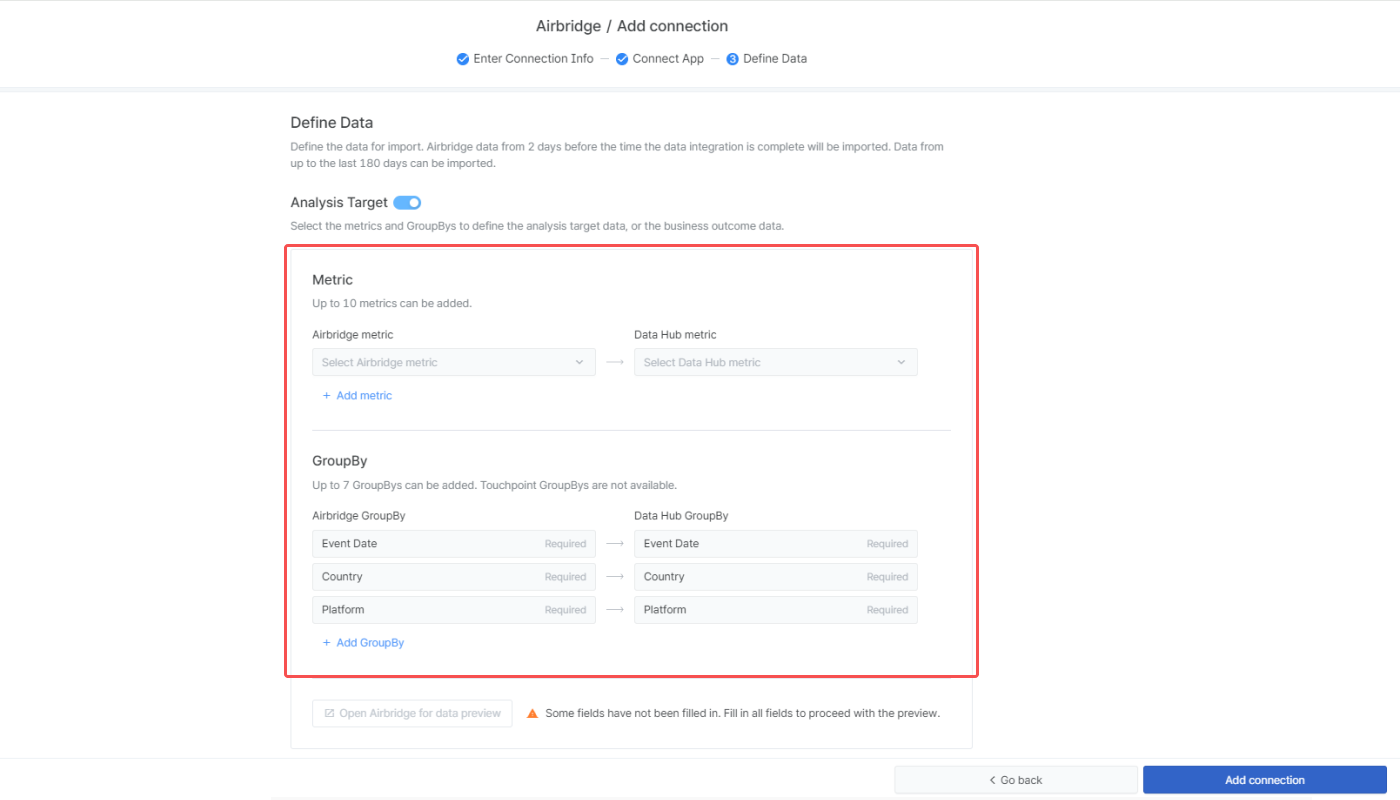
Metric: At least 1 metric must be selected. Click “+Add metric” to add metrics and the [minus] icon to delete metrics.
GroupBy: Event Date, Country, and Platform are selected by default and can’t be deleted. Click “+Add GroupBy” to add GroupBys and the [minus] icon to delete GroupBys that have been added.
| Max. number of options you can select | Required option (default) | Non-available option |
|---|---|---|---|
Metric | 10 | None | Touchpoint metrics, cost metrics |
GroupBy | 7 | Event Date, Country, Platform | Touchpoint GroupBys |
Metric: Clicks, Impressions, Clicks (Channel), Impressions (Channel), and Cost (Channel) are selected by default and can’t be deleted. No other metric can be added.
GroupBy: Event Date, Country, Platform, and Channel are selected by default and can’t be deleted. Click “+Add GroupBy” to add GroupBys and the [minus] icon to delete GroupBys that have been added.
Max. number of options you can select | Required option (default) | Non-available option | |
Metric | 5 | Clicks, Impressions, Clicks (Channel), Impressions (Channel), Cost (Channel) | All metrics other than the required options |
GroupBy | 8 | Event Date, Country, Platform, Channel | None |
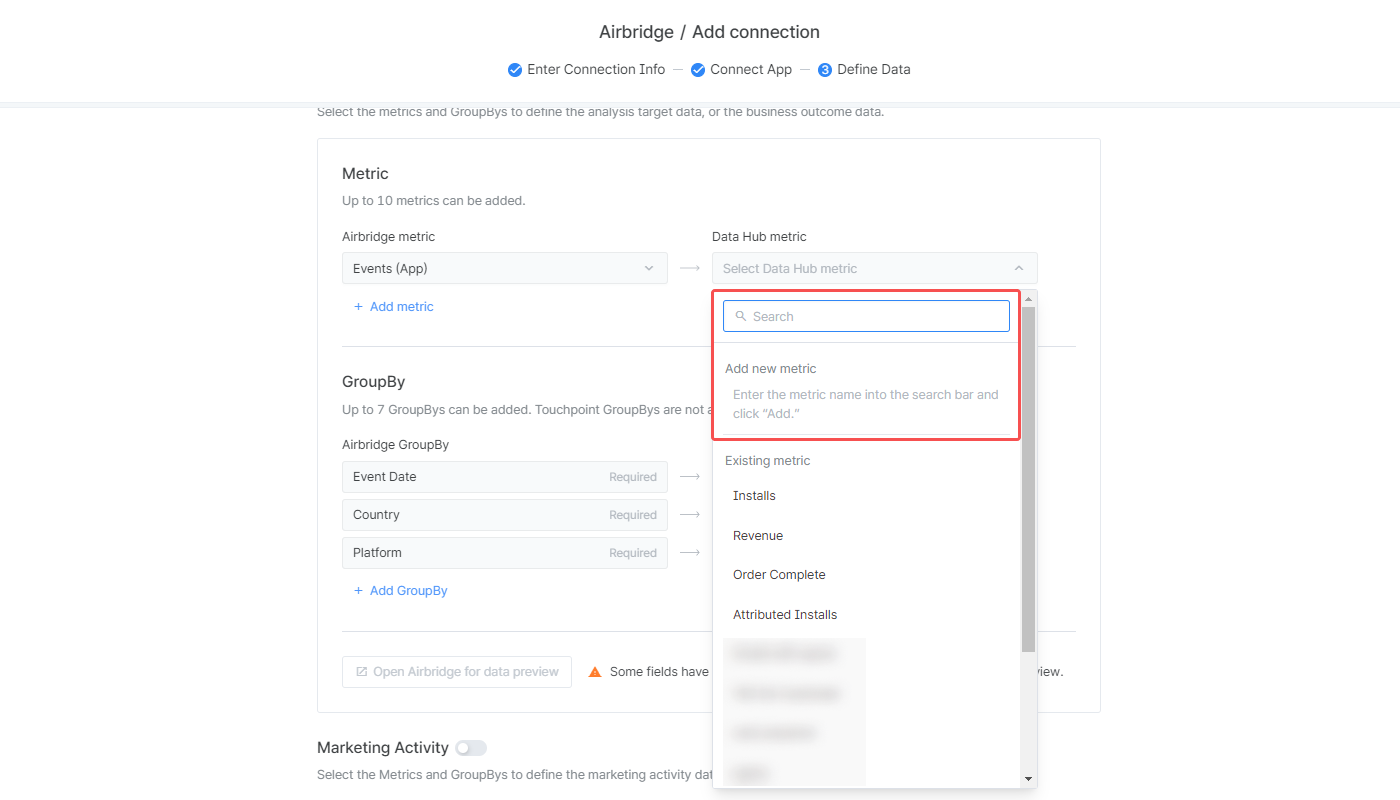
Metric
Analysis Target metrics: Installs, Revenue, Order Complete
Marketing activity metrics: Clicks, Cost, Impressions
If you want to add a new metric, enter the metric name in the search bar and click “Add.”
GroupBy
Event Date: Automatically mapped to the Airbridge GroupBy,
Event Date
Channel: Automatically mapped to the Airbridge GroupBy,
Channel
Country: Automatically mapped to the Airbridge GroupBy,
Country
Platform: Automatically mapped to the Airbridge GroupBy,
Platform
Custom 1, Custom 2, Custom 3, Custom 4: Can be mapped to any Airbridge GroupBy

3. When clicking the “Open Airbridge for data preview” button, you can view data of the last 7 days with the selected metrics and GroupBys applied to the Actuals Report in the Airbridge dashboard that will open in a separate tab.
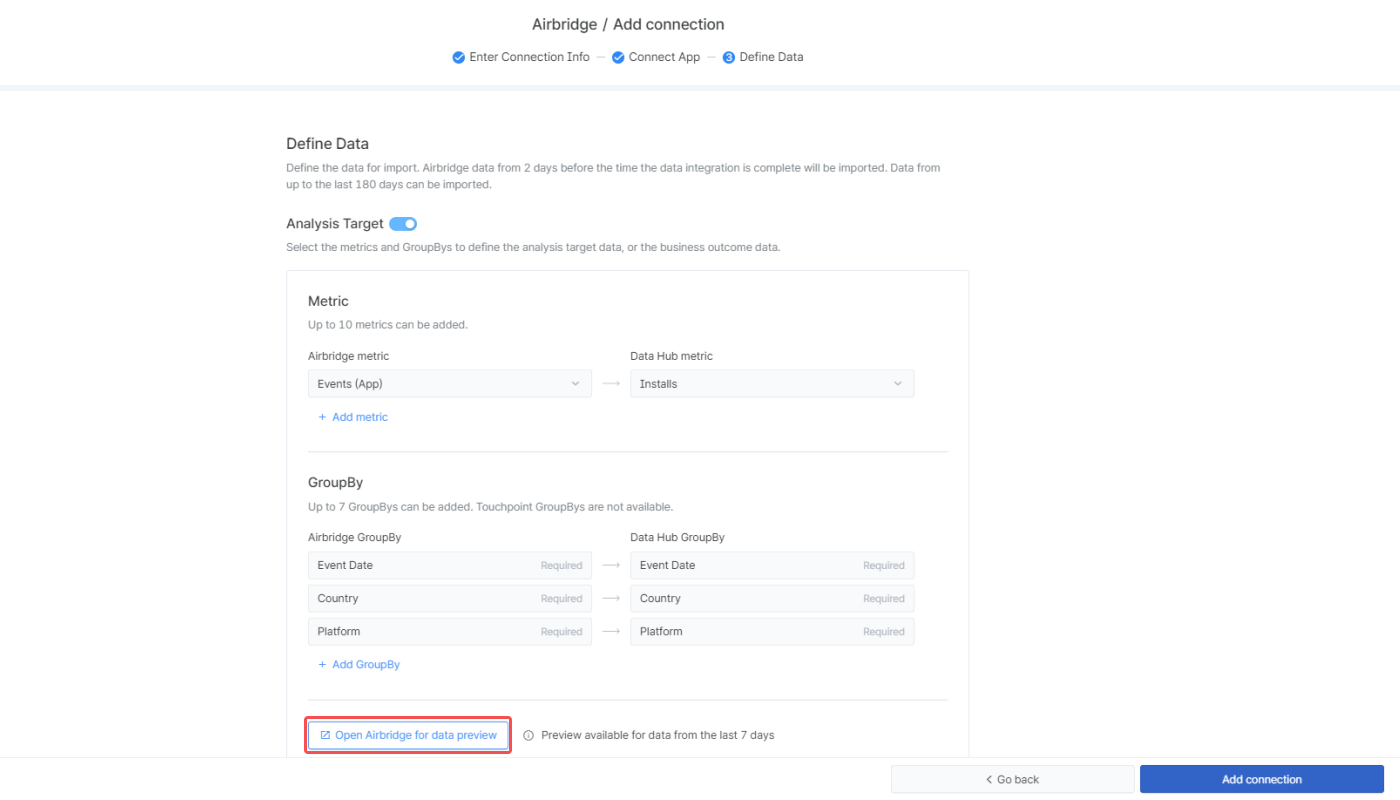
4. Once the configuration is complete, click the “Add connection” button.
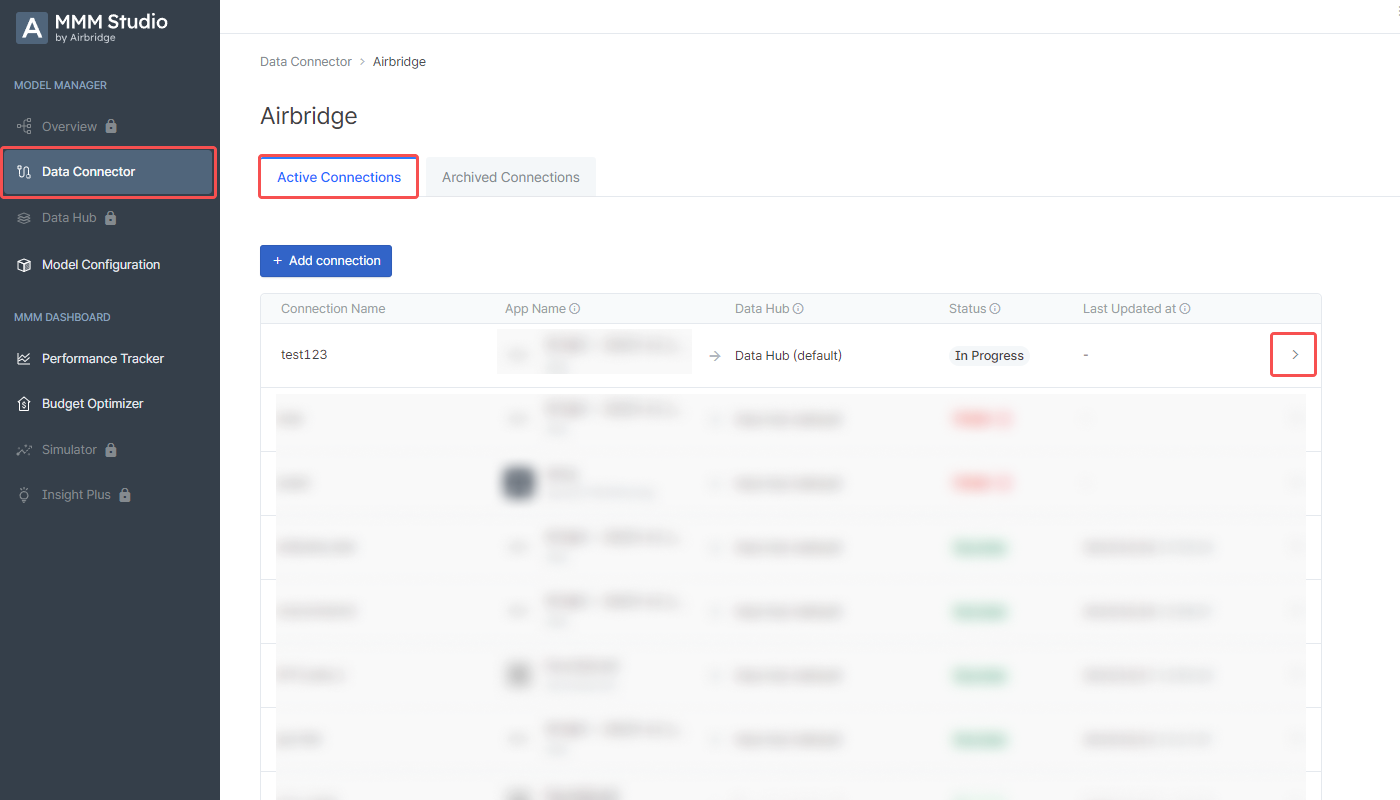
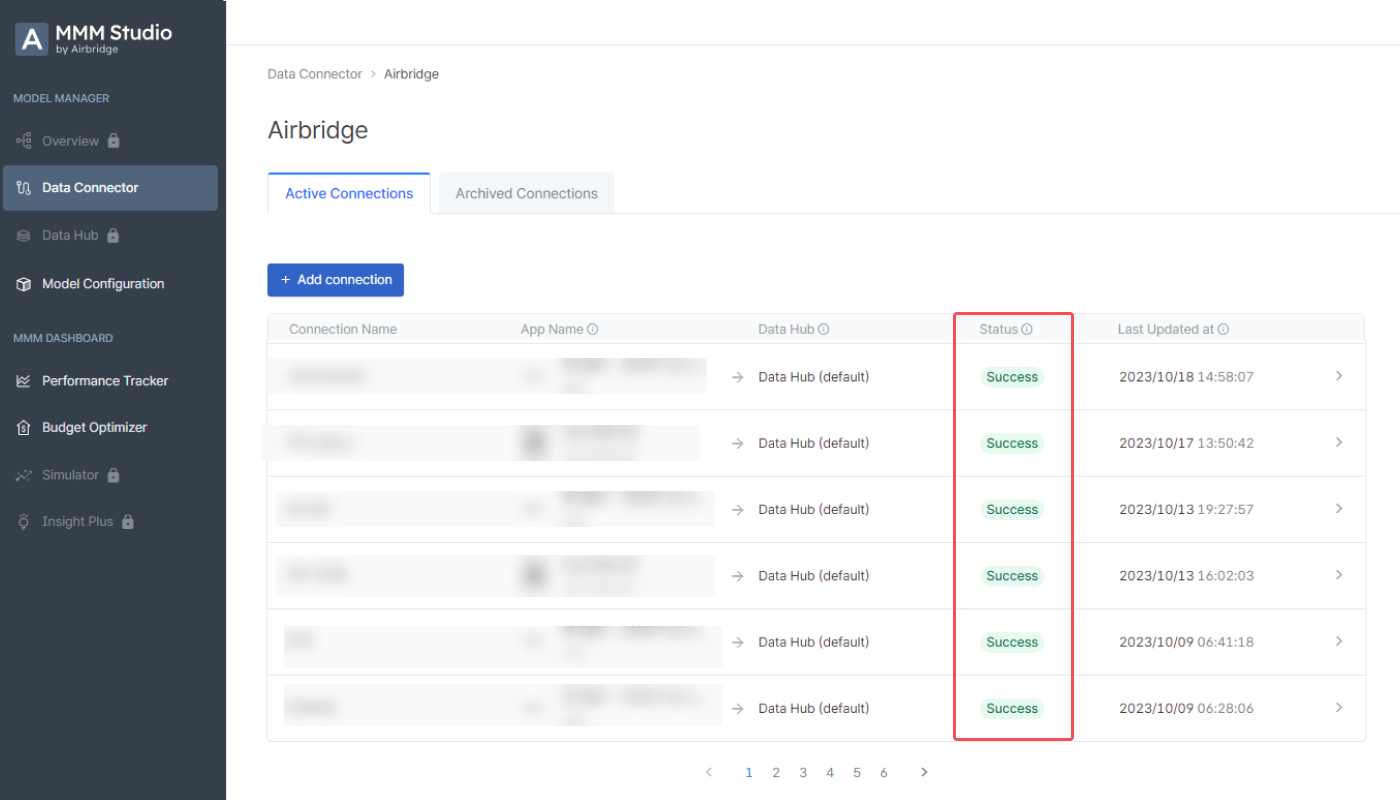
The added connections are listed in the [Active Connections] tab.

Click the [Arrow] icon on the right of each connection to view the connection details.
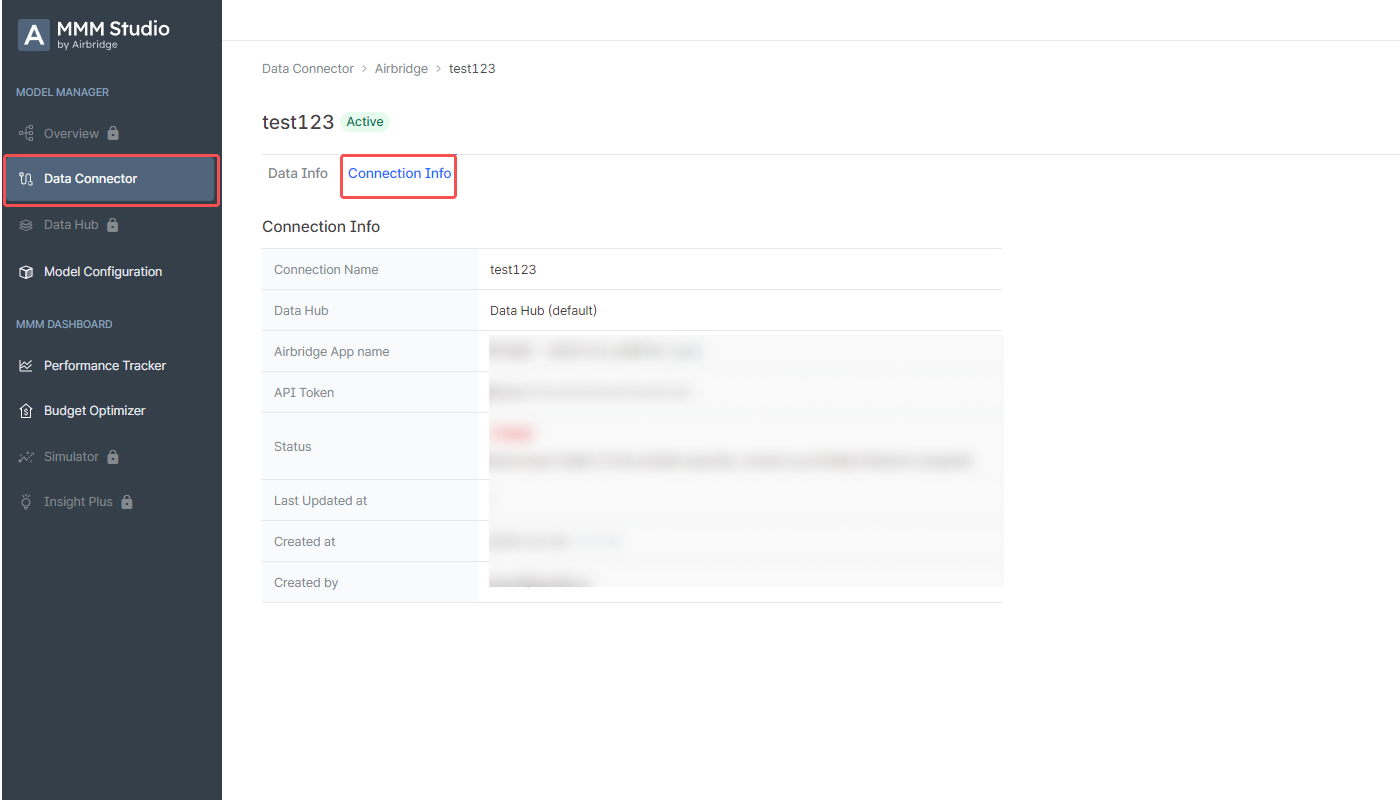
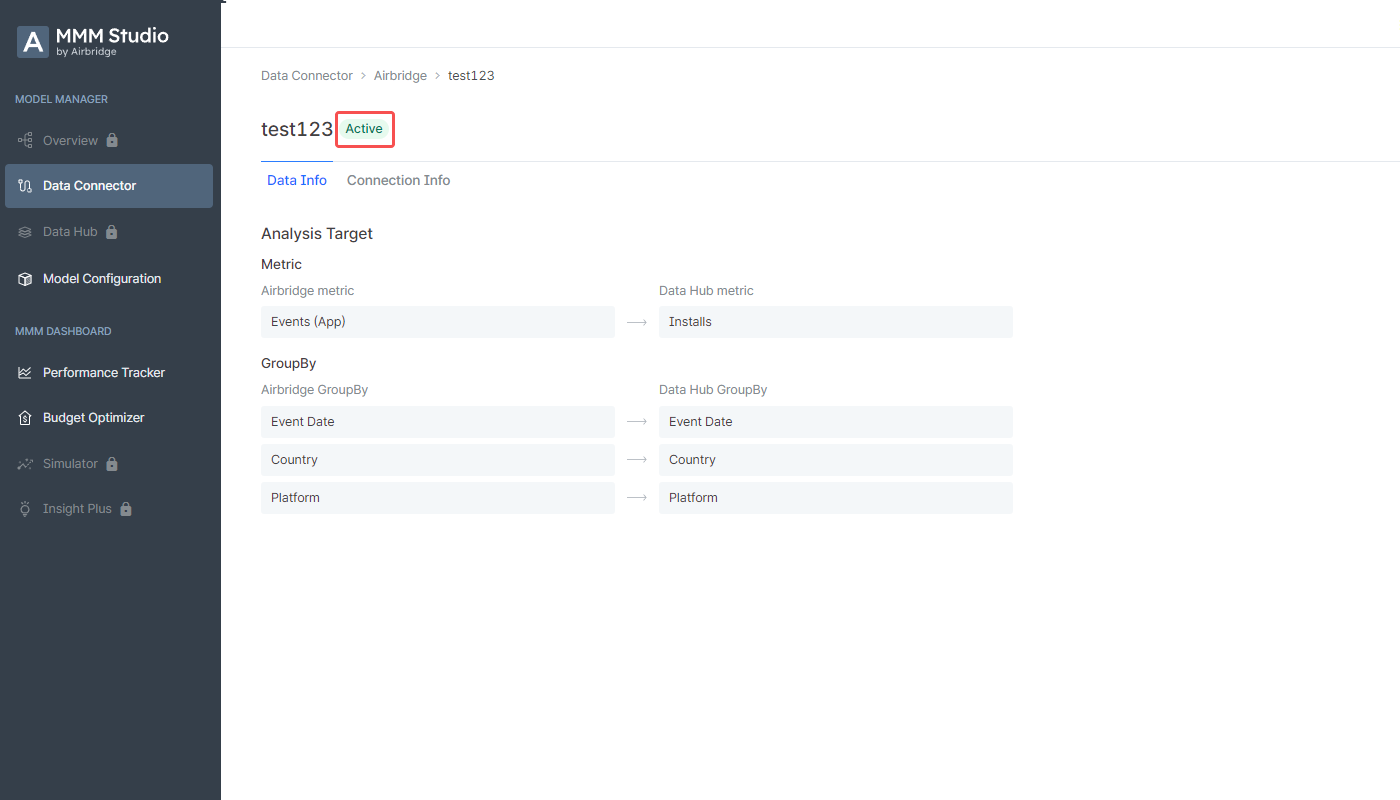
Select the [Data Info] tab to view the details of the data imported via the connection, including the event mapping list.

Select the [Connection Info] tab to view the details of the connection, including the connection name, the data hub where the data is saved, and more.
Click the “Settings” button and select “Duplicate” to copy the connection details. The connection details will be copied to create a new connection where you can make further adjustments.

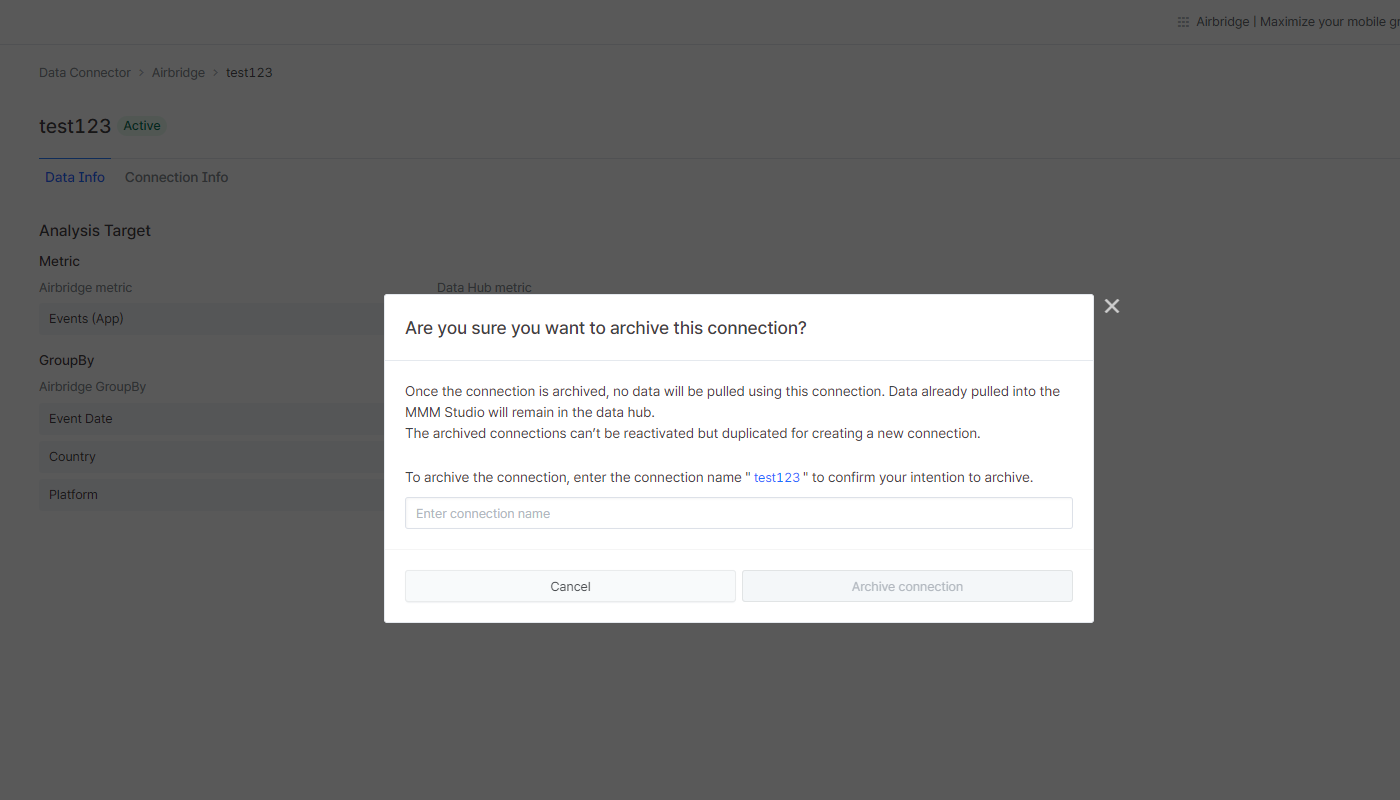
Click the “Settings” button and select “Archive” to archive the connection. In the popup window, enter the connection name into the field to confirm your intention to archive the connection.

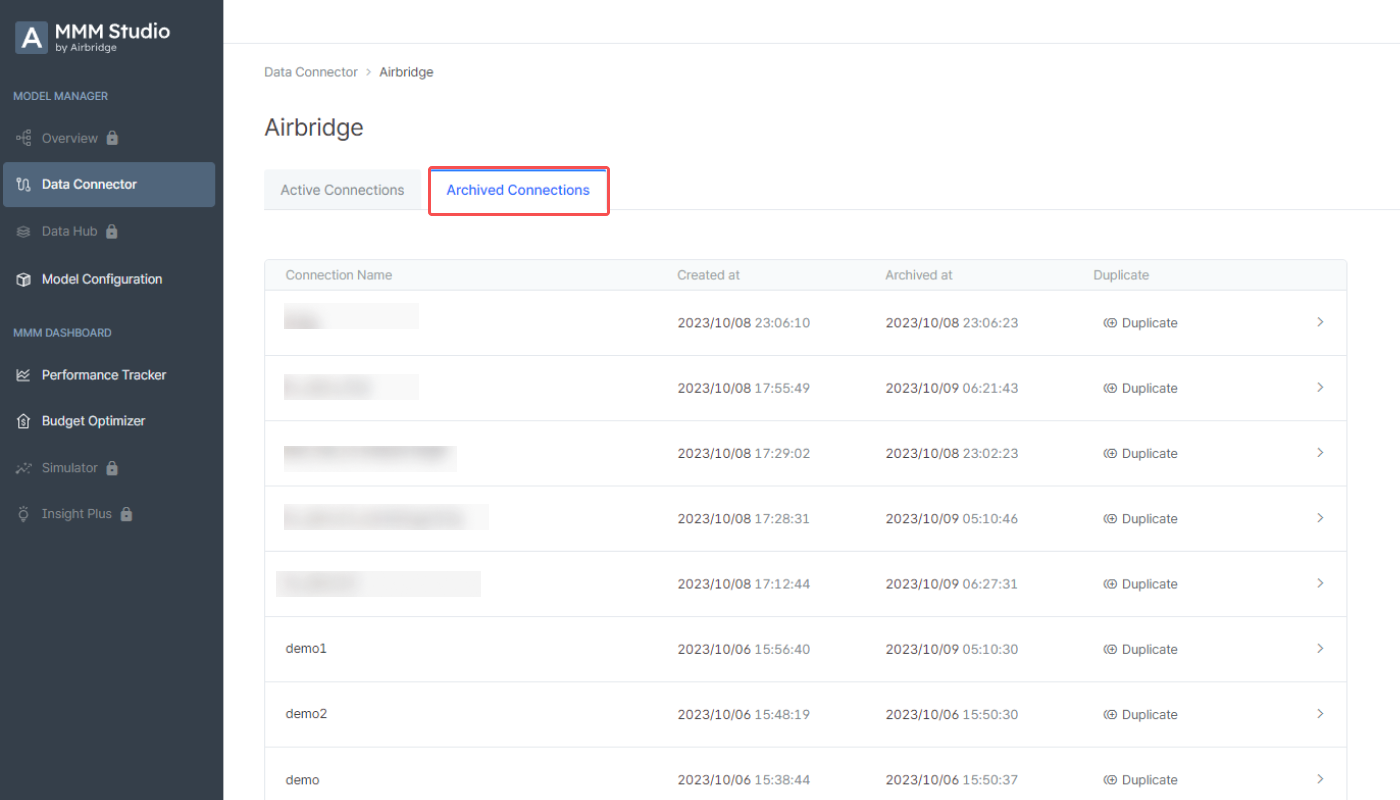
The archived connections are listed in the [Archived Connections] tab, where you can view when the connection was created and archived. The archived connections can’t be reactivated but duplicated. Click “Duplicate” to copy the connection details for creating a new connection. Data pulled from Airbridge before the connection is archived remains in the data hub even after the connection is archived.
Status | Description |
|---|---|
Success | The data import is complete. |
In progress | The data import is in progress. |
Failed | The data import failed. Check whether the API token has been correctly provided and try again. |
Status | Description |
|---|---|
Active | The connection is active and ready for data import. |
Archived | The connection has been archived. The archived connections are listed in the [Archived connections]. |
Was this helpful?