
Pre-setup
Complete the following steps before using the Generator Template.Install the Airbridge Tracking Link Generator
Install the Airbridge Tracking Link Generator
- Go to Google Workspace Marketplace and install the Airbridge Tracking Link Generator. We recommend logging in to your Google account first before clicking Install.
- When the pop-up window opens asking for your permission, click Continue.
- Choose a Google account to continue.
- Scroll down and click Allow.
- When the pop-up window opens confirming the install, click Done.
Find the App Name and Tracking Link API Token
Find the App Name and Tracking Link API Token
The App Name and Tracking Link API Token can be found on the [Settings]>[Tokens] page. You can copy the values by clicking on them.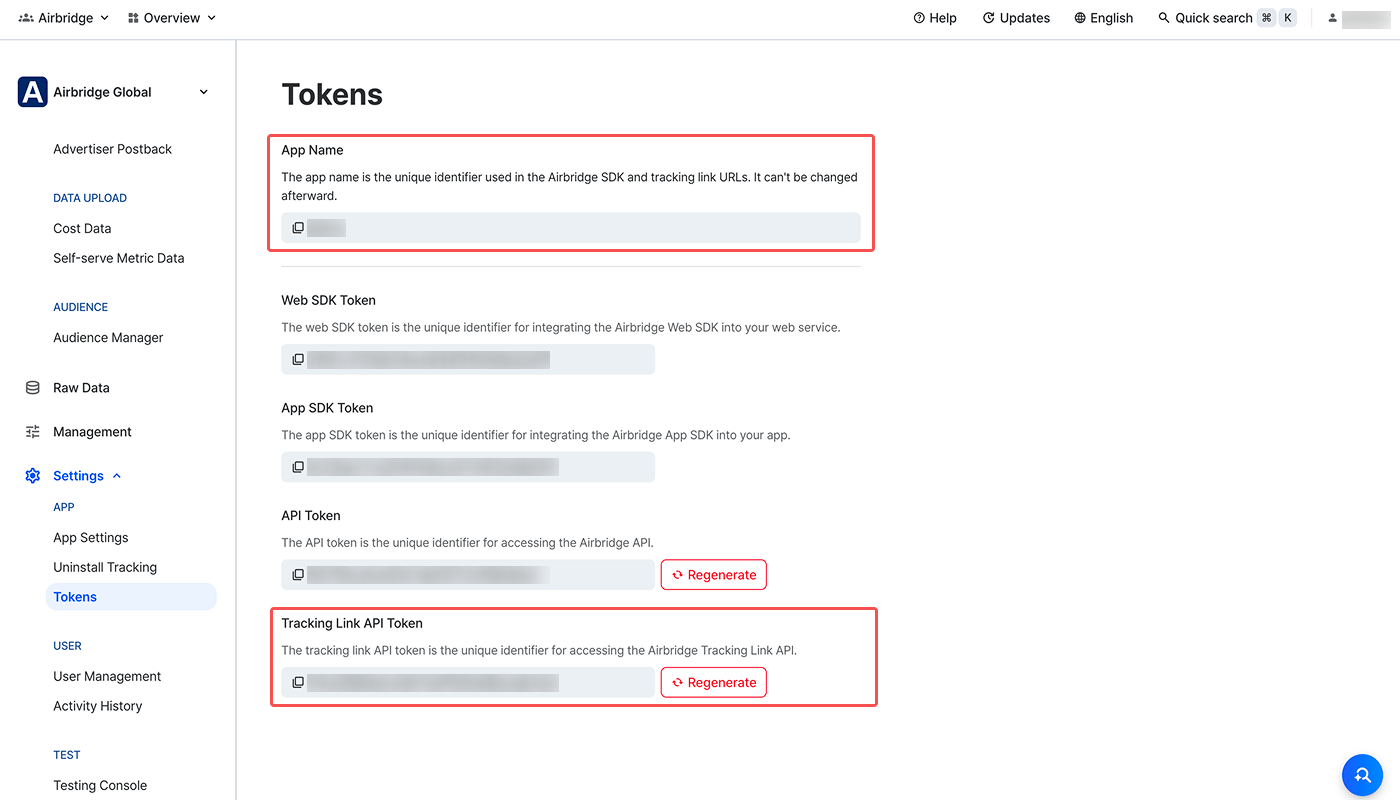
Creating Tracking Links in Bulk
Click the link below to create a copy of the Airbridge Tracking Link Generator Template (DeepLink Plan). Follow the steps below to create tracking links using the Generator Template.Creating tracking links using the Generator Template
Creating tracking links using the Generator Template
- Create a copy of the Airbridge Tracking Link Generator Template (DeepLink Plan). The new copy will be saved in your Google Drive. You’ll need to be logged in to your Google account.
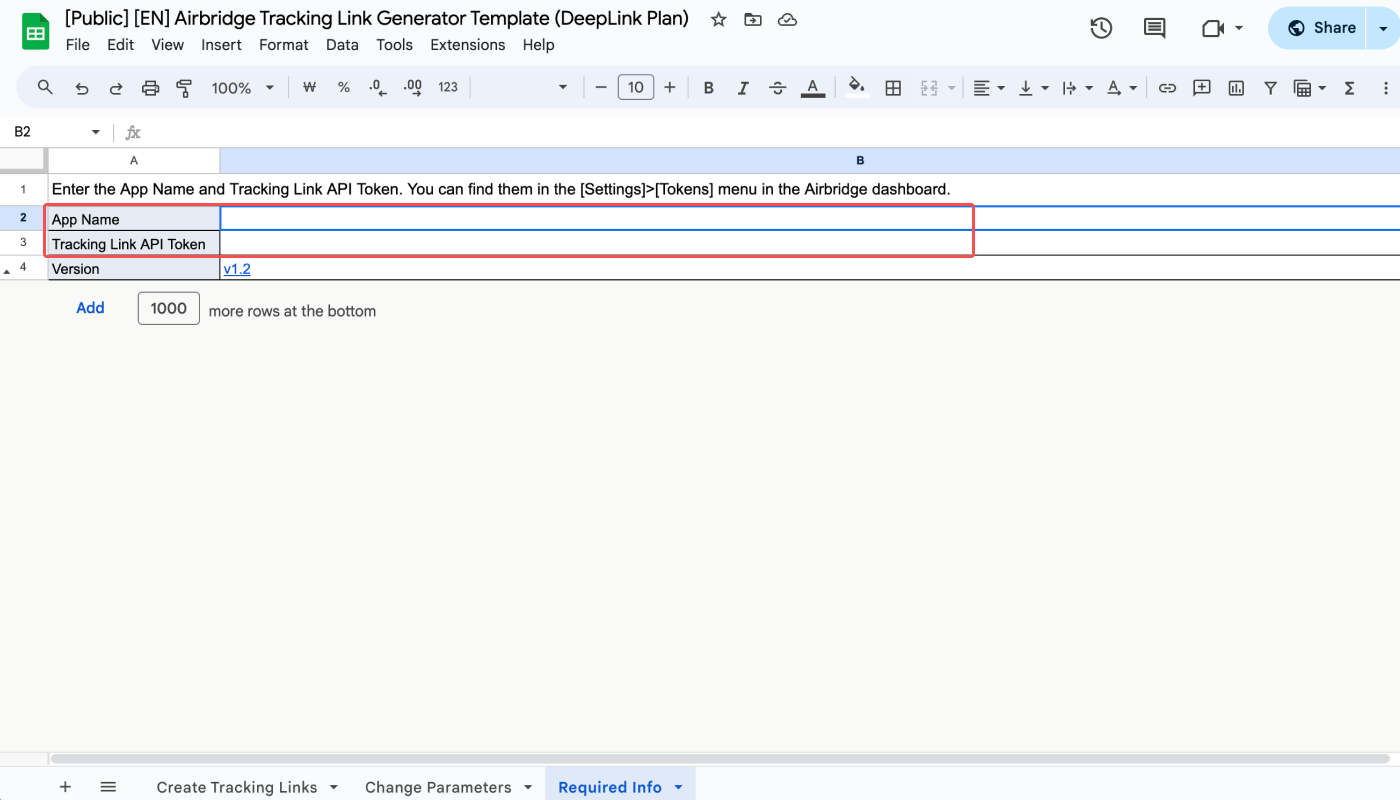
- In the [Required info] tab, enter the App Name and Tracking Link API Token, which can be found on the [Settings]>[Token] page of the Airbridge dashboard.
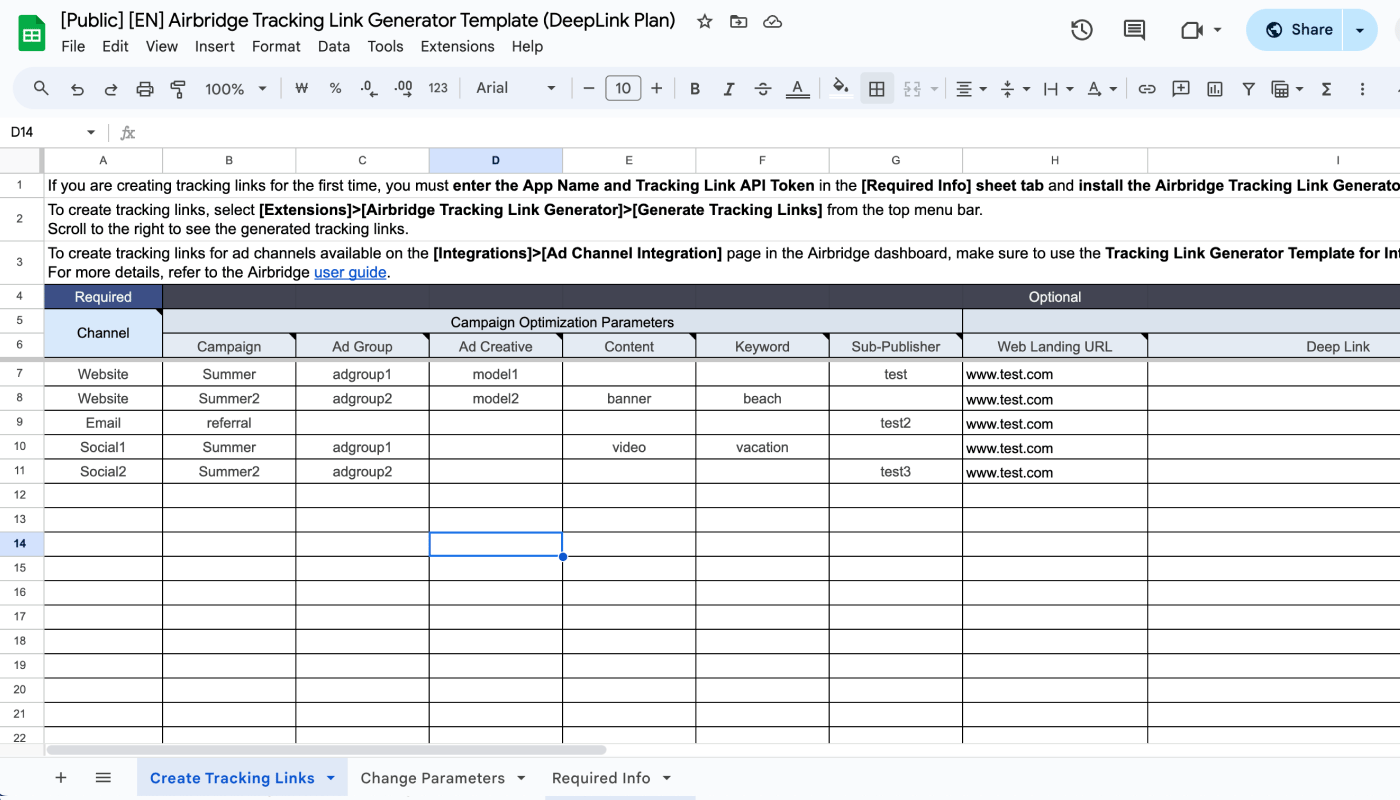
- Enter the parameter values in the [Create Tracking Links] tab. The Channel parameter is a required field. Others are not required to create a tracking link. Only lowercase letters, numbers, and underscores are supported. Do not enter special characters or spaces.
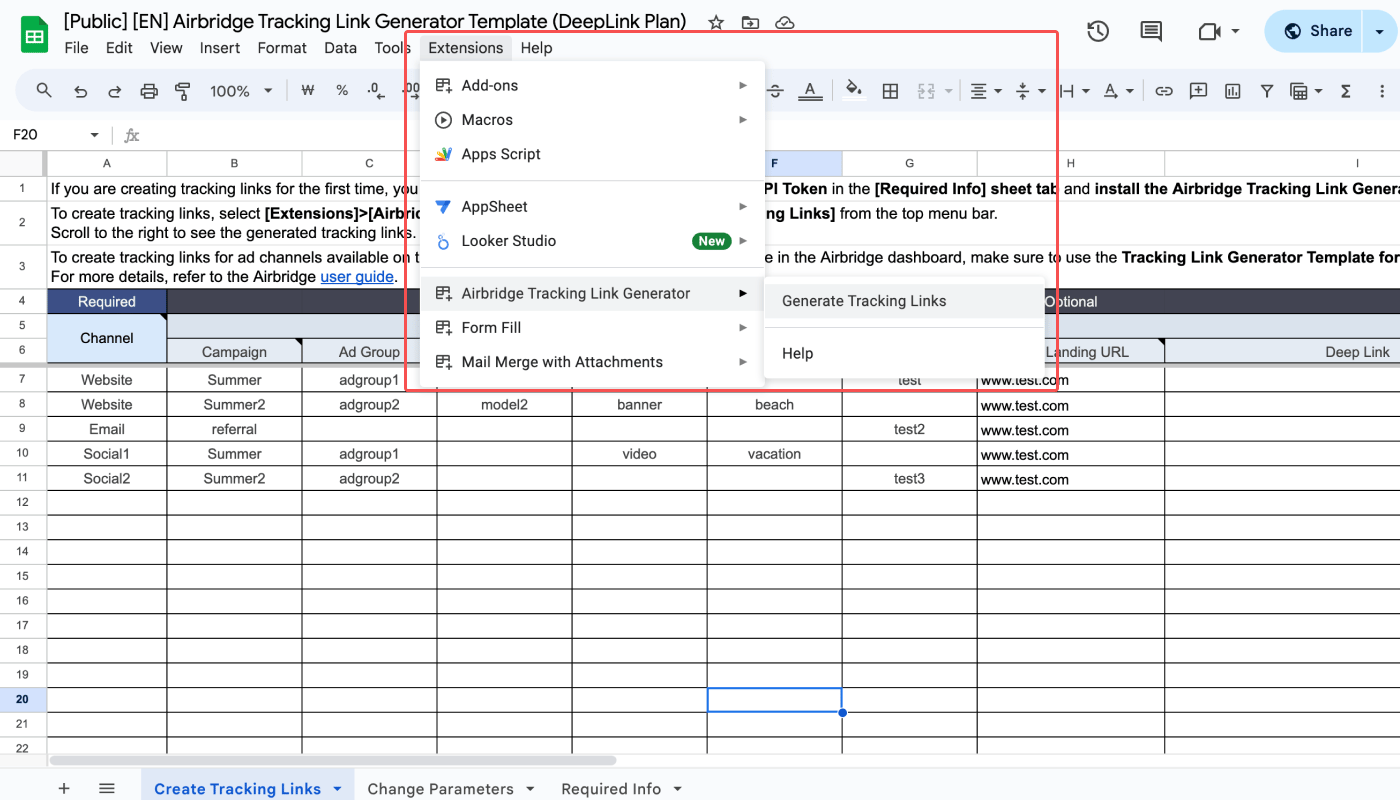
- Select [Extensions]>[Airbridge Tracking Link Generator]>[Generate Tracking Links] from the top menu bar to create tracking links.
Editing parameters of a tracking linkOnce a tracking link is created, the changes made to the parameter values in the Generator Template won’t be applied. If you want to make changes to the parameters of a tracking link, delete the tracking link and create a new one.
Managing tracking links created with the Generator Template
Managing tracking links created with the Generator Template
When you create a tracking link using the Tracking Link Generator Template, up to 2 types of tracking links are generated.
- A tracking link with click as
ad_type - A short version of the tracking link
Parameters
Refer to the information below to learn about different parameters.Channel
Channel
The Channel parameter is a required field. Only lowercase letters, numbers, and underscores are supported. Do not enter special characters or spaces.
Campaign Optimization Parameters
Campaign Optimization Parameters
Campaign optimization parameters are used to collect data for campaign optimization. The parameters can be selected as GroupBys or a filter option in the Airbridge reports.
Destination
Destination
The destination path is the URL where users are directed after clicking an ad with the tracking link embedded.
Sending users to specific destinations per platformBy filling in the “Android Fallback,” “iOS Fallback,” and “Desktop Fallback” fields with the respective destination URLs while leaving the “Web Landing URL” and “Deep Link” fields empty, users will always be redirected to the respective destinations.
Short Link ID
Short Link ID
Enter the short link ID for tracking link branding. If not entered, it will be randomly set and can’t be changed afterward. To be able to use this feature, you need to set your custom domain in your Airbridge dashboard.
Changing parameter values
If you want to edit the parameter values of tracking links you created in the Generator Template, you can do so in the [Change Parameters] tab of the Generator Template. While the Tracking Link API is used to create tracking links in the [Create Tracking Links] tab, the REGEXREPLACE function allows for quick parameter value replacement in the [Change Parameters] tab. Moreover, unlike the [Create Tracking Links] tab, the [Change Parameters] tab is not subject to Google Apps Script’s script runtime limitation.How to change parameter values
- From the [Create tracking links] tab, enter link names for tracking links in the Link Name column. The link names serve as the identifier for individual tracking links and shall be unique.
Link names must be uniqueIf a single link name is entered for multiple tracking links, you can’t edit the parameter values of different tracking links in the [Change Parameters] tab properly because only the first tracking link with the entered link name from the list will be considered for the parameter value replacement.
- In the [Change parameters] tab, select the tracking link name from the Link Name drop-down list of which you want to edit the parameter value.
- Enter the parameter values in the white fields. The grey fields indicate the parameters that are not configured in the selected tracking link.
- The updated tracking links appear in column K. They are click-types and are updated in real-time whenever the parameter values are updated.
- Make sure the desktop URL is correctly entered. It must include
- Make sure you don’t enter any value for the [Image URL], [Title], and [Description] fields.
- Make sure the OG tags of the desktop URL are properly configured. The problem could stem from the URL or network error.
The social share preview settings cannot be changed using the Generator Template if you have selected “Use OG tags” for the [OG tags of the web desktop URL] field to configure the social share preview. If you need to change the settings, go to [Tracking Link]>[Link Management] in the Airbridge dashboard, find the tracking link, click [Action]>[View details · Edit]>[Social Share Preview], and update the settings. If you have updated the OG tag information, click Refresh on the [Link Management] page to make sure the social share previews appear accordingly.http://orhttps://.