Google Tag Manager Setup - Web SDK
The Airbridge SDK can be installed using the Google Tag Manager.
Click New Tag in "Workspace Overview," or select [Tag]> [New] in the container.
Select Custom HTML at [Tag Configuration]>[Custom Settings].
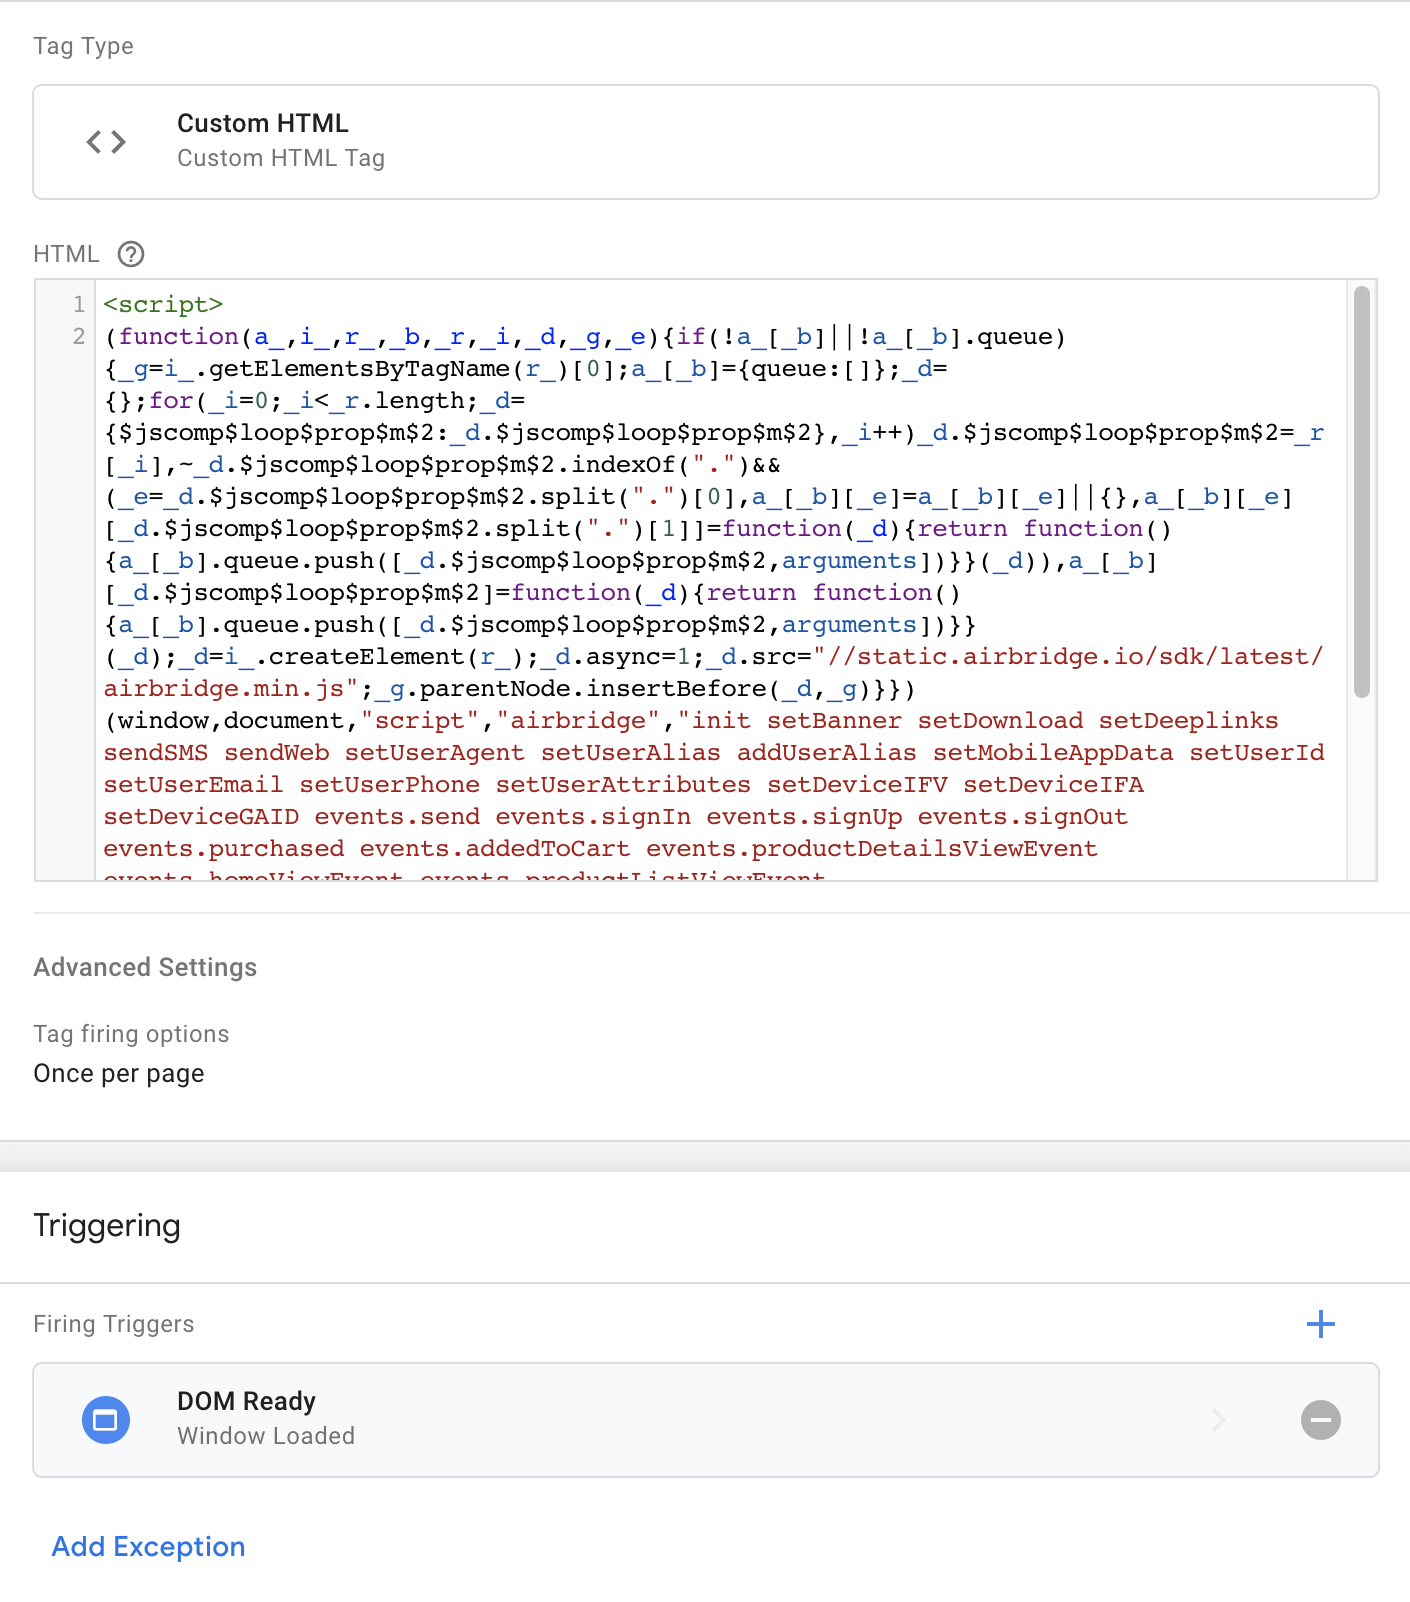
Insert the Airbridge SDK code in the "HTML" section as shown in the image below.
Go to [Tag Configuration]> [Advanced Settings]>[Tag firing priority] and enter a number greater than 0 (e.g., 9999).
Select Once per page at [Tag Configuration]>[Advanced Settings]>[Tag firing options].
Set "Trigger" to "Pageview - DOM Ready".
Complete the tag creation and click Submit.
Navigate to [Raw Data]>[Web Real-time Log] in the Airbridge dashboard and verify that the SDK logs are logged correctly.

Click New Tag in "Workspace Overview," or select [Tag]> [New] in the container.
Select Custom HTML at [Tag Configuration]>[Custom Settings].
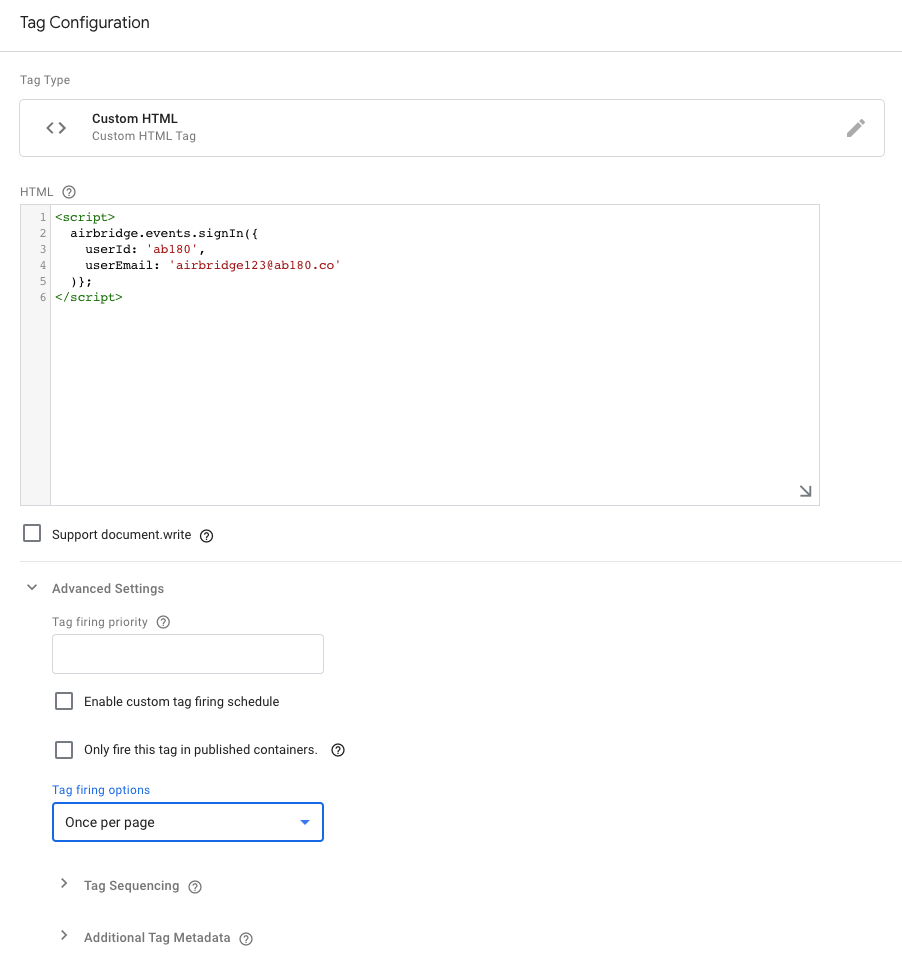
Insert the code for the events you want to track in the "HTML" section, as shown in the image below.
Depending on the event, select Unlimited, Once per event, or Once per page at [Tag Configuration]>[Advanced Settings]>[Tag firing options].
Set the appropriate trigger for the event.
Complete the tag creation and click Submit.
Navigate to [Raw Data]>[Web Real-time Log] in the Airbridge dashboard and verify that the SDK logs are logged correctly.

このページは役に立ちましたか?